Mango is one of the most popular fruits in the world, and we totally get why. Have you ever tasted anything quite like its uniquely sweet-tart flavor and slick, smooth texture? We think not.
Fleshy, tropical, and juicy, mangoes are high in multiple nutrients, too. According to the USDA, 1 cup of mango pieces contains 2.6 grams of fiber, 67% of the recommended dietary allowance (RDA) for vitamin C, 10% of the RDA for vitamin A, and just 99 calories.
The orange-fleshed fruits originated in India over 4,000 years ago and have traveled from Asia to every continent since. Mango is still considered a symbol of love in India, and presenting a basket of mangoes has been used as a gesture of friendship between individuals and entire nations.
If you feel like you’ve been seeing more of them in your neighborhood grocery store, you’re not wrong. U.S. consumption of mangoes has steadily risen since 2000.
Ready to go mango? Here’s what you need to know about buying, storing, and using these succulent fruits.
Types of mangoes
Each type of mango has a unique flavor, texture, shape, and size, which may also change depending on its stage of ripeness and time of the year. According to the National Mango Board, there are six main types of mangoes sold in the U.S. These are:
Honey (formerly known as Ataulfo)
Francis
Hayden
Keitt
Kent
Tommy Atkins
These all have different shapes, ranging from oval to round; varying flavors of tart and peachy to honey-sweet; and an array of hues of dark red, green, and bright yellow. Also, the seed-to-flesh ratio and amount of juice vs. fibrous pulp differs by the type of mango. (You can check out a full description of each type for more details.)
Though mangoes are grown all across South and Central America, Asia, and Africa, most sold in the U.S. are imported from Mexico, Brazil, Peru, Ecuador, Guatemala, and Haiti.
How to pick the perfect mango
Young green mangoes have a sweet, mildly citric flavor that’s good for making Indian-style pickles, Philippine chutneys and jams, Thai salads, and Caribbean stews and soups. The tender yellow ones, one the other hand, are usually eaten raw and used in drinks and desserts.
When it comes to choosing a ripe mango, there’s an important rule of thumb.
“Smell it first!” says Jet Lee, chef and owner at a Mango-Mango franchise near Atlanta. Lee purchases 100 boxes of fresh mangoes at a time to create mango pancakes, ice cream, juices, and cakes, and all kinds of other mango-based drinks and desserts for his late-night restaurant.
“A tropical, sweet-smelling mango means that it is ripe and ready to eat, while a sour or bitter smell indicates the mango may be unripe or not of good quality,” advises Lee.
Ripe mangoes will have some give, but shouldn’t be too soft or mushy. Skin should be smooth and firm, not wrinkled.
How to store mangoes
Unripe mangoes can be stored at room temperature until they’re soft. To slow down the ripening process, whole, ripe mangoes should be kept in the refrigerator.
Once a mango is cut, it needs to be consumed within 2 hours unless it’s placed in an airtight container and refrigerated or frozen.
How to cut a mango like a pro
Everyone has their own opinion about the best way to cut a mango — so we won’t go on record as to which one is officially best. Suffice it to say, you can slice, dice, or simply squeeze the pulp out, depending on what you plan to use the fruit for.
Before you get slicin’, just make sure to wash the mango. And always use a sharp knife! You can work around the long, flat seed in the center of the mango and slice each side without breaking the skin. Using a spoon, scoop out the slices (similar to an avocado), then dice it further if you like. (Check out our how-to guide for more juicy details.)
Ways to cook with mangoes
Besides sweetness and nutrition, you can add versatility to mangoes’ list of virtues.
The aromatic fruits can be used in salads, juices, smoothies, desserts (we’re thinking mango pie, brandied mango bread pudding, mango cheesecake, mango panna cotta), drinks (mango margarita, mango lassi, mango mojito), or as a condiment (mango chutney, mango salsa).
“Anything that you can cook with peaches, plums, cherries, or other stone fruit, you can also make with mangoes, and vice-versa,” says Jen Karetnick, Miami-based dining critic and author of the aptly-named cookbook Mango.
Among the many tips and tricks Karetnick shares in her book: drying up mangoes and grinding them into a powder to use as a seasoning, pureeing mango into a gazpacho-style soup, and grilling cubes of mango on skewers.
“If I’m feeling more creative, I’ll make a full mango meal of mussels steamed with white wine and mangoes, mango-jalapeño cornbread, asparagus with mango Hollandaise sauce, and baby roasted potatoes glazed with a mango-butter sauce reduced with Champagne!” she says.
Karetnick’s favorite mango recipe is also the simplest. She cuts up chunks of ripe mango, adds hunks of Gruyere or Jarlsberg cheese, and uses a provoletera (an Argentine baking dish) to bake in a preheated 350 degree oven for 10 minutes. Then she scoops out the mango-melted cheese and serves it with baguettes and a side of honey mustard.
Bottom line
Whether you’re a mango newb or have written an entire cookbook about the fruits, there’s always more to discover about mangoes. Try a Tommy Atkins for lengthy shelf life, an Indian Kesar for sweetness, or an Alphonse for its signature purple color. Happy tasting!
from Greatist Health RSS Feed https://bit.ly/3mZoyLx
Hi friends! Happy weekend! What do you have going on? We have an event for the girls’ school and I’m looking forward to teaching barre and hopefully catching a hike. The weather has been a dream this week! I’d love to hear what you’re up to. I also wanted to add a little note that I’m praying for safety for my friends in Hurricane Ian’s path. <3
It’s time for the weekly Friday Faves party! This is where I share some favorite finds from the week and around the web. I always love to hear about your faves, too, so please shout out something you’re loving in the comments section below.
A random note: I ended up canceling our fall break trip to NYC. We have a lot of reasons for deciding to postpone the trip, but decided we’d rather do a Disney cruise in the new year instead. When I told the kids, they were SO pumped, so I know we made the right choice! I’m also kind of glad that fall break will be more low-key, especially since we’re heading into the Pilot’s birthday, P’s birthday, Halloween, my birthday and a wedding, Thanksgiving through the New Year into Liv’s birthday. It’s all fun stuff – my fave time of year- but it can definitely be a lot. Do you have any upcoming trips planned?
Family dinner at Calle Tepa is always a winner. I feel like it’s one of the most underrated Mexican spots in Tucson; it’s been a go-to for years.
Fashion + beauty:
If you’ve been wanting to take advantage of the 30% off for new Beautycounter clients, it ends tonight! The discount will go back down to 20% on the 1st. Click here and use the code CLEANFORALL30. I highly recommend the All Bright C serum, AHA mask, color intense lipstick, charcoal mask, and supreme cream.
Got these Chelsea boots on sale at Nordstrom. I think they’ll be super cute with skirts, dresses, and leggings. (Still not sure how I feel about these with jeans…I’m not on board with the wide leg/baggy trend.)
I FINALLY created my Amazon storefront. I’m going to be adding in goodies this weekend – fashion, fitness, and for the kids is already available – and will also post more holiday gift ideas here. Check it out!
Hi friends! Happy Thursday! I have a new podcast episode and can’t wait to hear your thoughts on this one.
Today, I’m chatting with Lisa Moskovitz, RD, all about quieting the diet noise and why diets don’t work.
Here’s what we talk about on today’s episode:
How to quiet the diet noise: how become a more confident, autonomous, and intuitive eater, and improve your relationship with food
How to move the needle towards fitness and weight loss goals in a healthy way
Why diets don’t work: how they actually bring you further away from finding your healthiest, happiest weight
How diets impact your metabolism
Her tips for being Healthy in Real Life
and so.much.more.
I LOVED today’s conversation and hope that you’ll take a listen!
111: Why diets don’t work with Lisa Moskovitz, RD
Here’s a bit more about Lisa and her background:
Lisa Moskovitz, RD, is a registered dietitian, the CEO of NY Nutrition Group, a large group nutrition practice and the author of The Core 3 Healthy Eating Plan, a personalized, science-based guide to finding your healthiest, happiest weight. She received a BS in nutrition from Syracuse University and then went on to complete an intensive dietetic internship at NYPresbyterian Hospital. Since then, she has accumulated over a decade of experience in private practice, providing nutrition workshops and working with the media. Lisa is regularly featured in major publications such as Well + Good, Eat This Not That, Yahoo Health and is often interviewed for popular news channels such as Fox 5 NY, CBS News and Inside Edition.
I love love love the meals from Sakara Life! Use this link and the code XOGINAH for 20% off their meal delivery and clean boutique items. This is something I do once a month as a lil treat to myself and the meals are always showstoppers.
Get 15% off Organifi with the code FITNESSISTA. I drink the green juice, red juice, gold, and Harmony! (Each day I might have something different, or have two different things. Everything I’ve tried is amazing.)
The weather is cooling down, and I’m still obsessed with my sauna blanket. It feels even BETTER when it’s chilly outside and you can use the code FITNESSISTA15 for 15% off! This is one of my favorite ways to relax and sweat it out. I find that it energizes me, helps with aches and pains, I sleep better on the days I use this, and it makes my skin glow. Link to check it out here. You can also use my discount for the PEMF Go Mat, which I use every day!
If any of my fellow health professional friends are looking for another way to help their clients, I highly recommend IHP. You can also use this information to heal yourself and then go one to heal others, which I think is a beautiful mission.
Thank you so much for listening and for all of your support with the podcast! Please be sure to subscribe, and leave a rating or review if you enjoyed this episode. If you leave a rating, head to this page and you’ll get a little “thank you” gift from me to you.
Pumpkins are a beloved symbol of fall, the decoration of choice on Halloween, and the star of countless pumpkin pies — wait, actually, that last one is a lie, unless you make your own pumpkin puree and use that in your dessert.
If you’re buying a can of pumpkin off the shelf, you should know that it’s not made from the same orange jack-o’-lantern pumpkins you carve, or even their daintier, sweeter cousins, sugar pumpkins (also known as pie pumpkins).
In fact, canned pumpkin is actually squash. We know, big news. BIG. But before you quash pumpkin for being squash, read on. Pumpkin’s secret identity is actually not the dealbreaker it might seem.
So, what’s the difference between pumpkins and squash?
OK, so all pumpkins are squash, but not all squash are pumpkins.
The FDA declines to draw a hard line between the terms “pumpkin” and “squash” for labeling purposes, but there are some distinctive differences between the two.
Compared to other members of the gourd family, pumpkins — the standard orange sort we tend to picture at the mention of the word — have a lot more water in their flesh, more stringy fibers, and less natural sweetness, making them sadly inferior for baking.
The smaller sugar pumpkins have denser, meatier, more colorful, sweeter flesh, so if you do want to make your pie (or other pumpkin) recipes completely from scratch, use those.
If you’re buying the canned stuff, though, you’re probably getting Dickinson squash. This strain closely resembles butternut, and was specially developed for Libby’s. It accounts for 85% of all canned pumpkin sold in the United States.
With other brands, regardless of whether the label says “100% pumpkin” — and even if the ingredients mention only the p-word — you could be getting any of a number of winter squashes, or a blend of multiple varieties. It’s not a bad thing, although it is perhaps a little sneaky.
So how did pumpkin even become such a beloved fall stalwart, and when did gourds show up in pies (let alone in cans) in the first place? Let’s begin with a little botanical background.
When and where were pumpkins first grown?
Pumpkins and squash are believed to be native to Central America. The very first wild pumpkins were probably extremely bitter and small, but once they began to be cultivated for their flesh, they grew sweeter and more palatable.
Native North Americans often grew them as part of the “Three Sisters” (maize, beans, and squash), and they were an important staple food for surviving the winters.
European explorers as far back as the 1530s brought pumpkin seeds home with them, which explains why French and English cookbooks circa the 1600s contain some pumpkin recipes.
Once European colonists came to America, they began growing pumpkins as a staple food crop too.
These heirloom pumpkins and squash were of various shapes, sizes, and colors, but they all tasted pretty much the same: mildly sweet, starchy, and a little earthy. In the 19th century, the pumpkin’s importance as a human food crop waned dramatically, and it took a while for their ornamental value to become what it is today.
Since the 1970s, American farmers have prioritized bigger, sturdier pumpkins better suited for carving than cooking, so the standard pumpkin has become the large, smooth, orange one that comes to mind when we think “pumpkin patch.”
Today, pumpkins are grown on every continent except Antarctica, with India and China being some of the top producers. In the U.S., the Midwest claims the highest number of crops. Specifically, an area within 50 miles of Morton, IL produces most all of the pumpkins consumed in North America.
So how did pumpkin pie become a thing?
As we know it, pumpkin pie is a fairly recent invention, the most important distinguishing factor being the crust. There was definitely no such thing at the first Thanksgiving in 1621, since there were no ovens suitable for baking in America at the time, let alone the wheat or enough sugar required to make a proper pie.
But there may have been another sweet dish made with pumpkin at that celebration: milk, honey, and spices poured into hollowed-out pumpkin shells, which were roasted whole in hot ashes until blackened, soft, and steamy.
It appears that some Native Americans also made pumpkin porridge. In 1749, a Swedish botanist recorded that “[s]ome mix flour with the pumpkins when making porridge… They often make pudding or even pie or a kind of tart out of them.”
But it’s not until 1796, in American Cookery, the first official American cookbook, that we see something more akin to what we eat today, creamier and with familiar spices.
The two pumpkin pudding recipes in call for the pumpkin to be stewed until soft, then combined with eggs, sugar, mace, nutmeg, ginger, and cream, and baked for about an hour in a crust (or “paste”).
Pumpkin pie was political, too. New England abolitionists sometimes mentioned the dessert in anti-slavery novels and poems, and when Abraham Lincoln declared Thanksgiving a national holiday in 1863, some Confederates mocked pumpkin pie along with the people who enjoyed it.
Once the Civil War ended and Thanksgiving became more widely celebrated across America, pumpkin pie’s popularity spread too, helped in part by its inclusion in ever more cookbooks, newspapers, and women’s magazines.
When was pumpkin first canned?
In the 19th century, industrialization made almost everything easier, including dessert. Small, regional companies canned local pumpkin, but it should come as no surprise that Libby’s — which had been operating as a meat-canning company in Chicago since the 1800s — was the first mass-marketer of canned pumpkin.
In 1929, Libby’s acquired Morton’s vegetable processing plant, and by 1940 their famous pumpkin pie recipe first began appearing on their cans.
Of course, these days, there’s also canned pumpkin pie filling (sometimes labeled “pumpkin pie mix”), which differs in that spices, sugar, salt, and water are added to the pure pumpkin (or squash, if you still want to split hairs).
Unless a recipe specifically calls for pumpkin pie filling, always grab the plain canned pumpkin, or “100 percent pure” pumpkin puree, instead. And feel free to give it a knowing look when you do.
Bottom line
It may be a shocker to discover that the “pumpkin” in your autumn bread or Thanksgiving dessert is secretly squash… but when you’re digging into a velvety slice of pie (topped with a mountain of whipped cream), there’s probably no need to go out of your gourd over the difference.
from Greatist Health RSS Feed https://bit.ly/2XCcFko
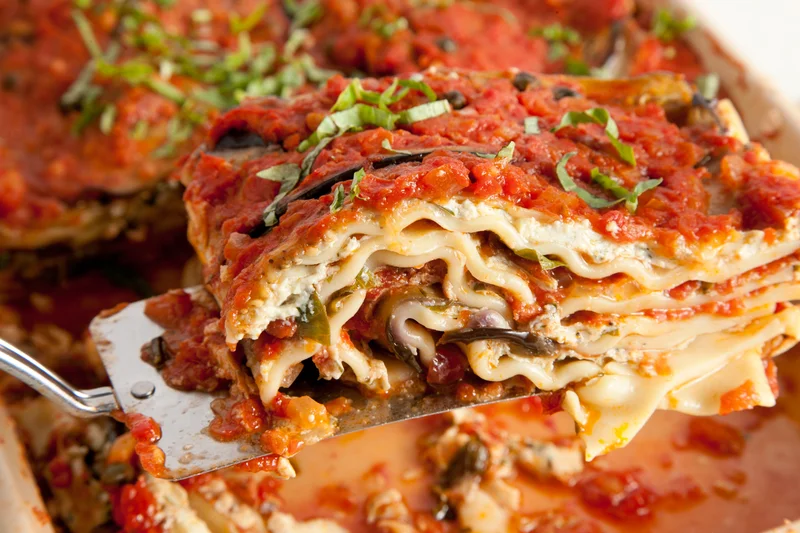
What’s lasagna without ricotta, mozzarella, and Parmesan? To a traditionalist, it’s a travesty. But to a vegan or someone with food allergies, it’s a delicious and healthy pasta dish (one that’s bound to please the meat- and dairy-lovers among us too).
If you’ve been looking for a tasty lasagna sans animal products, call off the hunt. This veggie-packed version uses creamy tofu in place of ricotta and nutritional yeast instead of Parmesan for a hearty, savory take on the Italian classic. We’ll admit it takes awhile to make, but the results? Perfecto.
To-die-for vegan lasagna
Makes 8-12 servings
Prep time: 1 1/2 hours
Cooking time: 50 minutes
Ingredients
For the eggplant:
1 1/2 pounds eggplant (about 2 small)
2 teaspoons kosher salt, plus more as needed
1/4 cup extra-virgin olive oil
Freshly ground black pepper
1 teaspoon finely chopped fresh Italian parsley leaves
1/2 teaspoon red wine vinegar
Pinch red pepper flakes
For the sauce:
2 (28-ounce) cans whole peeled tomatoes, preferably San Marzano
1/4 cup extra-virgin olive oil
1 medium yellow onion, finely chopped
2 medium garlic cloves, minced
1 tablespoon tomato paste
1 bay leaf
1/4 teaspoon red pepper flakes, plus more as needed
Kosher salt
2 tablespoons capers
For the noodles:
Kosher salt
12 ounces dried lasagna noodles
For the filling:
2 pounds soft tofu, drained
1/3 cup finely chopped Italian parsley leaves
3 tablespoons nutritional yeast (optional)
2 teaspoons finely grated lemon zest (from about 2 medium lemons)
2 tablespoons freshly squeezed lemon juice, plus more as needed (from about 1/2 lemon)
2 teaspoons kosher salt, plus more as needed
1/2 teaspoon freshly ground black pepper, plus more as needed
To assemble:
1 cup loosely packed basil leaves (from about 1 bunch), cut into 1/4-inch-thick ribbons
Instructions
For the eggplant:
Heat the oven to 350°F(180°C) and arrange a rack in the middle.
Cut the eggplant(s) lengthwise into 1/8-inch-thick slices. Place in a single layer on a flat surface or 2 baking sheets, overlapping slightly as needed, and sprinkle evenly with 1 teaspoon of the salt. Flip the eggplant and sprinkle evenly with the remaining 1 teaspoon salt. Let sit until water beads form on the surface, at least 30 minutes. Meanwhile, prepare the sauce.
For the sauce:
Using a food processor fitted with a blade attachment, pulse the tomatoes and their juices in batches until coarsely chopped (about 10 pulses). Heat the oil in a large saucepan with a tight-fitting lid over medium-high heat until shimmering. Add the onion and cook, stirring occasionally, until translucent, about 3 minutes. Add the garlic and cook until fragrant, about 30 seconds more.
Push the onions and garlic to one side of the pan and add the tomato paste to the empty side of the pan. Cook the paste slightly to remove the raw flavor, stirring occasionally, about 1-2 minutes. Stir the onions and garlic into the paste to incorporate. Add the chopped tomatoes, bay leaf, red pepper flakes, and a few pinches of salt. Bring the mixture to a boil, then reduce the heat to low, cover, and simmer for 45 minutes to meld the flavors.
Add the capers, taste, and season with additional salt and red pepper flakes as needed; set aside.
To finish the eggplant:
Using paper towels, pat the eggplant slices dry on both sides. In a large nonstick frying pan, heat 1 1/2 teaspoons of the oil over medium-high heat. Add just enough eggplant to sit in a single layer in the pan and sear on both sides, about 2 minutes per side. Taste and season with salt and pepper as needed. Transfer to a plate and repeat in batches, adding another 1 1/2 tablespoons of the oil and the remaining uncooked eggplant.
While the eggplant cooks, place the remaining 2 tablespoons olive oil, parsley, vinegar, red pepper flakes, and a pinch of salt in a large bowl and stir to combine. Transfer the seared eggplant to the oil-vinegar mixture and toss. Taste and season with additional salt as needed.
For the noodles:
Bring a large pot of heavily salted water to a boil over medium-high heat. Add the noodles and cook, stirring occasionally, until al dente, about 7 minutes. Drain. When cool enough to handle, lay the pieces flat on a lightly oiled baking sheet.
For the filling:
Place the tofu, parsley, nutritional yeast (if using), lemon zest, lemon juice, and measured salt and pepper in the bowl of a food processor fitted with a blade attachment and process until smooth, about 30 seconds. Taste and season with more lemon juice, salt, and pepper as needed; set aside.
To assemble the lasagna:
Spread a thin layer of tomato sauce in the bottom of a 13-by-9-inch baking dish. Place a single layer of noodles on top of the sauce, about 3 regular-sized noodles. Top the noodles with a quarter of the tofu filling (about 1 cup) and spread evenly. Lay a quarter of the eggplant slices over the filling. Spread about 1 cup of sauce over the eggplant and sprinkle with about 1/4 cup of the basil leaves. Make three more layers of noodles, filling, eggplant, sauce, and basil, omitting the basil from the top layer.
Cover with foil and bake for 50 minutes. Uncover and bake until bubbling, about 10 minutes more. Let cool at least 10 minutes before cutting. Sprinkle with the remaining 1/4 cup basil. Serve with any remaining tomato sauce.
from Greatist Health RSS Feed https://bit.ly/3SovTkP
Sharing some tips for easy meal planning for the busy moms out there + a template you can use.
Hi friends! How’s the day going so far? I hope you’re having a good morning! I’m getting things ready for Fit Team (join us here and get your new workouts on the 28th!) and have a podcast interview later today. Thank you so much for letting me know that you enjoy the old school more conversational type blog posts. I will definitely add them more frequently into the content rotation.
For today post, I wanted to chat a bit about meal planning because it is SAVIN.OUR.BACON right now. (Time-wise and money-wise!) We are in the thick of evening activities and events, and if I don’t know what we’re going to eat, it leads to random hodge lodge meals or takeout. It’s absolutely worth sitting down each week to plan our meals (at least our dinners) and making a list for one big grocery stop.
Taking some time to meal plan each week takes the guesswork and last-minute dinner stress out of the equation, and is a great way to save time, money and effort. Planning, preparing, and cooking healthy meals takes time, and meal planning in advance can help us make healthy meals for the family on a more consistent basis. It also maximizes trips to the grocery story and makes mom life a bit easier overall! I figured it was time I dedicated a post on practical meal planning for my busy mom friends out there.
Easy Meal Planning For Busy Moms
Setting aside time to make a weekly meal plan
Set aside 30 minutes or so each weekend to create your plan for the week. For us, dinners are the most important, but I also have an idea of what I’m going to pack in the girls’ lunches and make for breakfasts. Plan out as many meals as you’d like for the week, emphasizing dinner and weekly staples.
Create a master list
After you’ve planned out your meals, make a master grocery list including all of the ingredients. Take inventory of your pantry and fridge to avoid buying duplicates, unless you like having backups on hand.
Keep track of meals that work
If you find a meal that’s a home run for the family, hold it in your heart FOREVER. Until you make it again and they don’t like it the next time? (Kids can be a mystery sometimes, I tell ya.) I keep a running cheatsheet in my phone of meals the kids have really loved and will come back to them. We also have some staple dishes (like the ones in this post) that I know will always be a hit.
Asking help from family members
I like to ask the kids if there’s anything they’d like to have the following week and use their suggestions when I craft my list. I’ll also put a few cookbooks on the table for them to choose recipes that look good to them. Sometimes they surprise me with their selections and I love that helps to shake things up and prevent dinner ruts.
Create meal plans from items you have on hand
Before I start our meal plan for the week, I’ll think about any items I have on hand that I’d like to use. For example, we might have meat from ButcherBox or veggies from the garden that I want to use. I’ll search for recipes from my fave sources using these ingredients.
Creating themes on some days
This is huge if you have a schedule with extra-curricular and after-school activities that end up being around dinnertime. On soccer nights, I’ll specifically plan Instant Pot or slow cooker meals that can be ready quickly or already waiting for us. If we’re going to be home later that evening, I’ll choose meals that I can prep earlier in the day.
Bulk cooking
I’m a huge fan of making anything in bulk or doubling recipes, so we’re able to freeze or use leftovers later. I prefer to cook certain things only once per week, so if I know we’re having rice two times, I’ll make a large batch and save half of it. I’m also a huge fan of eating dinner leftovers for breakfast or lunch the following day, so it makes planning my lunches a little easier.
Order staples and faves online
This really streamlines the meal planning process for us, because usually I have meat and pantry essentials on hand. I order almost all of our meat from ButcherBox and I get most of our pantry staples from Thrive Market. (<— both of those links get you a discount if you decide to try it out! Thrive is 40% off your first order and ButcherBox is currently 30% off + free chicken for a year.)
This way, I only have to get fresh ingredients at the store, eggs, and dairy. Because Thrive Market and ButcherBox are significantly less expensive than grocery stores’ current prices, we save a lot of money by doing it this way. I also like shopping at Costco for any of our favorite brands they carry (like Rao’s pasta sauce, salad kids, organic veggies and berries, salsa, avocado oil, syrup, and almond butter).
Prep protein or anything you can in advance
I like to wash fresh fruit and veggies, chop anything I can for dinners and easy snacking, and prep a couple of protein staples. I’ll usually boil eggs and smoke chicken for the week. Anything you can do you set yourself up for advance: do it. I also like to mention that if you’re able to splurge on more convenience items that will make your life easier (like chicken that is already cooked and cut into pieces), do what you need to do to set yourself up for success.
Use a meal planning template
This helps a ton if you’re going to plan out meals for the week! Simply print, add in your meals, and write out your grocery list on the opposite side.
Free Weekly Meal Plan For Busy Moms
Here is a free weekly template I created for meal planning. If you need more help, enter your email address here and I’ll send you a free copy of meal prep blueprint! It has my exact strategy for meal planning, along with some new recipes.
Here’s a sample week of eats if you’re looking for ideas!
Indian spiced tea — aka masala chai — has a lovely delicacy and a fortifying strength. We harnessed both qualities for these refreshing milkshakes that should help you get through the muggiest summer afternoon.
Chai tea bags are handy, but we suggest making your own sachet. Simply snag some cheesecloth and a good-quality masala chai — a blend of loose-leaf black tea with whole spices such as cardamom pods, cloves, fennel seeds, black peppercorns, cinnamon, and dried ginger (one of our favorite blends is from The Chai Cart in San Francisco).
Easy frozen chai milkshake recipe
Total time: 20 minutes, plus 2-10 hours steeping time
Makes 4 shakes
Ingredients
3 cups whole milk
1/4 cup loose masala chai tied in cheesecloth, or 4 chai tea bags
4 slices peeled fresh ginger
12 whole black peppercorns
1 cinnamon stick
2 tablespoons sugar
1 pint vanilla ice cream
Whipped cream
Ground cinnamon, for garnish
Instructions
Place 4 tall glasses in the freezer to chill. In a saucepan, warm the milk over medium heat just until it begins to steam and bubble around the edge.
Remove the saucepan from the heat and add the chai sachet (or tea bags), ginger, peppercorns, cinnamon stick, and sugar. Stir briefly to dissolve the sugar.
Cover and set aside to cool to room temperature. Transfer to an airtight container and chill in the refrigerator for at least 2 hours or (preferably) overnight.
Pour the steeped chai through a fine-mesh strainer and discard the solids.
Add the ice cream to a blender, then pour in the cold chai and blend until smooth.
Pour into the chilled glasses, top each with a big dollop of whipped cream, and dust with a little ground cinnamon. Serve immediately.
from Greatist Health RSS Feed https://bit.ly/3CaWAnm
Hi friends! How was the weekend? I hope you had an amazing one. This blog post is a way to bring it back old school and share some more real-life adventures. Quite a few of you let me know that you missed the style of blogging from the past (I do, too!) so I’m trying to do it in a way that’s low-key and still focused on my experience, instead of the kids’ experience if that makes sense? It can be tricky because the kids are obviously a huge part of my life (and by far the most exciting and such an enjoyable part of my life). I’m still trying to navigate blogging in a way that feels authentic to me without overdoing it on kid content, while continuing to create value-driven posts, too.
If you guys enjoy this and want more everyday-style posts, let me know!
This weekend was a wild one and packed with so many fun adventures. Friday night, we went to a local fall festival with the fam. My dad, stepmom, aunt, cousins, Kyle and Meg, and their kiddos were all there.
We also ran into so many familiar faces that evening! Tucson is a small world, but feels smaller the longer we stay here.
BEFORE fall festival, the Pilot took P to a birthday party while I took Liv to dance, so P had double fun times. The kids played in the obstacle courses, got their faces painted, did the cake walk and bingo thing, and it was a blast.
Saturday morning, P had a soccer game, I took care of some work stuff and chores, and then one of Liv’s best friends came over for a sleepover.
We took the crew to sushi at Ginza,
(dress is here! Heads up that it runs big, so if you’re in between sizes, I’d size down)
and then picked up one of P’s friends so she would have a buddy, too. We headed to the mall, where the younger kids hit up the giant arcade with the Pilot, the older girls and I went to Claire’s and got boba teas.
We made it back to the arcade for some motorcycle races, Dance Dance Revolution, and then grabbed ice cream before P’s friend went home.
(they’re 10 and way cooler than I’ll ever be)
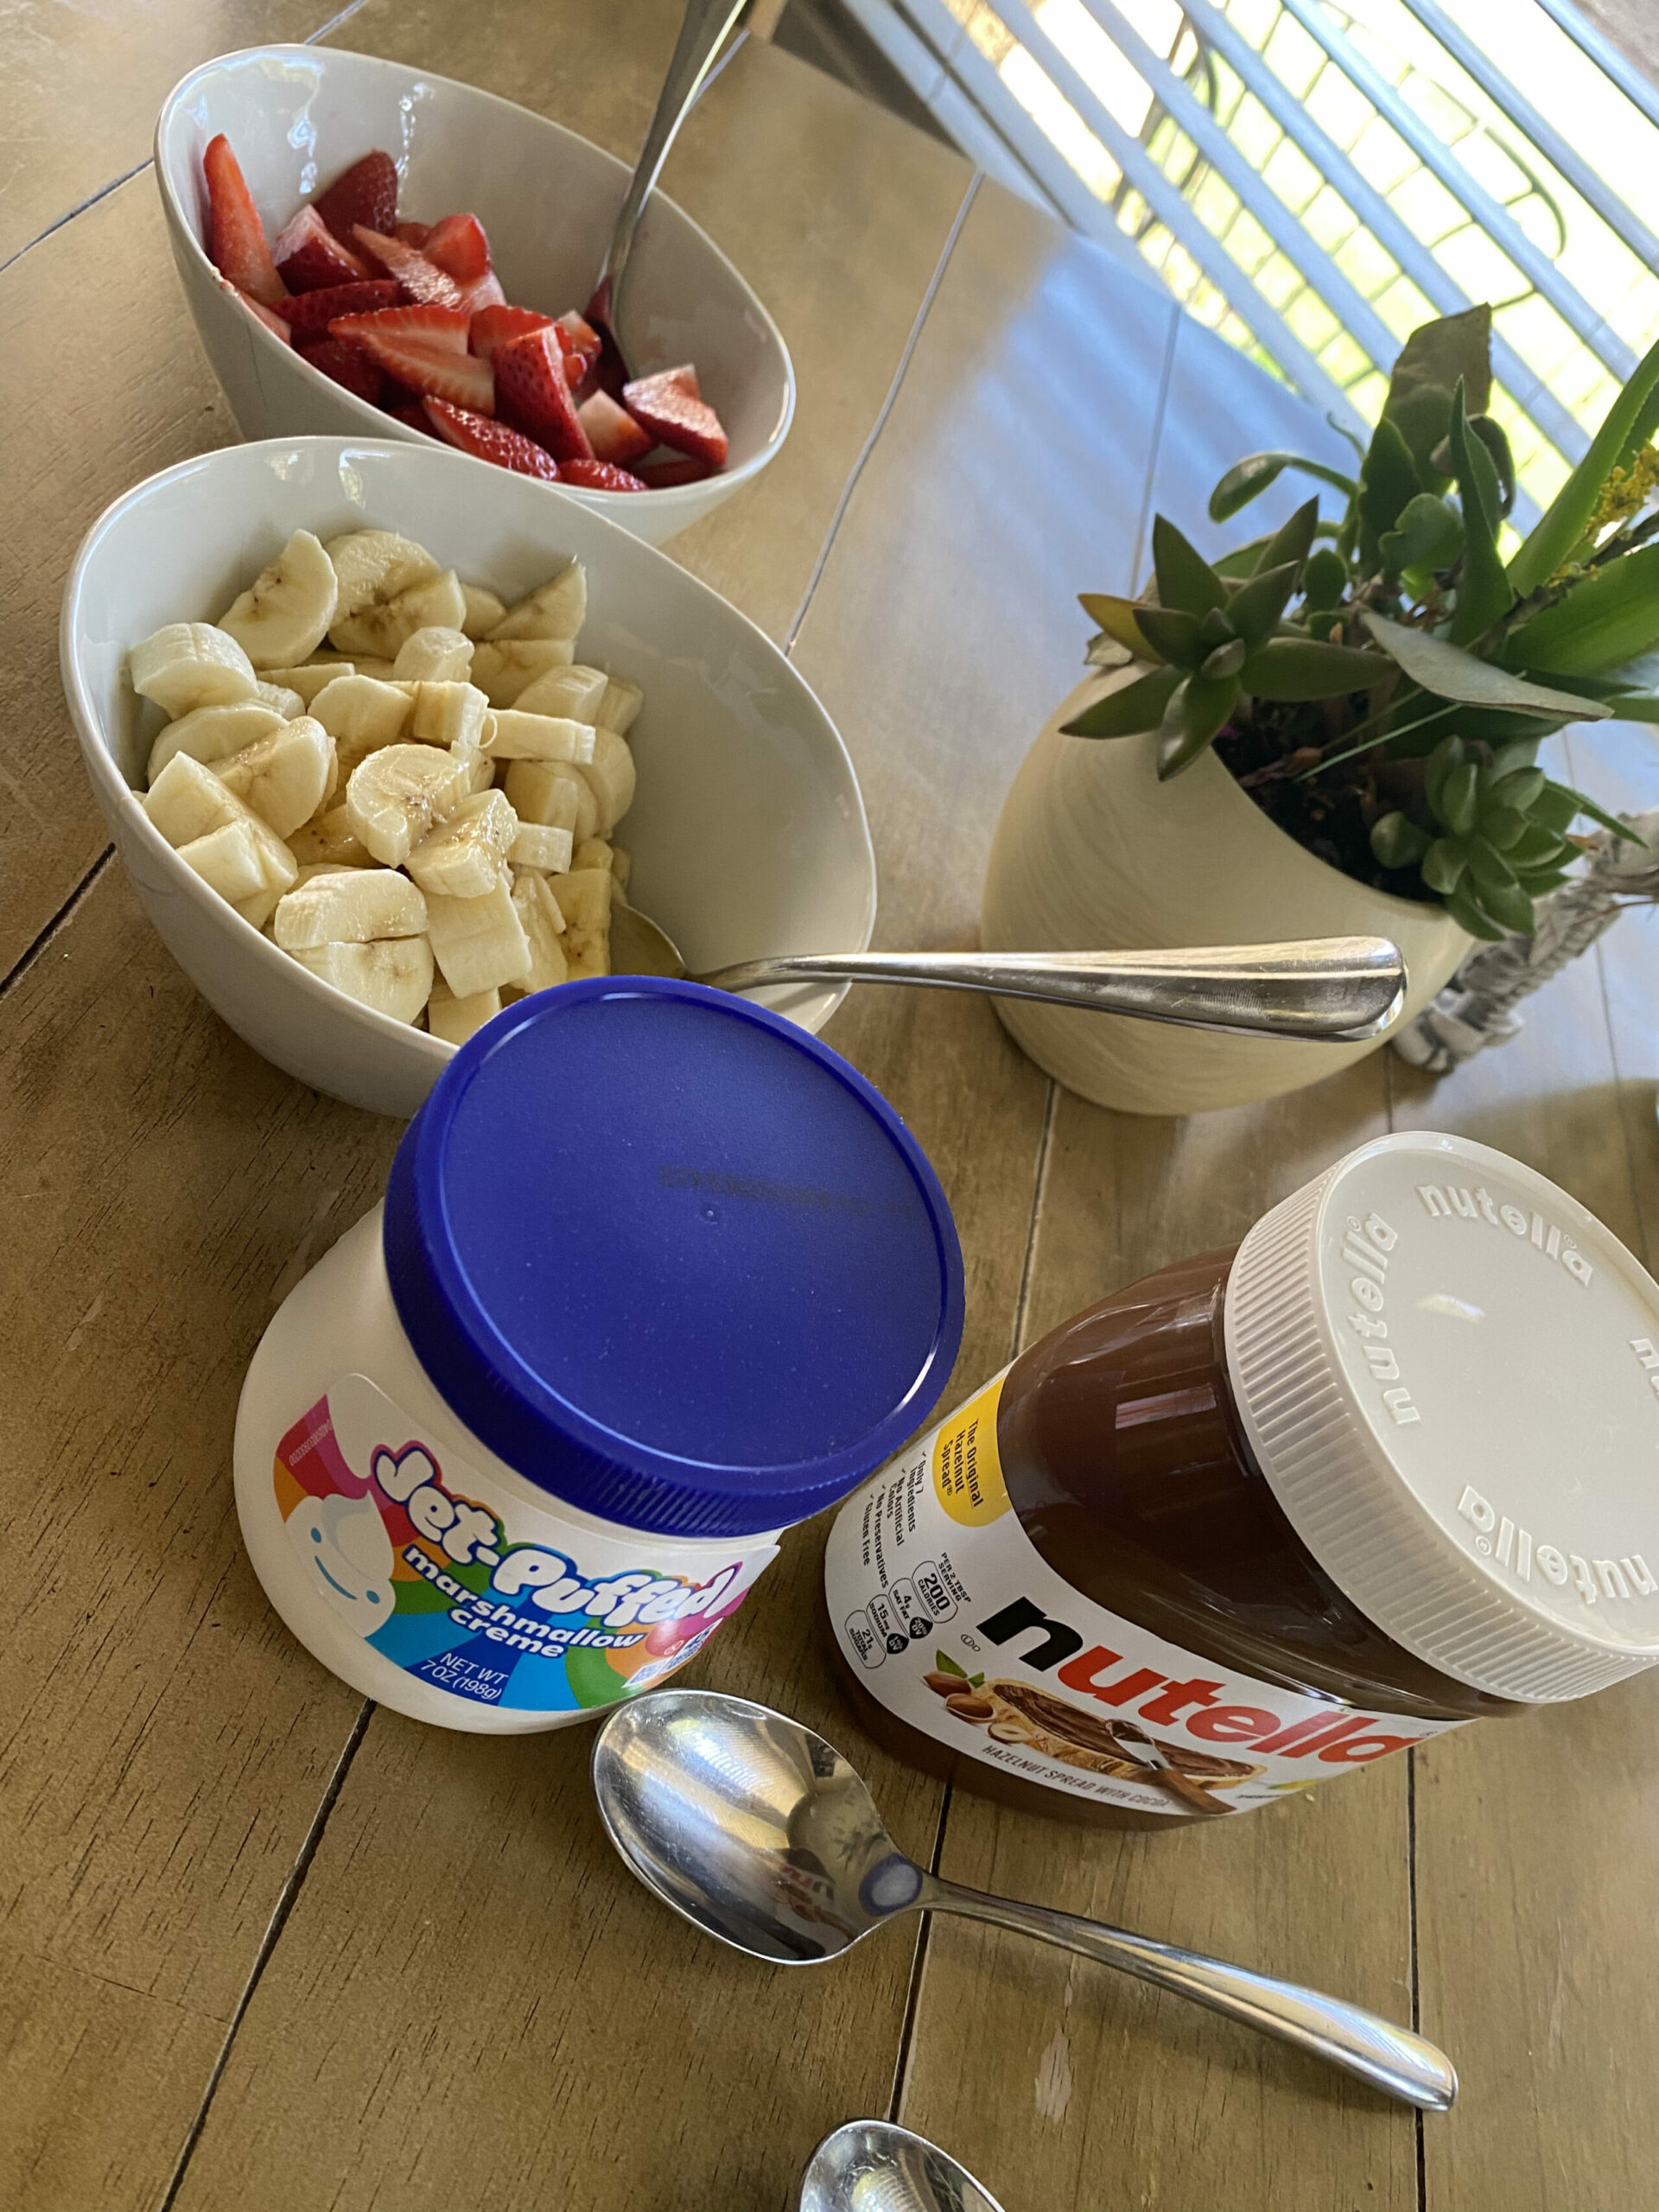
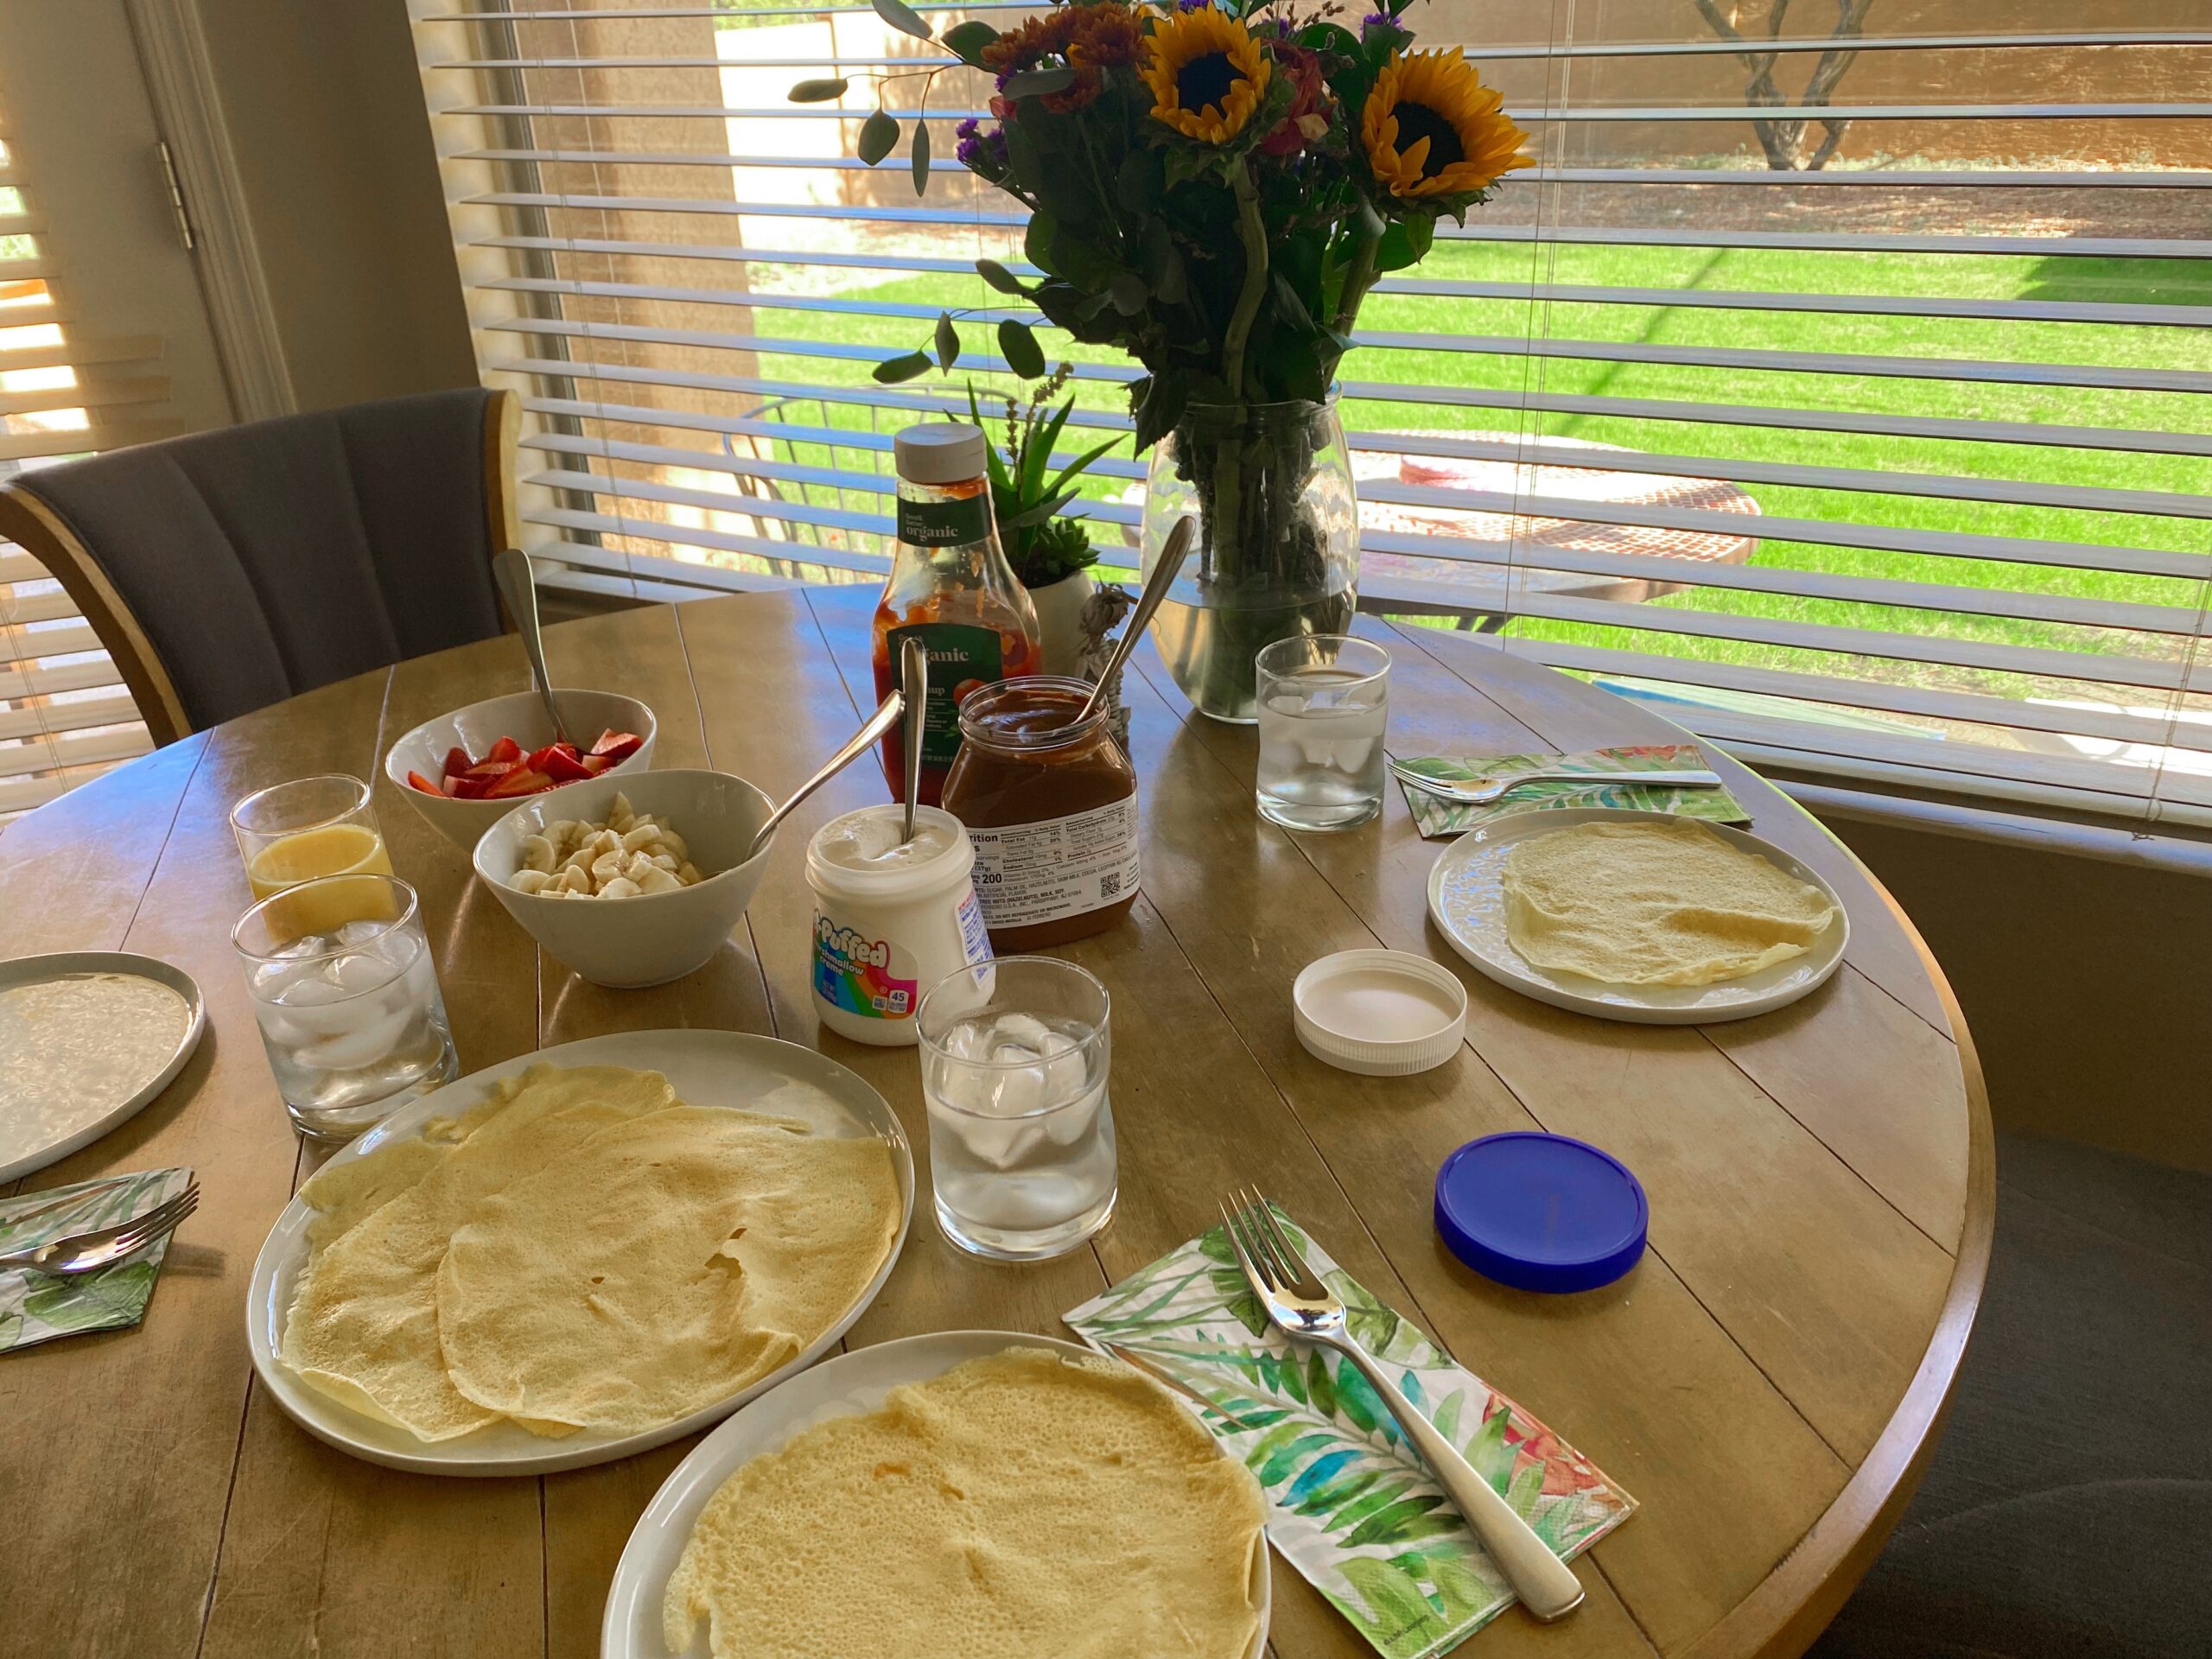
Sleepover breakfast was crepes! I hadn’t made them in years, but used this recipe (added a little vanilla to it) and they came out really well! The kids loved building their own crepes with bananas, strawberries, Nutella, marshmallow fluff, and we served everything up with crispy bacon, hash browns, and orange juice.
Later that afternoon, we saw Lion King at Centennial Hall! TBH I tend to feel a little meh about Lion King (I think I just overdid it from watching the movie 1800 times in the 90s with my JTT obsession), but the live production is so different. The costumes are set design are truly breathtaking, and we all loved it.
Also worth noting that Broadway in Tucson has STEPPED UP their theatre snack and drinks game. They had charcuterie boxes, hummus and veggie boxes, chocolate gummy worm pudding for the kids, wine, beer, giant cookies — 10/10 recommend a snack stop if you’re seeing a show.
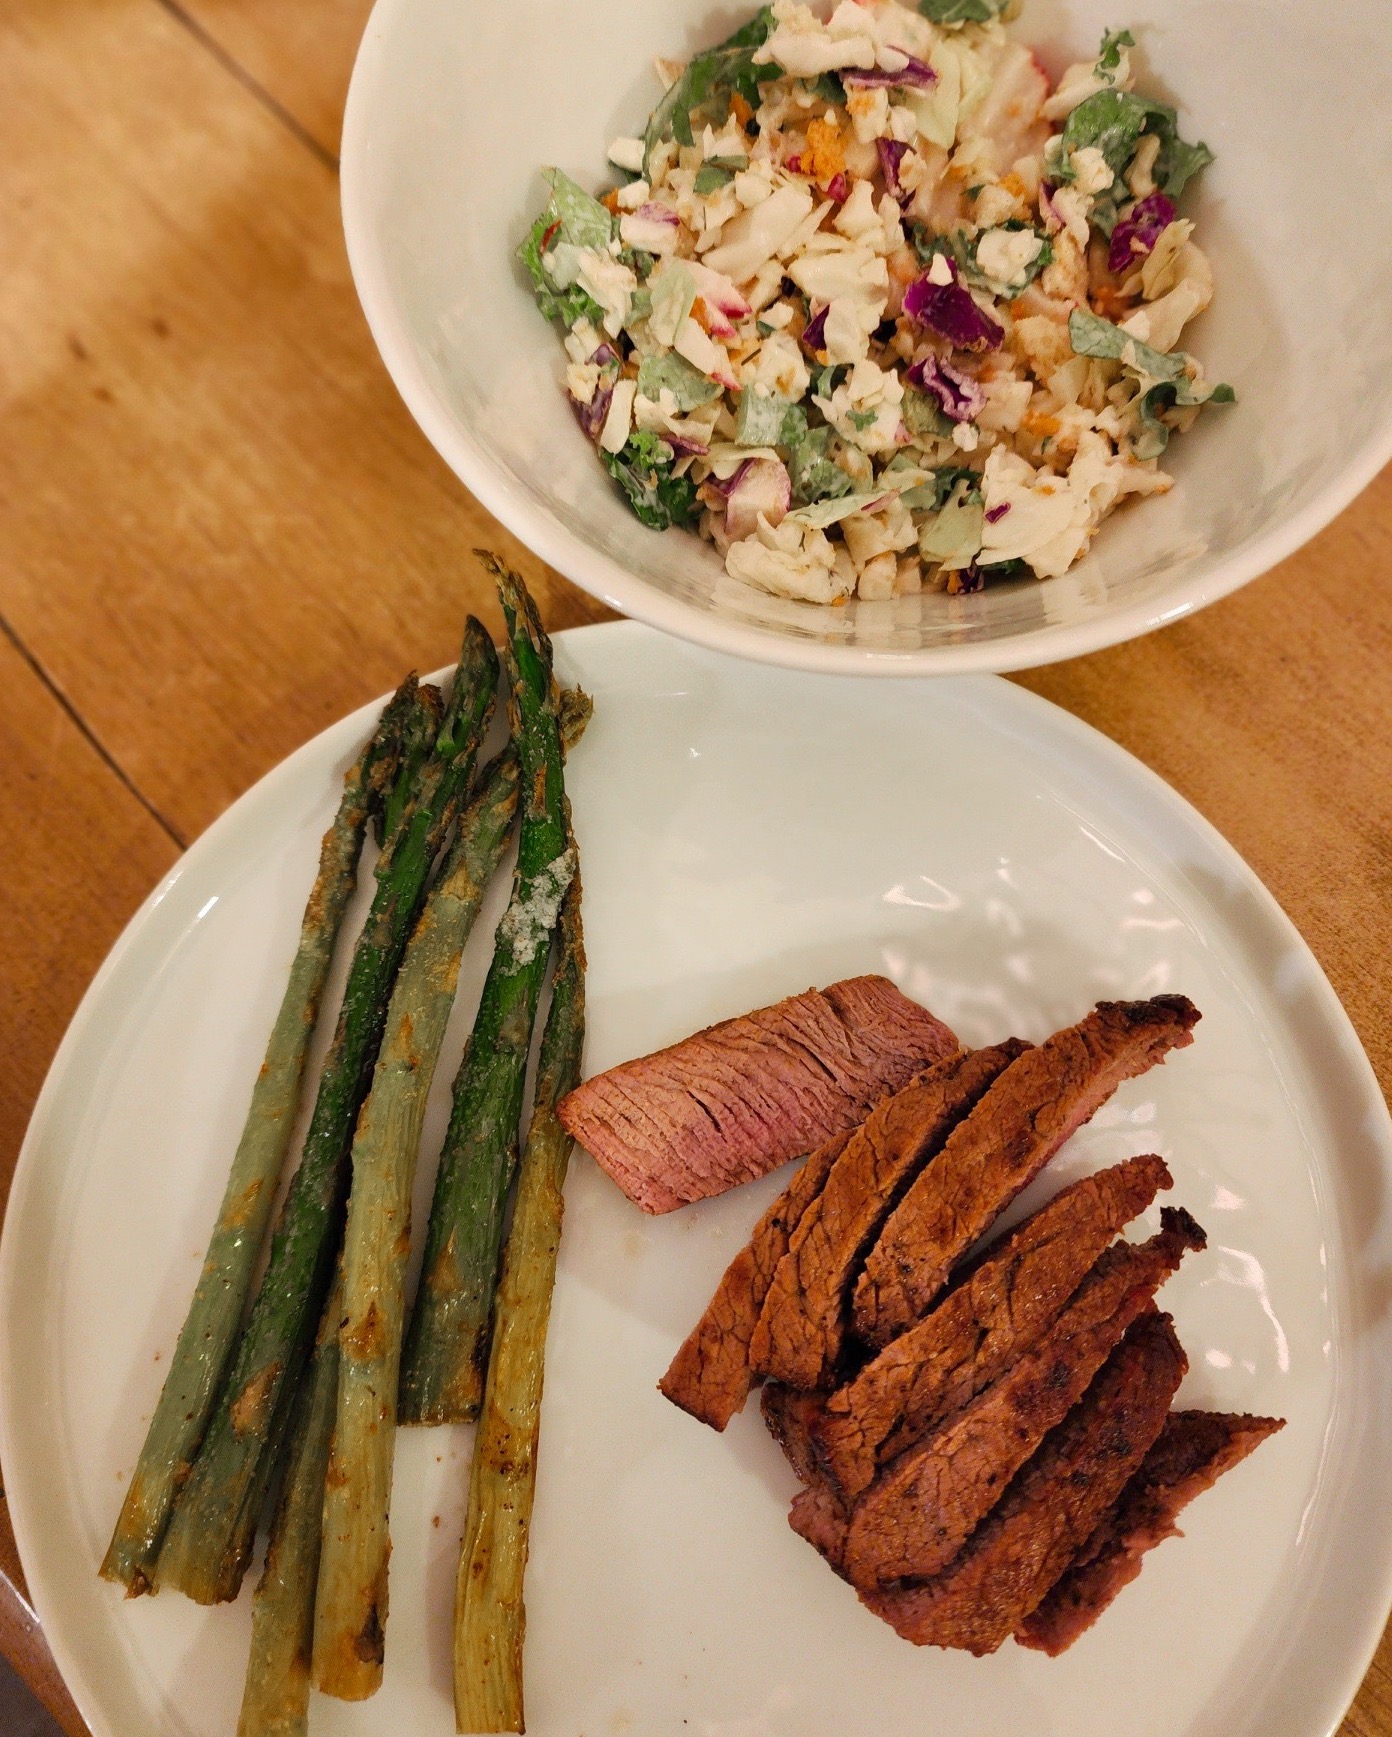
Sunday night dinner was filet with asparagus, homemade sourdough, salad kit (we’re fans of the dill pickle salad kid from Whole Foods), and a little wine to cap off the weekend.
I ended up taking Friday, Saturday, and Sunday off from the gym, so I’m feeling refreshed and ready to get back into my workout mojo this week. If you want to join us for Fit Team, the link is here! New workouts go out on Wednesday and I’m filming a new mobility workout for the platform this afternoon.
I hope you have a happy Monday and I’ll see ya soon!
What was the highlight of your weekend? Any fun sleepover breakfast ideas? I usually do pancakes, but crepes were a good way to switch things up.
A dusting of freckles on your face is so desirable these days that people use makeup, henna, and even tattoos to mimic them. But if you’d rather nix yours, that’s your prerogative. (Just take it from Britt.)
If you want to X out your frecks, there are options. Here’s what to know.
Can you actually get rid of freckles?
Freckles are also called ephelides, aka hyperpigmented spots that are usually (but not always) found in European and Asian populations. These babies tend to fade away with reduced sun exposure — so it’s not uncommon for them to ghost you or become near-invisible in cooler months. They also tend to fade as you get older.
But if you want to speed up this process, there are def steps you can take. Unlike raised moles, they’re flat — so you can’t have a doc lop them off. But you *can* do things like use treatments that either remove the top layers of your skin, bleach them, or break down the melanin. Using lots of SPF can also prevent new ones from popping up.
Pssst: Keep in mind that sunspots — aka age/liver spots or solar lentigines — are different. These are the result of UV damage and don’t fade over time. However, like freckles, they also respond to many treatments.
BONNINSTUDIO/Stocksy United
How to get rid of freckles
Just because your freckles make you look sun-kissed, doesn’t mean you can’t kiss them goodbye. 💋 Here’s how.
Laser or intense pulsed light (IPL) treatment
Laser and intense pulsed light (ILP) treatments are go-to ways of getting rid of unwanted frecks.
Laser technology involves targeting intense light to freckled areas, breaking down unwanted pigment and revealing freckle-less skin underneath.
Laser resurfacing basically removes skin layers until the frecks disappear, while IPL works to destroy the melanin that gives the freckles their color.
According to 2006 research, both Q-switched laser treatment (a popular type of laser therapy) and IPL work well to quash unwanted freckles. But in a sample of 15 patients, the Q-switched laser treatment worked better.
Since 2017 research echoed this finding, the 1064 Q-switched Nd YAG laser might really be the MVP. Even though the sample size (43) was pretty small, a little over half of the participants experienced a significant reduction in freckles. A handful of people developed hyperpigmentation (aka unwanted coloring) in the treatment area, though.
Since you don’t necessarily wanna swap freckles for unwanted discoloration, talk with a derm about your options. And keep in mind that since any laser treatment makes your skin super vulnerable to UV damage, you’ll have to stay out of the sun or be super diligent about SPF as your skin heals.
And while results are typically permanent, you’ll have to be careful about sun exposure anyway if you want to avoid the development of more frecks in the future.
Chemical peel
A chemical peel can help literally peel back the layers until you like what you see. 👀
To get rid of freckles, you’ll need a professional to use a moderate to strong peel that most likely contains glycolic or trichloroacetic acid. According to 2022 research, peels are pretty effective at fading freckle pigmentation. Once the top layers are gone, new skin will form in its place.
Since this is a pretty abrasive process, chemical peels can come with side effects like:
They’ll also take a while to heal, during which time you can expect your skin to be pretty sensitive. You’ll also have to follow doc’s orders and likely take a prescription antiviral to reduce the risk of infection.
Topical fading cream
Bleaching your skin isn’t known to be the safest option to combat freckles, but it does work.
According to 2009 research, hydroquinone cream is especially effective in combo with tretinoin (a type of retinoid that aids in skin cell turnover) and fluocinolone acetonide (aka a corticosteroid that reduces inflammation).
These additional ingredients may help combat common side effects of topical hydroquinone, such as:
stinging
inflammation
dryness
itching
blistering
discoloration
Keep in mind that hydroquinone is a potential carcinogen. Research from 2022 concluded that hydroquinone is super toxic to aquatic life and rodents and that it might cause leukemia, liver cancer, and tumors in animals. But these findings are talking about hydroquinone in the environment (like when used in paints or motor oils) — topical cream doesn’t have any significant toxicity.
Retinoid is a vitamin A compound that can help heal sun-damaged skin and fade freckles a bit. According to a 2014 review, retinoids might also help protect your skin from UV rays and prevent new freckles from forming down the road.
(Keep in mind that retinoids can make your skin more vulnerable to sun damage, so you also need to use plenty of SPF when using them.)
You can get retinoid creams OTC or in higher doses with a prescription. Common side effects include:
redness
dryness
irritation
flaking
peeling
Heads up that retinoids prob won’t make your freckles disappear altogether, but they can help make them less noticeable.
Cryosurgery
Cryosurgery might be the coolest (literally) way to dissolve freckles — but it’s also not the most popular or effective.
It involves using extremely cold liquid nitrogen to freeze and destroy pesky lil frecks. Though this treatment is more popular on nevi — aka moles — it technically can be used on freckles.
The freezing temps cause the area to essentially form a blister, which will then ideally heal up freckle-free. Side effects include discoloration and bleeding — but with proper aftercare, it shouldn’t leave a scar behind (though it *is* possible to have some scarring).
Natural remedies
“I slathered yogurt on my face, and my freckles disappeared overnight!” — said no one ever. Still, there are lots of natural remedies that the internet says might at least soften them up a little.
We’re NGL — we have no proof that these work whatsoever. But hey, they prob won’t cause any serious harm:
Lemon juice. Anyone who turned their hair orange in 7th grade knows that lemon juice can def lighten hair —but can it diminish freckles, too? At the very least, it’s thought to lighten skin, but keep in mind that it also might burn or irritate it.
Honey. Some people swear by combining honey with sugar to make an exfoliating scrub. While you’ll have more luck with a heavier-duty exfoliant, it might just work a tiny bit of magic.
Buttermilk or yogurt. Buttermilk and yogurt contain lactic acid, which has known lightening properties. Supposedly, putting it directly on your face and leaving for about 10 mins can have a lightening effect. But you might be better off just buying a product with lactic acid.
Basically, your skin has cells that produce melanin, which is a friendly pigment that helps protect your skin from UV rays. When your skin’s exposed to the sun, its cells produce more melanin in an effort to protect you.
So, freckles are essentially a buildup of melanin on the skin’s surface and seem to crop up thanks to your genes. But TBH, the pros don’t know *exactly* what triggers them in some people and not others.
Even though dark spots — aka age/liver spots — are also caused by the sun + melanin, they’re not the same as freckles. According to researchers, these spots pop up primarily due to sun damage and don’t seem to be as strongly heritable.
Preventing new freckles from forming
Sun protection is the number one way to prevent new frecks from forming. So break out your sunscreen and oversized hat like you’re freaking Samantha Jones, ‘cause if you truly want to break up with your freckles, you’re gonna need them.
applying sunscreen at least 15 mins before heading outside (even in cloudy weather!)
reapplying every 2 hours
When to see a doctor
Even though freckles are noncancerous, they’re associated with a higher risk of skin cancer. That’s because if you have light skin + freckles, you’re more vulnerable to melanoma.
Freckles aren’t usually a reason for concern, though. But if you notice any new moles or changes in the size, color, or shape of a “freckle,” head to a medical professional, JIC. They’ll be able to assess the spot and let you know what’s up.
Frequently asked questions
Can you actually get rid of freckles?
Yep! Research shows that Q-switched laser treatments are especially effective. Other treatments that work include:
But since freckles emerge in response to sun exposure, there’s no guarantee they won’t return.
How do I permanently get rid of freckles?
To permanently banish freckles, you’ll likely need to undergo an intensive treatment to remove them. Then you’ll need to seriously commit to SPF use to keep them from coming back.
Laser therapy (particularly with Q-switched lasers) is thought to be the best way to banish them right now. Afterward, you’ll want to avoid excess sun exposure to prevent them from returning. But of course, there’s no guarantee.
Can freckles be removed naturally?
There’s no known way to remove freckles naturally ATM. Even a “natural” remedy like lemon juice contains citric acid, which is essentially just a low-strength, no-frills chemical exfoliant.
How long do freckles take to go away?
That depends! If you undergo laser therapy or a chemical peel, you’ll notice immediate results. That being said, your skin will take a while to heal from invasive treatments like these.
It also might take several sessions depending on how pigmented your freckles are and how your skin responds to treatment.
Retinoids and fading creams can take more sustained effort to see results — think weeks to months. And even then, they still might not fade completely.
Can freckles go away on their own?
Some freckles diminish or disappear altogether during the winter months, then pop back up again when the sun comes out. Some hereditary freckles can also fade as you get older.
By wearing SPF and staying out of the sun, you can help keep them at bay.
The bottom line
Even though freckles aren’t harmful and are pretty dang cute if you ask us, it’s totally fine to want to get rid of them. Invasive treatments like laser treatment, intense pulsed light (IPL) therapy, and chemical peels are known to be pretty effective ways to remove or fade them.
Keep in mind that these therapies take a while to heal from, can make your skin more sensitive to the sun, and can cause serious side effects like burning and irritation.
If you still want to say bye to your frecks, talk with your derm to figure out the best removal method for you.
from Greatist Health RSS Feed https://bit.ly/3C56lU1
Before I head into the usual Friday Faves post, I wanted to send a huge hug and thank you to all of you for your wonderful messages, emails, texts, and comments about saying goodbye to sweet Caro. All of your lovely messages lifted us up during a hard week. I hope you know how much we appreciate you.
While I was heartbroken over everything, I feel a sense of peace this week that she’s pain-free and hanging out with Bella and my Tata Gene.
What do you have going on this weekend? It’s going to be a fun one over here. P has a birthday party, we’re headed to a fall festival, Liv’s friend is sleeping over, and we’re seeing Lion King. Whew! Packed as much fun as possible into the weekend. 🙂 I hope you have a great one ahead, too.
A bright spot in the week: seeing Michael Bublé for the second time! The last time I saw him in concert was 2019, and it was a DREAM to see him again on Tuesday night. Madre watched the kiddos and the Pilot and I headed up to Phoenix for dinner and the show. It was everything. He’s so incredibly talented, the musicians were incredible, and I LOVED his backup singers/dancers. They were up there killin’ it the entire time.
Naturally, I screamed my face off and croaked all day on Wednesday. It was worth it and 10/10 will do it again.
We had amazing seats! Also, there was a woman in the audience who has been to 52 of his shows! GOALS.
It’s time for the weekly Friday Faves party! This is where I share some of my favorite finds from the week and around the web. I always love to hear about your faves, too, so please shout out something you’re loving in the comments section below.
The All Bright C serum. It makes a huge difference in my skin tone, and can help to protect from further damage.
Our new reflect effect mask! Its bouncy gel formula features a hardworking blend of chemical and physical exfoliants: AHA glycolic acid and bamboo particles for added exfoliation, plus hydration boosting saccharide isomerate to soothe skin.
If you’re going to spend at least $50, I recommend joining Band of Beauty. It’s $29 for the year and you get a free gift for joining (the charcoal mask and overnight peel), free shipping on orders over $100 and 10% back in product credit that you can use right away.
This cute dress! It’s a little summery but so is our weather (100+ this week), so I’m rolling with it.
I’ve been looking for a lower heeled sandal to wear with jeans and dresses, so I picked these ones. They should be here today – I’ll report back.
Fitness + good eats:
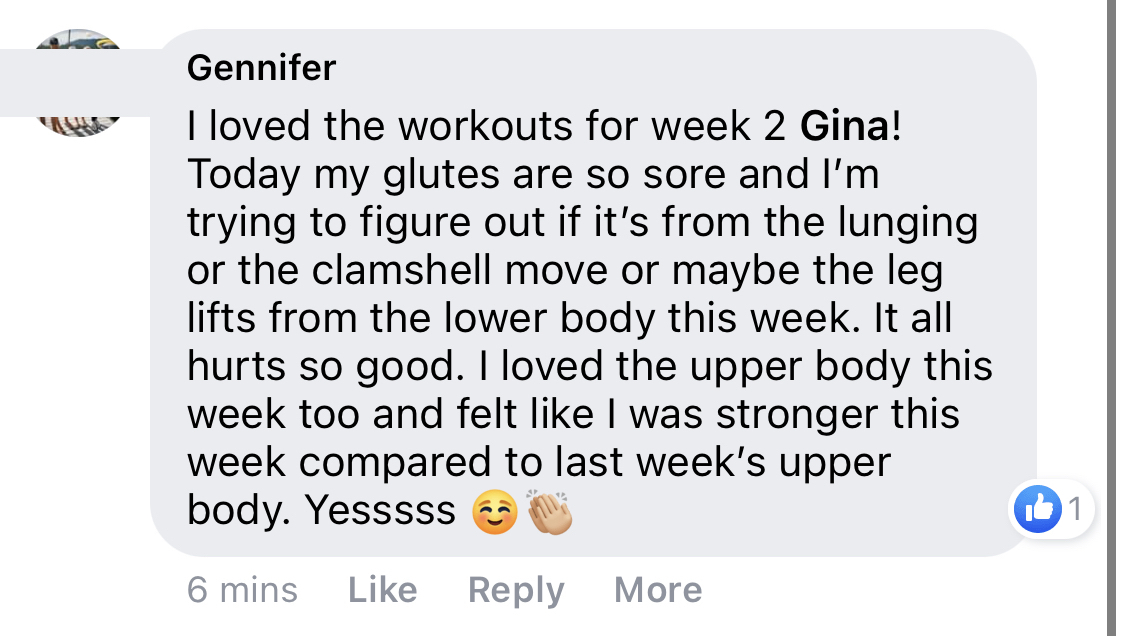
If you’ve been feeling blah about your routine, confused about how often to train which muscle group, and like you need some community support as we head into October, join us for Fit Team! You’ll get instant access to our September workouts and all of the bonuses (recipes, playlists, live call recordings) and the new October workouts + our Healthy Girl Fall challenge will arrive in your inbox next Wednesday!
You’re getting all of your fitness programming done for you (you just have to put in the work!) and have access to a Women’s Fitness Specialist, certified Personal Trainer, and Integrative Health Practitioner (meeee) at your fingertips, crafting your programming and here to support you along the way.