How to Make and Flavor Kombucha at Home

Sharing tips on how to make and flavor your kombucha at home!

Hi friends! Hope you’re having a lovely morning! This week is a bit bonkers and we’re enjoying time with some friends who are here from Florida! I’ll be back on Friday with some faves, but in the meantime, here’s a post from the archives. If you’re curious about brewing kombucha at home, here’s the full how-to!

So, it FINALLY HAPPENED.

After about a year (maybe a little longer?) of inconsistently making kombucha at home, I finally made some that tastes even better than store-bought stuff.
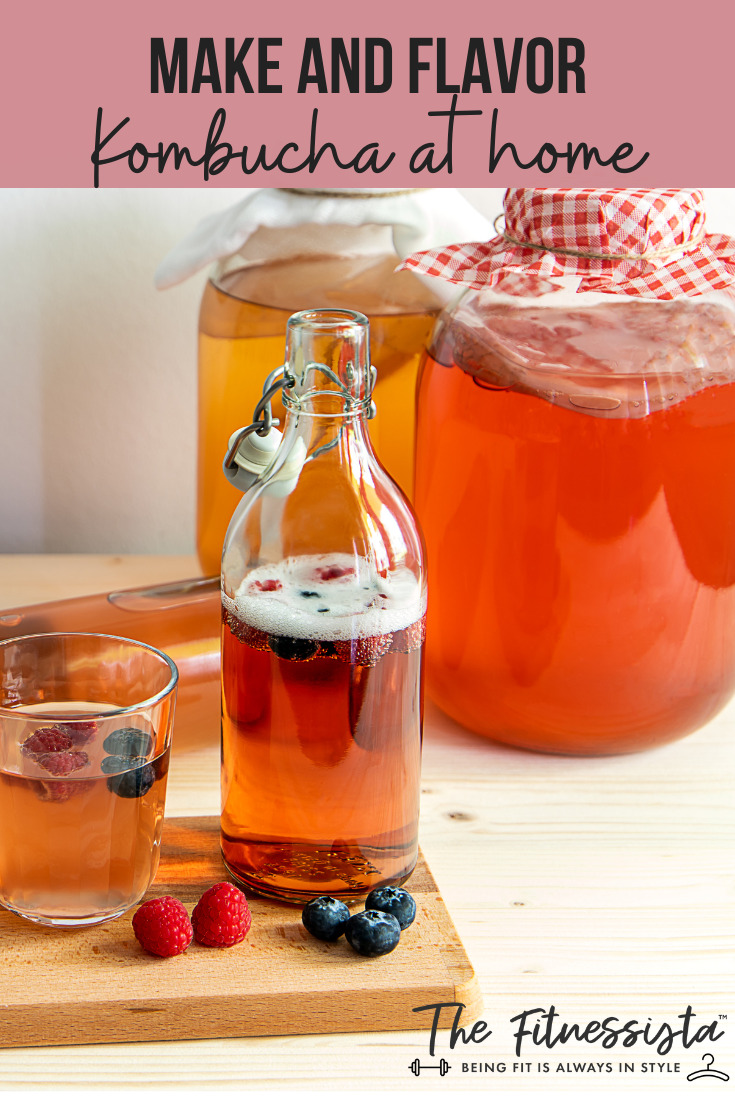
How To Make And Flavor Kombucha At Home

How To Make And Flavor Kombucha At Home

Tips on How to Make Kombucha at Home

-I followed the steps in this post but will outline them again, updated with the current techniques.

1) The quality of the SCOBY (the starter bacteria that looks like a flat, opaque gummy disk) makes all the difference in the world. I got an awesome SCOBY from Amazon, but I’ve also ordered a dud that ended up molding. (A little tidbit about mold: a lot of people are rightfully fearful about making moldy or bad kombucha. If the batch is bad, it’s an obvious thing. You will know it’s bad just by looking at it. The SCOBY will have blue or greenish patches on it, and well, it will look like mold. Don’t drink it; throw it away to start over.) The SCOBY I picked up from the farmer’s market in Ocean Beach is a BEAST.

(I got a bottle from the farmer’s market, filled with SCOBY strands and starter tea. To say I was skeptical would be an understatement. Shame on me.)

I’ve made multiple batches with said amazing SCOBY and also gave one to Whitney; she now has a full-up SCOBY hotel.

I like ‘em thick.

Scoby handling guidelines: always make sure your hands, tools, container, and anything that comes in contact with the SCOBY, are fully sanitized. Do not touch the SCOBY (or stir your kombucha) with anything metal; it can destroy it. Use wood or plastic tools instead.The Kombucha Fermentation Process
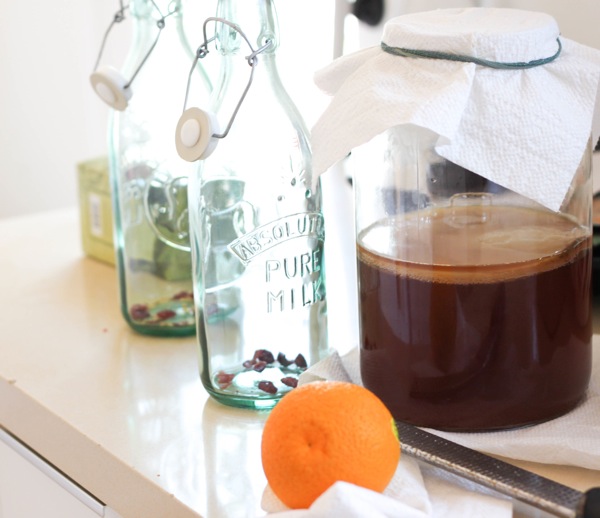
The Kombucha Fermentation Process

2) After you have your SCOBY, make your starter tea (black and green tea with NO added essential oils work well). I like Newman’s Own organic black tea. 8-10 cups of water to 8-10 bags of tea (equal water: tea ratio). After the water comes up to a boil, I add the tea bags, remove from the heat and stir in one cup of organic sugar. Let the tea cool completely to room temperature before straining it and pouring it into your kombucha jar (this is a perfect one).

3) Next, you’ll add about 2 cups of starter liquid (or whatever came with your SCOBY), and gently place the SCOBY on top. If the SCOBY and tea are at the same temperature, they will float beautifully to the top. If it sinks to the bottom, NBD. Just let it swim around and a new SCOBY will grow on top.

4) Cover it with cheesecloth or a paper towel (covered to protect, but with something that will enable it to breathe) and secure it with an elastic band before placing it in a dark cabinet to ferment. Avoid looking at it while it’s fermenting (the kombucha is brewing!), and start checking the taste of the mixture in about a week. This is where you’ll decide how tangy or sweet you like it.

Dip a clean plastic spoon into the ‘buch and give it a taste. If it’s to your liking, you’re ready for a second ferment! If it’s too sweet, give it a couple more days to become more tangy/acidic. Or if it’s too tangy, move on to the next step (flavoring and second fermentation) and add some extra fruit juice.

The duration of your kombucha fermentation will vary based on your climate and taste preferences. In hot Tucson, it was ready in about a week. In cooler weather, it could take up to two weeks. Be patient, young grasshopper.Kombucha Brewing
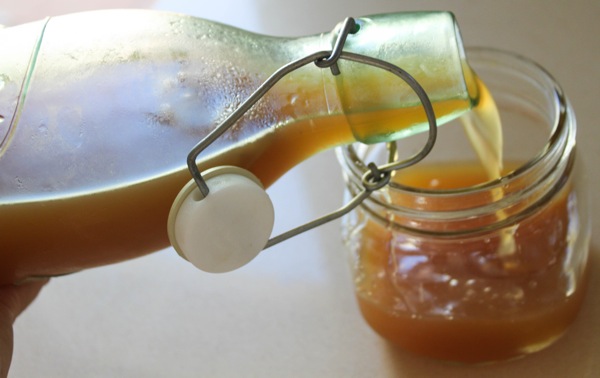
Kombucha Brewing

5) So, you’re ready for your second fermentation, and the fun part is you get to add flavorings to your kombucha! Get another jar or two (that has a flip lid, like these), or some airtight bottles like mason jars for the second round of fermentation + flavoring the mixture.

Here are some flavor ideas:

  • Fruit juice (apple, berry, orange)
  • Berries (raspberries, blueberries, strawberries); I’d recommend using fresh vs. frozen fruit
  • Herbs (lavender, dried ginger, mint)
  • Fresh ginger for that zing!
  • Strawberry basil is also a favorite combo of mine. Have fun experimenting!

To each jar or bottle, add some juice, herbs (if you’d like) and (this is KEY) some dried fruit (like dried cranberries or raisins). The sugar in the dried fruit will continue to feed the bacteria, and will also make the kombucha fizzy. Another thing that helps will fizz factor: dried ginger. This stuff is particularly awesome; a little (like a hefty pinch for each Mason jar) goes a long way. Pour the kombucha into each jar or bottle, but be sure to leave at least 2 cups of kombucha in the original jar to use as your “starter tea” for the next batch.

6) Seal the flavored kombucha and place it back in the pantry (in a dark, temperate spot) for 2-3 days. 

7) Next, you’ll transfer the jars/bottles from the pantry to the fridge to chill and enjoy! (if you used any “whole” fruits, herbs, or berries, strain the mixture before sealing again to place in the fridge.
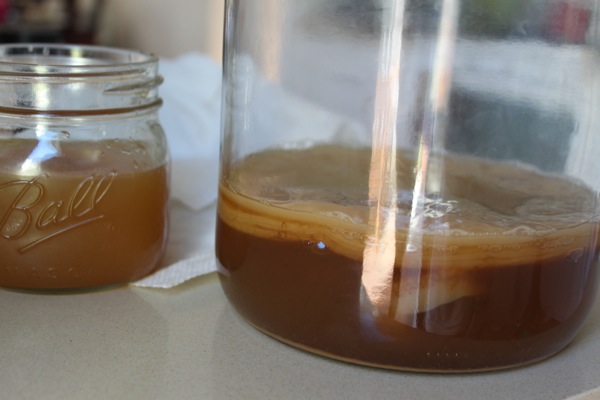
Alternate Recipe: Homemade Orange Cranberry Ginger Kombucha

It was getting close, and I was happy with the fruit flavor combos I’d tried, but it was always a little too tangy, too sweet, not fizzy enough, etc.

After quite a bit of experimentation, I got the result I’d been searching for for my finished kombucha; it was a glorious moment indeed. A warm embrace was shared with the kombucha jar before holding the SCOBY in the air like a baby Simba while singing a celebratory chant.

(Ok, just in my mind.)How to Make and Flavor Kombucha at Home
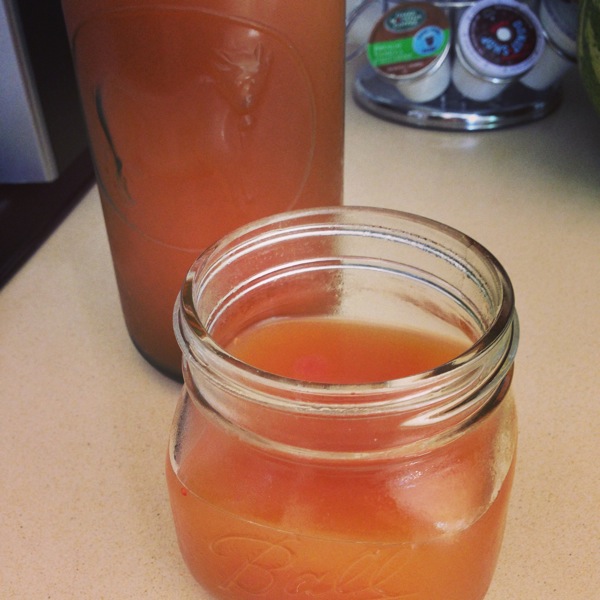
How Much Alcohol Is in Kombucha?

Ah, the delightful world of kombucha! Did you know that this fizzy fermented beverage has been around for centuries? Quite impressive, right? Now, let’s get down to the fun part – the alcohol content.

You’ll be happy to know that most commercial kombucha brands contain small amounts of alcohol, usually below 0.5%. Ah, just a smidge! This is because, during the fermentation process, the friendly bacteria and yeast buddies work their magic and convert some of the natural sugars into alcohol. Don’t fret, though! It’s only a trace amount and won’t leave you feeling tipsy. So enjoy your kombucha without worrying about a surprise visit from the booze brigade!

What is the Best Time to Drink Kombucha?

Can you imagine delighting in its effervescent pick-me-up during the daytime to steer clear of caffeine-induced sleep disruptions?

With kombucha, there’s a world of flavor-infused possibilities to explore. 

After you gently burp the bottles to release carbonation and prevent fizzy fountain mishaps, turn your trusty gallon jar into a playground of kombucha creativity by adding fresh or dried lemon and ginger for that zesty kick. And don’t forget the heart and soul of any kombucha recipe – the sweet tea that kickstarts fermentation, sweetened further with fresh fruit chunks for an explosion of delightful flavors. So, my friend, raise your glass and embrace the freedom to sip kombucha at any time that brings you joy, flavor, and a refreshingly healthy gut. Cheers to your kombucha happiness!
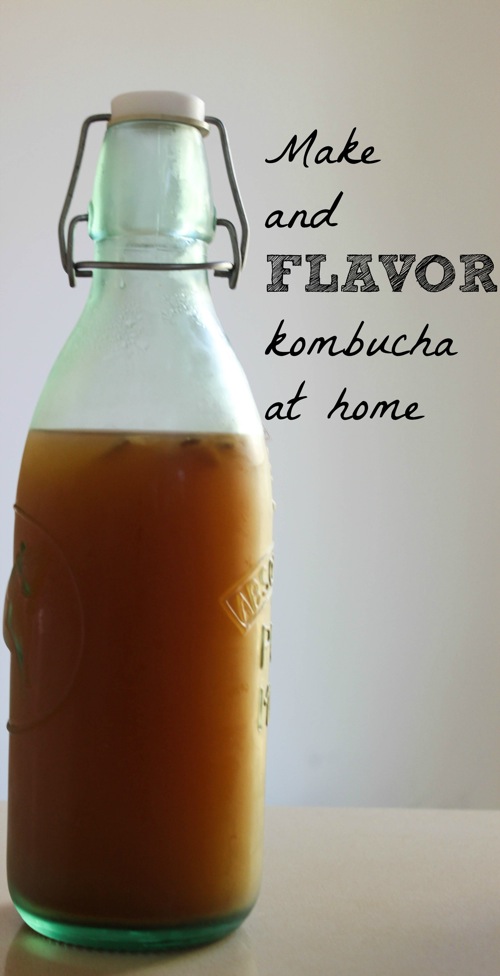
How to Make and Flavor Kombucha at Home

Make and flavor kombucha at home! Way less expensive than buying it, and you can customize your flavors. It’s not as scary as it looks.

Don’t let your kombucha dreams stay dreams – start brewing today and unleash your flavor potential!

So what do you do with the old bottle of kombucha (which now has the old “Mother” SCOBY in it + the new layer of “baby” SCOBY growing on top)? You separate the baby from the mother (yes, this involves touching it with your hands and cringing as you peel the slimy layers apart). The baby SCOBY can now venture on its own into the world to make its kombucha (so you can have two batches growing at once). Or even better: put it in a baggie with some starter tea and gift it to a friend! The gift that keeps on giving haha.

A little tip: I only use one SCOBY for a max of two batches of kombucha, and then will switch over to the baby SCOBY. They become weaker with each batch, so it’s good to switch to a new SCOBY after a couple of rounds.

Hope this helped those of you who were considering making your kombucha!

Kombucha: yay or nay? Have you ever made kombucha at home? If so, what are your favorite flavors? Is anything unique that you like to make or ferment? I would love to experiment with homemade ghee or goat cheese!

xoxo

Gina


The post How to Make and Flavor Kombucha at Home appeared first on The Fitnessista.


from The Fitnessista https://ift.tt/0FLdCAq
https://ift.tt/4fg9cJs

Friday Faves 6.30

Hi friends! Happy Friday! I hope you’re having a wonderful morning. I’m off to the eye doctor today and am crossing my fingers to get the all clear to start wearing contacts again. It’s been a bit hard to function in glasses for the past five weeks so I’m really, really hoping I’ll be able to wear my contacts, even just for a few hours each day.

We are back in Tucson after 12 days in Europe and it.was.magical. I’ll be posting a full recap of our trip, so stay tuned for all of the details! I’ll prob split it into two posts: Rome and the 7-night Italy and Greece Disney cruise. If you have any questions I can answer or include in my post(s), please let me know.

It’s time for the weekly Friday Faves party! This is where I share some of my favorite finds from the week and around the web. I always love to hear about your faves, too, so please shout out something you’re loving in the comments section.

Life:


(I’ll dream about this tuna pizza foreverrrrrr. So salty and savoy and amazing)

Our trip! I have a lot to say about it, but it was such a gift to spend so much time together as a family, without the distractions of life, work, and chores. I pre-wrote eight beefy blog posts to auto-publish while I was gone, and it was amazing to be truly present and not have to focus on content creation. The Pilot also got to take a break from work, and we could just enjoy time together in some breathtakingly beautiful places! It was definitely the trip of a lifetime.

Fashion + beauty:

This athletic dress! I had to see what the hype was about, and it LIVES UP to it. The fabric is a dream, it has a built-in bra with soft, removable cups, and shorts, you know, if you actually want to be athletic in it. I wore my dress while lounging in Rome, eating chocolate croissants, and it served that purpose equally well. 😉 I’m ordering two more colors!

Sharing some more love for Vivobarefoots. I wore my white low-top ones this entire trip and they felt awesome. My referral link gets you 15% off. 

A similar version of my fave visor. 

Read, watch, listen:

Anyone else that can’t wait for the Barbie movie? It looks so fun and clever; like the perfect summer movie.

Just finished this book. It was sweet and intriguing. Not my fave of the summer – that goes to this one!! – but still a light and enjoyable read.

Fun movie ideas.

Fitness, health + good eats:

Thinking of attempting this gnocchi even though we all know it won’t be the same lol.

A total body barre workout.

More clues on how exercise can decrease inflammation. 

Making this chocolate pie for our 4th of July bbq.

Today is the last day to use my code FITNESSISTA10 for 10% off at EquiLife. You can use this for the detox – we start as a community on July 10 – or any supplements you’ve been needing. It’s free shipping storewide right now, too!

Happy Friday, friends!

xoxo

Gina

PS congrats to the winner of the sneaky Organifi giveaway, Laura! I’ll be reaching out to order your prize for you 🙂

The post Friday Faves 6.30 appeared first on The Fitnessista.


from The Fitnessista https://ift.tt/prvhPR4
https://ift.tt/LdJPA4N

The F-Factor Diet: Can This Fiber-Filled Diet Help You Lose Weight?

Want to shed a few pounds but don’t wanna follow a fad diet that leaves you hangry and miserable? Well, say hello to the F-Factor Diet — a fusion of fiber and flavor designed to transform your body and keep you feeling satisfied. 

The F-Factor Diet is a nutrition plan emphasizing high-fiber foods, lean proteins, and avoiding sugary, processed foods. The theory is that by upping fiber intake, your blood sugar levels should stabilize, and you’ll feel fuller for longer. 

But not to sugarcoat it (pun intended) — the F-Factor Diet comes with its own set of hurdles, as sudden increases in fiber intake can cause bloating, cramping, and gas. So should you try the F-Factor Diet? Continue reading as we evaluate the F-Factor Diet and conquer the fiber frontier!

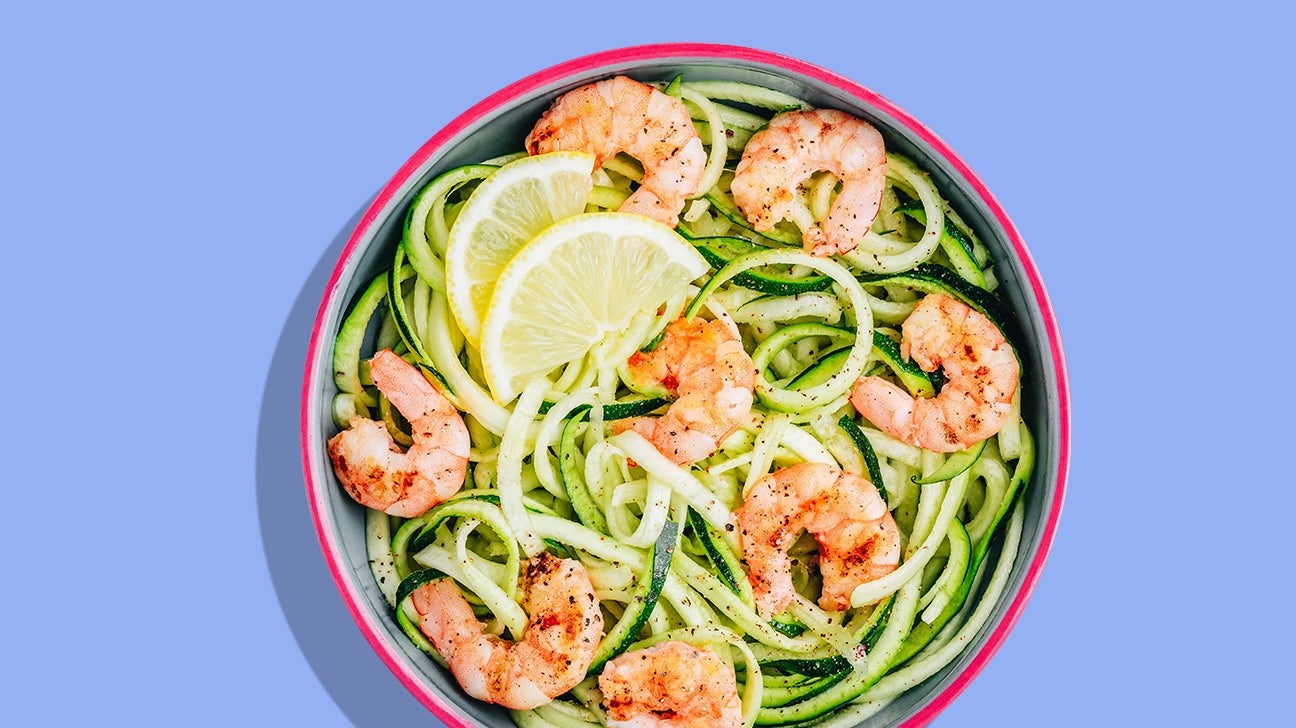
f-factor diet shrimp noodles

What is the F-Factor Diet?

The F-Factor Diet is a nutrition plan emphasizing the importance of incorporating high-fiber foods into daily meals. Created by registered dietitian Tanya Zuckerbrot, the F-Factor Diet has gained popularity for its focus on increasing fiber intake to promote weight loss, improve digestion, and enhance overall health.

The “F” in F-Factor stands for fiber, the hero of this diet. Fiber is a type of carbohydrate that the body can’t fully digest, so it adds bulk to your meals without adding extra calories. By incorporating high-fiber foods like fruits, vegetables, whole grains, and legumes, the F-Factor Diet aims to increase satiety (aka fullness), stabilize blood sugar levels, and support healthy digestion.

Unlike many low-calorie diet plans, the F-Factor Diet doesn’t eliminate food groups or restrict calorie intake excessively. So eating out and enjoying the odd alcoholic beverage isn’t a problem. Instead, it encourages a balanced approach to eating, combining lean proteins, healthy fats, and high-fiber carbohydrates. 

The diet emphasizes the concept of net carbs, which are the digestible carbs your body breaks down and absorbs after accounting for any sugar alcohol. You calculate them by subtracting the grams of fiber from the total grams of carbs.

The F-Factor Diet also includes “unlimited” non-starchy vegetables, which provide essential vitamins, minerals, and additional fiber while keeping calorie intake in check.

While the F-Factor Diet offers several potential benefits, like weight management and improved gut health, results may vary. As with any diet, you should consult your doctor or a  registered dietitian before significantly changing your eating habits.

F-Factor steps

The F-Factor Diet has three phases that gradually guide you through a gradual increase in carb intake, allowing your body to adjust and adapt while still achieving your goals. 

In each phase, you aim for three meals and one snack daily, avoiding anything refined, processed, and sugary, and choosing unprocessed carbs like:

  • fruits
  • veggies
  • whole grains
  • nuts
  • seeds

Phase 1 — Jump-start your weight loss

Phase 1 of the F-Factor Diet kicks things off by incorporating fewer than 35 grams of net carbs daily. These carbs are spread over approximately three servings, carefully selected to provide optimal nutrition while keeping your carbohydrate intake in check. 

This phase aims to jump-start your weight loss journey, allowing you to experience early results and build momentum.

Phase 2 — Stepping up the carb game

As you progress and your body adapts, it’s time to enter phase 2. You’ll incorporate fewer than 75 grams of net carbs daily in this phase. These carbs are distributed over approximately six servings, giving you more flexibility and variety while controlling your carbohydrate intake. 

Phase 2 continues to support weight loss while providing more options to satisfy your taste buds.

Phase 3 — The maintenance phase

Congrats! You’ve made it to Phase 3 — the maintenance phase of the F-Factor Diet. Here, you’ll establish a sustainable eating pattern that you can maintain indefinitely. It includes around nine servings of carbs per day, totaling fewer than 125 grams of net carbs. 

The focus shifts from rapid weight loss to maintaining a healthy balance and lifestyle that works for you in the long run.

Does it work?

Does the F-Factor Diet live up to its fiberlicious promises? As a low-calorie, low-carb diet, it should result in weight loss. 

The F-Factor Diet focuses on minimally processed, nutrient-dense foods. These whole foods nourish your body and provide a solid foundation for weight loss. By choosing foods rich in fiber, you can harness the power of this mighty nutrient to achieve and maintain a healthy weight.

But why is fiber such a game-changer when it comes to weight loss? Well, it all comes down to its unique properties. Fiber is a slow-digesting nutrient, meaning it takes longer for your body to break it down. This slow digestion process keeps you feeling full and satisfied for extended periods between meals, curbing those pesky hunger pangs that often lead to snacking and overeating.

And guess what? The evidence consistently points to the positive impact of fiber on shedding extra pounds. Increasing fiber consumption not only aids in weight loss but may also play a role in preventing obesity and related chronic diseases.

In fact, a study of 345 adults with excess weight or obesity found that fiber intake was the most significant dietary factor in promoting weight loss. This held true regardless of calorie intake or the macronutrient composition of their diet. So even if you’re not obsessing over every calorie or strictly following a specific macronutrient ratio, increasing your fiber intake can still make a substantial difference to weight loss.

The bottom line? The F-Factor Diet’s emphasis on whole, minimally processed foods and high fiber content is rooted in solid scientific evidence. Incorporating these principles into your eating habits can support your weight loss goals.

What can you eat on the F-Factor diet?

The F-Factor Diet is a flexible plan, so you can choose many options within general guidelines. Aim for lean proteins, complex carbs, and high fiber, plant-based foods.

Here are some of the key food groups and options that are encouraged on the F-Factor diet:

  • High-fiber fruits. Embrace the sweetness of nature with high-fiber fruits like berries, apples, pears, and oranges. These juicy delights satisfy your taste buds and provide a burst of essential vitamins and antioxidants.
  • Nutritious vegetables. Fill your plate with a rainbow of nutrient-dense vegetables. From leafy greens like spinach and kale to cruciferous veggies like broccoli and cauliflower, these fiber-packed powerhouses add color, crunch, and goodness to your meals.
  • Whole grains. Incorporate whole grains like quinoa, brown rice, oats, and whole wheat bread into your diet. These wholesome options provide a hearty dose of fiber, vitamins, and minerals while keeping you satisfied and energized.
  • Lean proteins. Enjoy lean protein sources like skinless poultry, fish, eggs, tofu, and Greek yogurt. These protein-packed foods help support muscle growth and repair, keeping you feeling full and satiated throughout the day.
  • Healthy fats. Include nourishing fats, like avocados, nuts, seeds, and olive oil. These healthy fats provide essential nutrients and help enhance the flavor and fullness-rating of your meals.
  • Fiber-friendly snacks. Choose roasted chickpeas, air-popped popcorn, and veggie sticks with hummus. These snacks offer a satisfying crunch while boosting your fiber intake.
  • Moderate alcohol. Yes, you can have a drink! But only in moderation, meaning one drink daily for females and two for males.

The F-Factor Diet also offers branded powders and bars, offering convenient sources of protein and fiber.

What you can’t eat on the F-Factor Diet

While the F-Factor Diet doesn’t officially exclude any foods, you should minimize highly processed foods and low-quality carbs for best results. These include:

  • Highly processed foods: Steer clear of sugary snacks, sodas, fast food, and processed meats. These foods tend to be low in fiber, high in added sugars, saturated fats, and artificial ingredients, which can hinder your progress.
  • Refined grains: Limit your intake of refined grains like white bread, white rice, and pasta. These processed grains have been stripped of their fiber content, leaving a less nutritious and satisfying option behind.
  • Sugary treats: Minimize your consumption of sugary treats like cookies, candies, cakes, and sweetened beverages. These high-sugar indulgences can lead to energy crashes, cravings, and weight gain, derailing your progress on the F-Factor Diet.
  • High-fat meats: Reduce your intake of high-fat meats like fatty cuts of beef and pork and processed meats like bacon and sausage. These meats are typically higher in saturated fats and can be less supportive of your weight loss goals.

Remember, the F-Factor Diet encourages a balanced approach to eating and focuses on nourishing your body with whole, minimally processed foods. By making mindful choices and avoiding foods that are low in fiber and high in added sugars.

Is the F-Factor Diet safe?

In the early phases, the F-Factor Diet is very similar to keto or a very low-carb diet. While F-Factor is generally considered safe for most folks, rapid weight loss, particularly in the initial phases, may increase the risk of nutrient defiiences, kidney stones, and electrolyte disturbances

Additionally, any significant changes to your diet may cause problems if you have certain medical conditions. So it’s always best to seek professional guidance from your doctor or a registered dietician. They can provide personalized guidance, help address specific concerns, and ensure that the F-Factor Diet is a safe and suitable approach to achieving your health and weight loss goals.  

Furthermore, while the F-Factor Diet may offer benefits, weighing the potential downsides before adopting this eating plan is essential. Here are some factors to consider:

  • Exercise. One issue with the F-Factor Diet is its minimized emphasis on exercise. The diet even suggests that exercise may increase appetite, potentially hindering weight loss. But, being physically active has numerous benefits for weight loss and overall health. Engaging in activities like running, walking, biking, yoga, weight lifting, or playing sports can help boost your calorie burn and support your weight loss efforts.
  • Nutrients. While the F-Factor Diet focuses heavily on fiber, it’s essential to maintain a well-rounded diet that includes all vital nutrients. While fiber is necessary for satiety and digestion, other nutrients like protein and fat also play significant roles in weight loss and overall health. Protein and fat can help increase fullness, support muscle maintenance, and impact calorie expenditure. So, ensure you get a balanced intake of all essential nutrients.
  • Calorie intake. The F-Factor Diet may lead to consuming too few calories, especially in the initial phases. Severely restricted calorie intake over an extended period can lead to various health problems due to nutrient deficiencies. It’s crucial to monitor your calorie intake and ensure it aligns with your needs to avoid negative impacts on your health.
  • Fiber-related side effects. Increasing fiber intake rapidly can result in side effects like bloating, cramping, gas, and diarrhea. While these are normal and indicate that fiber is doing its job, it’s advisable to gradually increase fiber intake if you’re not accustomed to a high-fiber diet.
  • Cost considerations. The cost of the F-Factor Diet can vary, with personal startup packages reportedly priced at an eye-watering $15,000. However, you can embark on the diet independently using Tanya Zuckerbrot’s books as guidance and accessing recipes available on the F-Factor Diet website. 

Takeaway

In the F-Factor Diet, fiber takes center stage, and lean proteins are the supporting cast. It’s a diet that gives you the freedom to eat out and doesn’t make you say goodbye to your fave foods. But while it might work for some folks, let’s not overlook the fine print.

While research specifically on the F-Factor Diet is a bit MIA, there’s no denying the benefits of a fiber-rich diet. But its laser focus on fiber might make you forget that other nutrients are crucial too.

Fiber is fantastic AF, but it’s not the superhero that can save the day alone. Instead, eating whole foods, staying active, and finding a lifestyle that suits you may be a better approach to sustainable weight loss.


from Greatist Health RSS Feed https://bit.ly/3NvHcGH

Grease Is Not the Word: 10 Hair Hacks for Greasy Hair

Greasy hair got you down? Well, fear not! Here are 10 hacks to get your greasy hair back on track. We also have a detailed explanation of the causes of greasy hair, plus prevention tips.

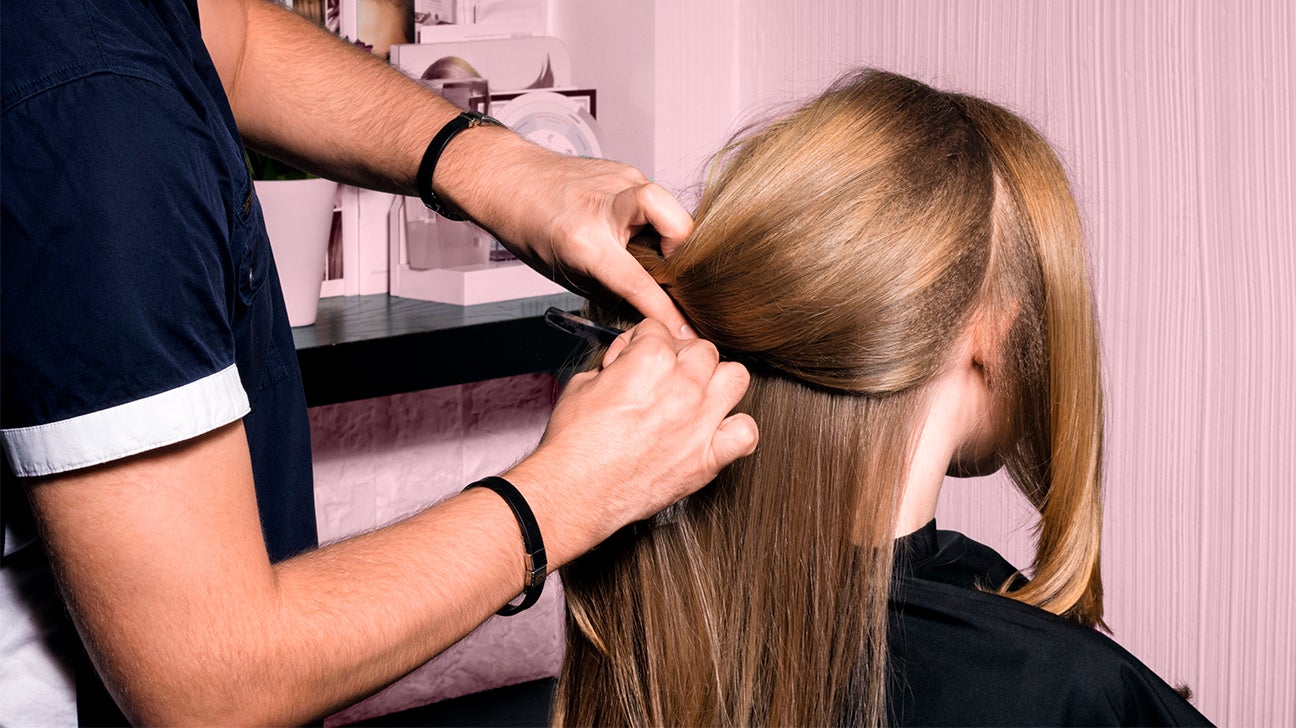
oily hair person getting their hair done
Drouk/Getty Images

10 tips to manage greasy hair

Before we get into the nitty-gritty, err, nitty-greasy… here are 10 tips to help you treat and prevent greasy hair:

  1. Find the right shampoo for your unique hair needs, and wash it every other day.
  2. Don’t put too much conditioner, and avoid using conditioner on your scalp.
  3. Rinse your hair thoroughly after each wash.
  4. Avoid styling products that contain oil-producing ingredients, and don’t overdo it with hot tools.
  5. Wash your hair after using a hat or helmet, and keep your hats clean.
  6. Use dry shampoo to absorb excess oils and moisture.
  7. Use a clarifying shampoo.
  8. Use natural haircare products like apple cider vinegar.
  9. Adjust your diet, avoiding foods that lead to excessive oil production.
  10. Find ways to reduce your stress.

What causes greasy hair?

Greasy hair happens when there’s an excess or buildup of sebum, the oil that our scalp produces to keep our locks healthy. These oils are meant to protect our precious hair proteins and keep everything in balance. But sometimes things go haywire. But why?

Here are some common causes:

  • Genetics. Your DNA could be the reason you’re an oil-making machine. If you’re predisposed to oily skin, then you’re predisposed to an oily scalp, too.
  • Diet. Your diet might also be the culprit. Eating a lot of sugar and dairy products might kick your sebaceous glands into high gear.
  • Hormones. Those oil-producing glands on your skin also go aggro if your hormones are out of whack. So things like menstrual cycles, puberty, and pregnancy can all play a part.
  • Sweat. Whether you’re sweaty from working out or spending time out in the sun, sweat can lead to an oily scalp and greasy hair.
  • Haircare routine. You might be washing your hair not enough, or too often. This can throw the oil balance of your hair off kilter.
  • Products. Harsh products that strip away all your natural oils will cause your oil glands to overreact and make too much oil. On the other hand, conditioners that add too much moisture to your hair might build up over time, turning it into a gloppy muck. 
  • Hair type. People with fine hair are at a higher risk of a greasy scalp. Fine hair can’t absorb as much sebum and moisture compared to thicker hair. Also if you have fine hair, you probs have more hair follicles per square inch. That means you might produce more sebum than those with thick hair.

10 ways to get rid of greasy hair

Ready to show that grease who’s boss? Here are 10 ways to manage greasy hair.

1. Shampoo routine

If your hair tends to be oily, you should prob wash it every other day. But don’t overdo it. The more you wash your hair, the more you strip your hair of its natural oils. This will kick your follicles into grease-making mode.

Also, it might help to use a gentle shampoo or products that contain lauryl sulfates or sulfosuccinates. These chemicals work to remove sebum from the hair. Balance is the key here, so nothing too harsh. 

And only use a little bit of shampoo, about the size of a quarter. (Remember coins?) Gently massage the little dollop into your scalp and let it froth up on its own. Don’t worry about getting the shampoo all the way to the tips of your hair. Focus on the follicles where the oil is produced.

2. Condition correctly

Conditioner adds moisture and luster to your hair. So if you don’t want to add more greasiness, avoid putting it on your scalp. Instead, spread a little conditioner just on your tips. If you have shorter hair or thinning hair, you may want to skip the conditioner altogether.

Remember, every hair type has unique needs. It might take some trial and error, but you’ll eventually find one that works for you.

3. Rinse right

Make sure to thoroughly rinse out any shampoo or conditioner. Otherwise, all sorts of residue might literally stick around. When rinsing, go for some tepid water. Hot water will totally strip your hair of its oils, alerting those sebaceous glands to kick into overdrive. Rinsing your hair with cooler water will also help your scalp stay healthy by promoting blood flow on your scalp.

4. Style with care

Avoid styling products that contain silicone or products that add too much moisture, like oils. Again, these will not only weigh down your hair and make it look oilier, but they could also throw your scalp’s moisture balance out of whack. Reach for a lighter product with a spray applicator.

Also, be careful not to overdo it with hot styling tools. Adding heat to your hair will definitely up the grease factor. To keep things balanced, try to air dry your hair at least once or twice a week. 

5. Clean up your hat hair

It’s a great idea to wear a hat to protect your skin and hair against UV damage, especially in the summer. And it’s super wise to wear a helmet while biking. But anything that covers your head will also make your scalp sweat. So be sure to wash your hair after wearing a hat or a helmet. 

6. Dry shampoo

Dry shampoo can be a great option for quickly reducing the oiliness of your hair. These products are usually powders or sprays that absorb the grease between washings. Be careful, though. Using too much dry shampoo will leave your hair full of gunky residue which could lead to dandruff or other scalp irritation.

Pro tip: If you want to experiment with dry shampoo, put a little of it into your brush and then work it into your hair so it gets all the way down to your roots.

7. Time to clarify

As you tweak your hair routine, think about using a clarifying shampoo once a week. Clarifying shampoos give your hair a sort of deep clean, lifting out the residue that can build up from other shampoos, conditioners, dry shampoos, styling products, or air pollutants. 

8. Go natural

If you want to go the DIY route to tame your oily hair, there are a few options. Some styling professionals recommend trying apple cider to reduce the greasiness. Make a mixture of one part apple cider vinegar and eight parts water, let it soak in your hair for a few minutes. Then rinse it out with tepid water. 

Aloe vera and coconut oil also help to soothe your scalp and remove excess oils. But make sure to use them sparingly and only on your scalp as they are also natural moisturizers. 

Cornstarch is a great DIY dry shampoo. Also, in a small study, green tea products were shown to reduce sebum production in the skin.

9. Adjust your diet

As we mentioned, your diet might be the culprit in causing your glands to make more skin oils. To regain a balance, opt for a diet rich in whole grains, fish, and vitamin E. This will help regulate oil production.

Foods containing fatty acids also help balance your sebum production and promote healthier hair. Fish, nuts, seeds, plant oils, and fortified foods like milk and yogurt are all secret weapons for luscious locks.

10. Manage your stress

When stress or anxiety bubbles up in your life, your body reacts by increasing the production of certain hormones. This can lead to a hormonal imbalance, which then results in a number of different body changes. One of the results is the production of more sebum on your scalp. Luckily, there are many proven techniques for helping you chill out. Your hair will thank you.

Takeaway

Greasy hair can be triggered by a medley of factors like hormonal imbalances, your genetics, your diet, your hair care habits, or the weather. Glands in your scalp produce that oil we call sebum. Sometimes, those glands go into overdrive, turning your locks into a greasy mess. Fine hair loves to soak up sebum like a sponge.

There are some simple hair hacks that can help de-grease your hair. Try washing your hair every other day with a smidgen of gentle shampoo, avoiding harsh products that strip away your precious natural oils, and applying it only to your scalp. If you like using conditioner, apply it sparingly and just to the tips of your hair. Rinse with tepid water to keep that residue at bay. Remember, hot water will send your sebaceous glands into overdrive, leaving you slicker than a car dealer. 

Styling products with silicone or excessive moisture are the enemy, just like those fiery styling tools that turn up the greasiness dial. Dry shampoo, the hero of the unwashed, can save the day. Just don’t go overboard and turn your head into a powdery mess.


from Greatist Health RSS Feed https://bit.ly/435zGrC

How to train for a half marathon

Sharing tips on how to train for a half marathon, including fuel tips, training strategies, recovery, and more!

Hi friends! How’s the day treating ya? I hope you’re having a great one.

For today’s post, let’s lace up our running shoes, shall we?

It’s been quite a while since I’ve done a half marathon (one of my Ironman friends keeps telling me I need to do another one), I still help clients and friends train for endurance events. I love creating training plans and sharing tips, so I figured we’d chat about half marathons and training strategies.

So, what exactly is a half marathon?

Well, it’s a long-distance race that covers a distance of 13.1 miles or 21.1 kilometers. It’s a challenging yet achievable goal for many runners, offering a stepping stone between shorter races like 5Ks and the ultimate endurance test of a full marathon.What sets a half marathon apart from a full marathon is the distance. While a full marathon covers 26.2 miles, a half marathon is a more manageable undertaking, making it a popular choice for runners of varying abilities and experience levels. It’s an ideal challenge for those looking to push their limits and experience the thrill of a longer race without the intensity and extensive training required for a full marathon.

Before taking on a half marathon, there are several things to consider and prepare for. It’s essential to assess your current fitness level, set realistic goals, invest in proper running gear, and pay attention to nutrition and hydration.

Additionally, understanding the course, pacing strategies, and recovery techniques will contribute to your overall success and enjoyment of the race.Training for a half marathon not only helps you physically but also provides mental and emotional benefits. The discipline and commitment required to follow a training plan can boost your mental strength and resilience, transferring into other areas of your life.

Today, I’ll be sharing a comprehensive guide on how to train for a half marathon, covering topics like creating a training plan, incorporating cross-training and strength exercises, managing your nutrition and hydration, and tips for race day success. My aim is to provide you with the tools, guidance, and motivation to make the most out of your half marathon journey and achieve your PRs (personal records!).

How to train for a half marathon

Step 1

Create a training plan or follow a training schedule. It’s important to build your endurance gradually, improving your cardiovascular fitness, and strengthening your muscles. A well-designed training plan will help you develop the necessary physical and mental strength, allowing you to conquer the distance with confidence.

Step 2

Emphasize resistance training. Resistance training will help to support all of the muscles in your legs, and can help to prevent muscle imbalances and overuse injuries. Resistance training can also make you a stronger, faster runner, and improve your endurance. If you’re training for anything (or training for LIFE), don’t skip out on resistance work.

Step 3

Recover wisely. Make sure to have at least 1-2 full days of rest each week. This is your body’s chance to recover and repair from your hard work. It can be hard to take days off, especially if you’re enjoying training, but I promise you that this is where the magic happens. Use these days for extra stretching or mobility work, or something restorative, like a sauna session, bath, or long nap.

Step 4

Prepare hydration and nutrition. This takes a little bit of trial and error, especially when you’re trying to figure out race day fueling strategies. Make sure that you’re consuming enough water, electrolytes (especially for workouts longer than an hour), and fueling your body with healthy carbs, protein, fat, and fiber. Experiment with carbs during longer runs, too. You may find that you like a gel or a few gummies when you first start, and then every 30-45 minutes. The key is to get yourself some carbs and a little boost BEFORE you hit a wall.

Step 5

Make an awesome playlist. This can make such a huge difference with motivation! Prep a playlist with the songs you love to hear, and add them in the order you need to hear them. For example, I put more motivational songs at the front of my playlist and really amp it up towards the end. I always make my favorite song the one I’ll hear around mile 10, when I usually hit a little slump.

Best Workouts for Half Marathon

Glute work (especially glute medius)

To improve your glute strength as a runner, incorporate exercises that target the glute muscles into your training routine. Movements like squats, lunges, hip thrusts, and glute bridges are all fantastic choices. Additionally, incorporating resistance bands, kettlebells, or bodyweight exercises can further challenge your glutes and promote strength development.

Quad strengtheners

These muscles are responsible for extending your knee and propelling you forward with each stride. When your quads are strong, they help generate power and provide stability during the push-off phase, resulting in a more powerful stride and increased speed.

Hip flexor stretches

Our hip flexors can get tight from constant flexion at the hip as we run, so make sure to incorporate hip flexor stretches.

Lateral movements

Lateral movements engage the muscles responsible for stabilizing your hips, knees, and ankles in side-to-side motions. By incorporating exercises such as lateral lunges, lateral bounds, or lateral shuffles, you can improve your stability and balance. This translates to better control and coordination during your runs, especially when navigating uneven surfaces or changing directions quickly.

Injury Prevention: Running predominantly involves forward movement, which can lead to muscle imbalances and neglect of certain muscle groups. Lateral movements work different muscle fibers and activate muscles that may not be fully engaged during traditional running. Strengthening the muscles in your hips, glutes, and inner and outer thighs through lateral movements can help correct imbalances, reduce the risk of common running injuries like iliotibial band syndrome (ITBS), and improve overall biomechanics.

Improved Agility and Quickness: Lateral movements require quick changes in direction and footwork. By incorporating lateral exercises into your training, you can enhance your agility and reaction time. This can be particularly beneficial for trail runners or those participating in sports that involve frequent changes in direction, such as soccer or basketball

Increased Hip Mobility: Lateral movements often involve a greater range of motion in the hips compared to linear running. Regularly performing lateral exercises can help improve hip mobility and flexibility, which can translate to a smoother and more efficient running gait.

Core Engagement: Lateral movements engage your core muscles, including the obliques and deep abdominal muscles, as they help stabilize your torso during side-to-side movements. A strong core is essential for maintaining proper running posture and transferring power from your lower body to your upper body.

To incorporate lateral movements into your training, consider adding exercises such as lateral lunges, side shuffles, lateral bounds, or lateral leg lifts. You can perform these exercises as part of your warm-up, cool-down, or dedicated strength training sessions.

Functional core work

As you increase your mileage or aim for longer distance races, maintaining core stability becomes even more critical. A strong core helps delay fatigue by supporting your body’s posture and reducing the impact of repetitive motion on other muscles. By improving your core endurance, you can maintain good form and prevent energy wastage, enabling you to sustain your pace during long runs or races.

To incorporate functional core work into your training, focus on exercises that mimic the demands of running and engage multiple muscle groups simultaneously. Planks, side planks, Russian twists, mountain climbers, and bird dogs are excellent examples.

Half Marathon Training Schedule

I have a full sample training plan here from my post How to train for a half marathon while strength training. It includes a balanced mix of strength, running (with progressive mileage), and rest. As always, talk with a doctor before making any fitness changes and honor your body; modify as needed.

Crossing that finish line after months of preparation can be an incredibly empowering and fulfilling experience, fueling your self-confidence and sense of achievement. If you’re currently training for a half marathon, I’m cheering for you and sending lots of wishes for an awesome race!

xoxo

Gina

The post How to train for a half marathon appeared first on The Fitnessista.


from The Fitnessista https://ift.tt/nCmbQHP
https://ift.tt/Xg3uqvI

Skin Cycling: A Tiktok Skincare Trend Dermatologists Can Get Behind

Skin cycling is a four-day skincare routine that involves cycling between exfoliants, retinol-based products, and moisturizers. This allows your skin to rest which, in theory, can improve skin health and reduce irritation from active ingredients or harsh exfoliants. But does it really work?

Here’s what board-certified derms say about skin cycling.

What is skin cycling?

Like many online trends, skin cycling was popularized by TikTok, but this one has some merit worth exploring. 

Melanie Palm, M.D., a board-certified dermatologist and cosmetic surgeon at Art of Skin MD explains that this four-night skincare routine alternates between using active ingredients and recovery — or “letting the skin rest.”

“Skin cycling is nothing new,” she says. “In fact, dermatologists have been recommending this sort of turnover and skincare routine for years.”

How skin cycling works

Palm explains that while the age of the patient, emerging skin conditions, time of year, and environmental factors all play a role in skin cycling, this routine generally entails these steps:

  • One night of exfoliation. This means using active ingredients like AHAs (glycolic or lactic acid) or BHAs (salicylic acid).
  • One night of retinoids. Think retinol (available over-the-counter or in prescription strength) or tretinoin or adapalene (both are prescriptions except for Differin adapalene gel which is budget-friendly and available OTC almost anywhere, including Amazon). 
  • Two nights of “recovery” or rest. Palm says these nights typically feature hydrating and/or calming skincare products. “Steps like cleansing and moisturizing generally stay the same every night of this skin cycling schedule,” she adds. 

Okay, but why try this routine?

Palm tells us skin cycling can be an effective way to maintain the health of your skin barrier as it prevents you from overusing certain active ingredients that can strip or irritate your skin.

Benefits of skin cycling

No point in anything skincare related without benefits, right?

Palm explains that skin cycling can be beneficial for those who are unsure of which skincare products to use and when in that it provides structure to your skincare routine

“It can also be helpful in preventing one from over-exfoliating or over-using skincare products with active ingredients, which can lead to irritation, inflammation, and a compromised skin barrier,” she says. 

Plus, she adds, if you’re new to chemical exfoliants and/or retinoids, skin cycling can also be an effective way to introduce these ingredients into your skincare routine without drying out or irritating your skin.” 

Skin cycling drawbacks

If this is far from your first rodeo, and you know you can tolerate AHAs, BHAs, and retinoids, Palm points out that skin cycling could delay optimal results — especially since you’re likely only using these active ingredients two times a week on the skin cycling schedule. 

“Ideally, one should work up to tolerating retinoid use once a day or every other day for the best results,” she says.  

Skin cycling side effects

Palm explains that because skin cycling offers recovery days, it can usually help to minimize side effects from using active ingredients. 

“However, if you’re a newbie to AHAs, BHAs, and retinoids, it’s possible you can experience some dryness and irritation if you’re just incorporating them into your routine via skin cycling,” she says. 

Palm tells us to remember that these active ingredients make your skin more photosensitive.

“It’s critical to be diligent about SPF application throughout the day,” she says.

Lastly, she mentions that patch testing a new skincare product is essential to avoid a possible allergic reaction. Simply apply a little of the product to a small area before applying it all over a larger skin area. 

Who should avoid skin cycling?

Stephanie Saxton-Daniels, M.D., a board-certified dermatologist at Westlake Dermatology in Dallas, reminds us that not all skincare products and regimens are suited for everyone. 

She also tells us people with flares of skin disease or those who haven’t yet seen a board-certified dermatologist for their appropriate regimens and diagnoses may need to skip skin cycling. 

AKA, always see a good derm if you can before building out your routine, especially if you have any concerns that need addressing.

Palm adds that those who are pregnant or nursing should avoid using retinoids, which are a step in the skin cycling routine. “If you have eczema, rosacea, or a skin allergy, AHAs/BHAs, and retinoids can also further irritate your skin,” Palm says.  

“Consult with a board-certified dermatologist if you’re unsure on how to introduce new skincare products or active ingredients into your routine,” she adds.

FAQs

How soon do you see results from skin cycling?

Palm says if you’re utilizing the skin cycling method to slowly incorporate retinoids or AHAs/BHAs into your routine, you should be able to increase the frequency of utilizing these active ingredients after one month. 

As we mentioned above, Palm says it’s ideal to work up to using retinoids once a day or every other day. “I recommend using chemical exfoliants up to two times weekly,” she says. 

What is an example skin cycling routine?

Palm offers a handy skin cycling schedule below:

  • Night 1: Exfoliate. Remove makeup, cleanse, exfoliate with salicylic acid, and moisturize with hyaluronic acid and ceramides.
  • Night 2: Retinoids. Remove makeup, cleanse, apply tretinoin, and moisturize with hyaluronic acid and ceramides.
  • Nights 3 and 4: Recover. Remove makeup, cleanse, and apply a serum with niacinamide, peptides, or growth factor. Then moisturize with hyaluronic acid and ceramides.

Palm says that each morning of this skin cycling schedule, you’ll want to do the following steps: 

  1. Cleanse
  2. Apply a vitamin C serum
  3. Moisturize 
  4. Protect your skin with a broad-spectrum SPF of 30 or above

Are there any risks?

Assuming you’re using products you’re not allergic to and ones that your skin can tolerate, Palm says skin cycling is generally considered safe for most skin types

Again, she notes that if you’re pregnant, nursing, or have a specific skin condition, you’ll want to consult your dermatologist to determine whether certain AHAs, BHAs, or retinoids are right for you right now. 

Takeaway 

Skin cycling is a simple way to let your skin get a breather in between steps or possibly avoid irritation. 

It includes one night of exfoliation, followed by one night of retinoids or retinol (your preference), then two back-to-back nights of rest.

This can benefit those who have a tough time tolerating the spicy experience that active ingredients are known for.

But for those who are used to actives and can tolerate them more regularly, it may not benefit you to incorporate rest days. But no one knows your skin better than your derm, so see one if you can. 


from Greatist Health RSS Feed https://bit.ly/3NyKY28

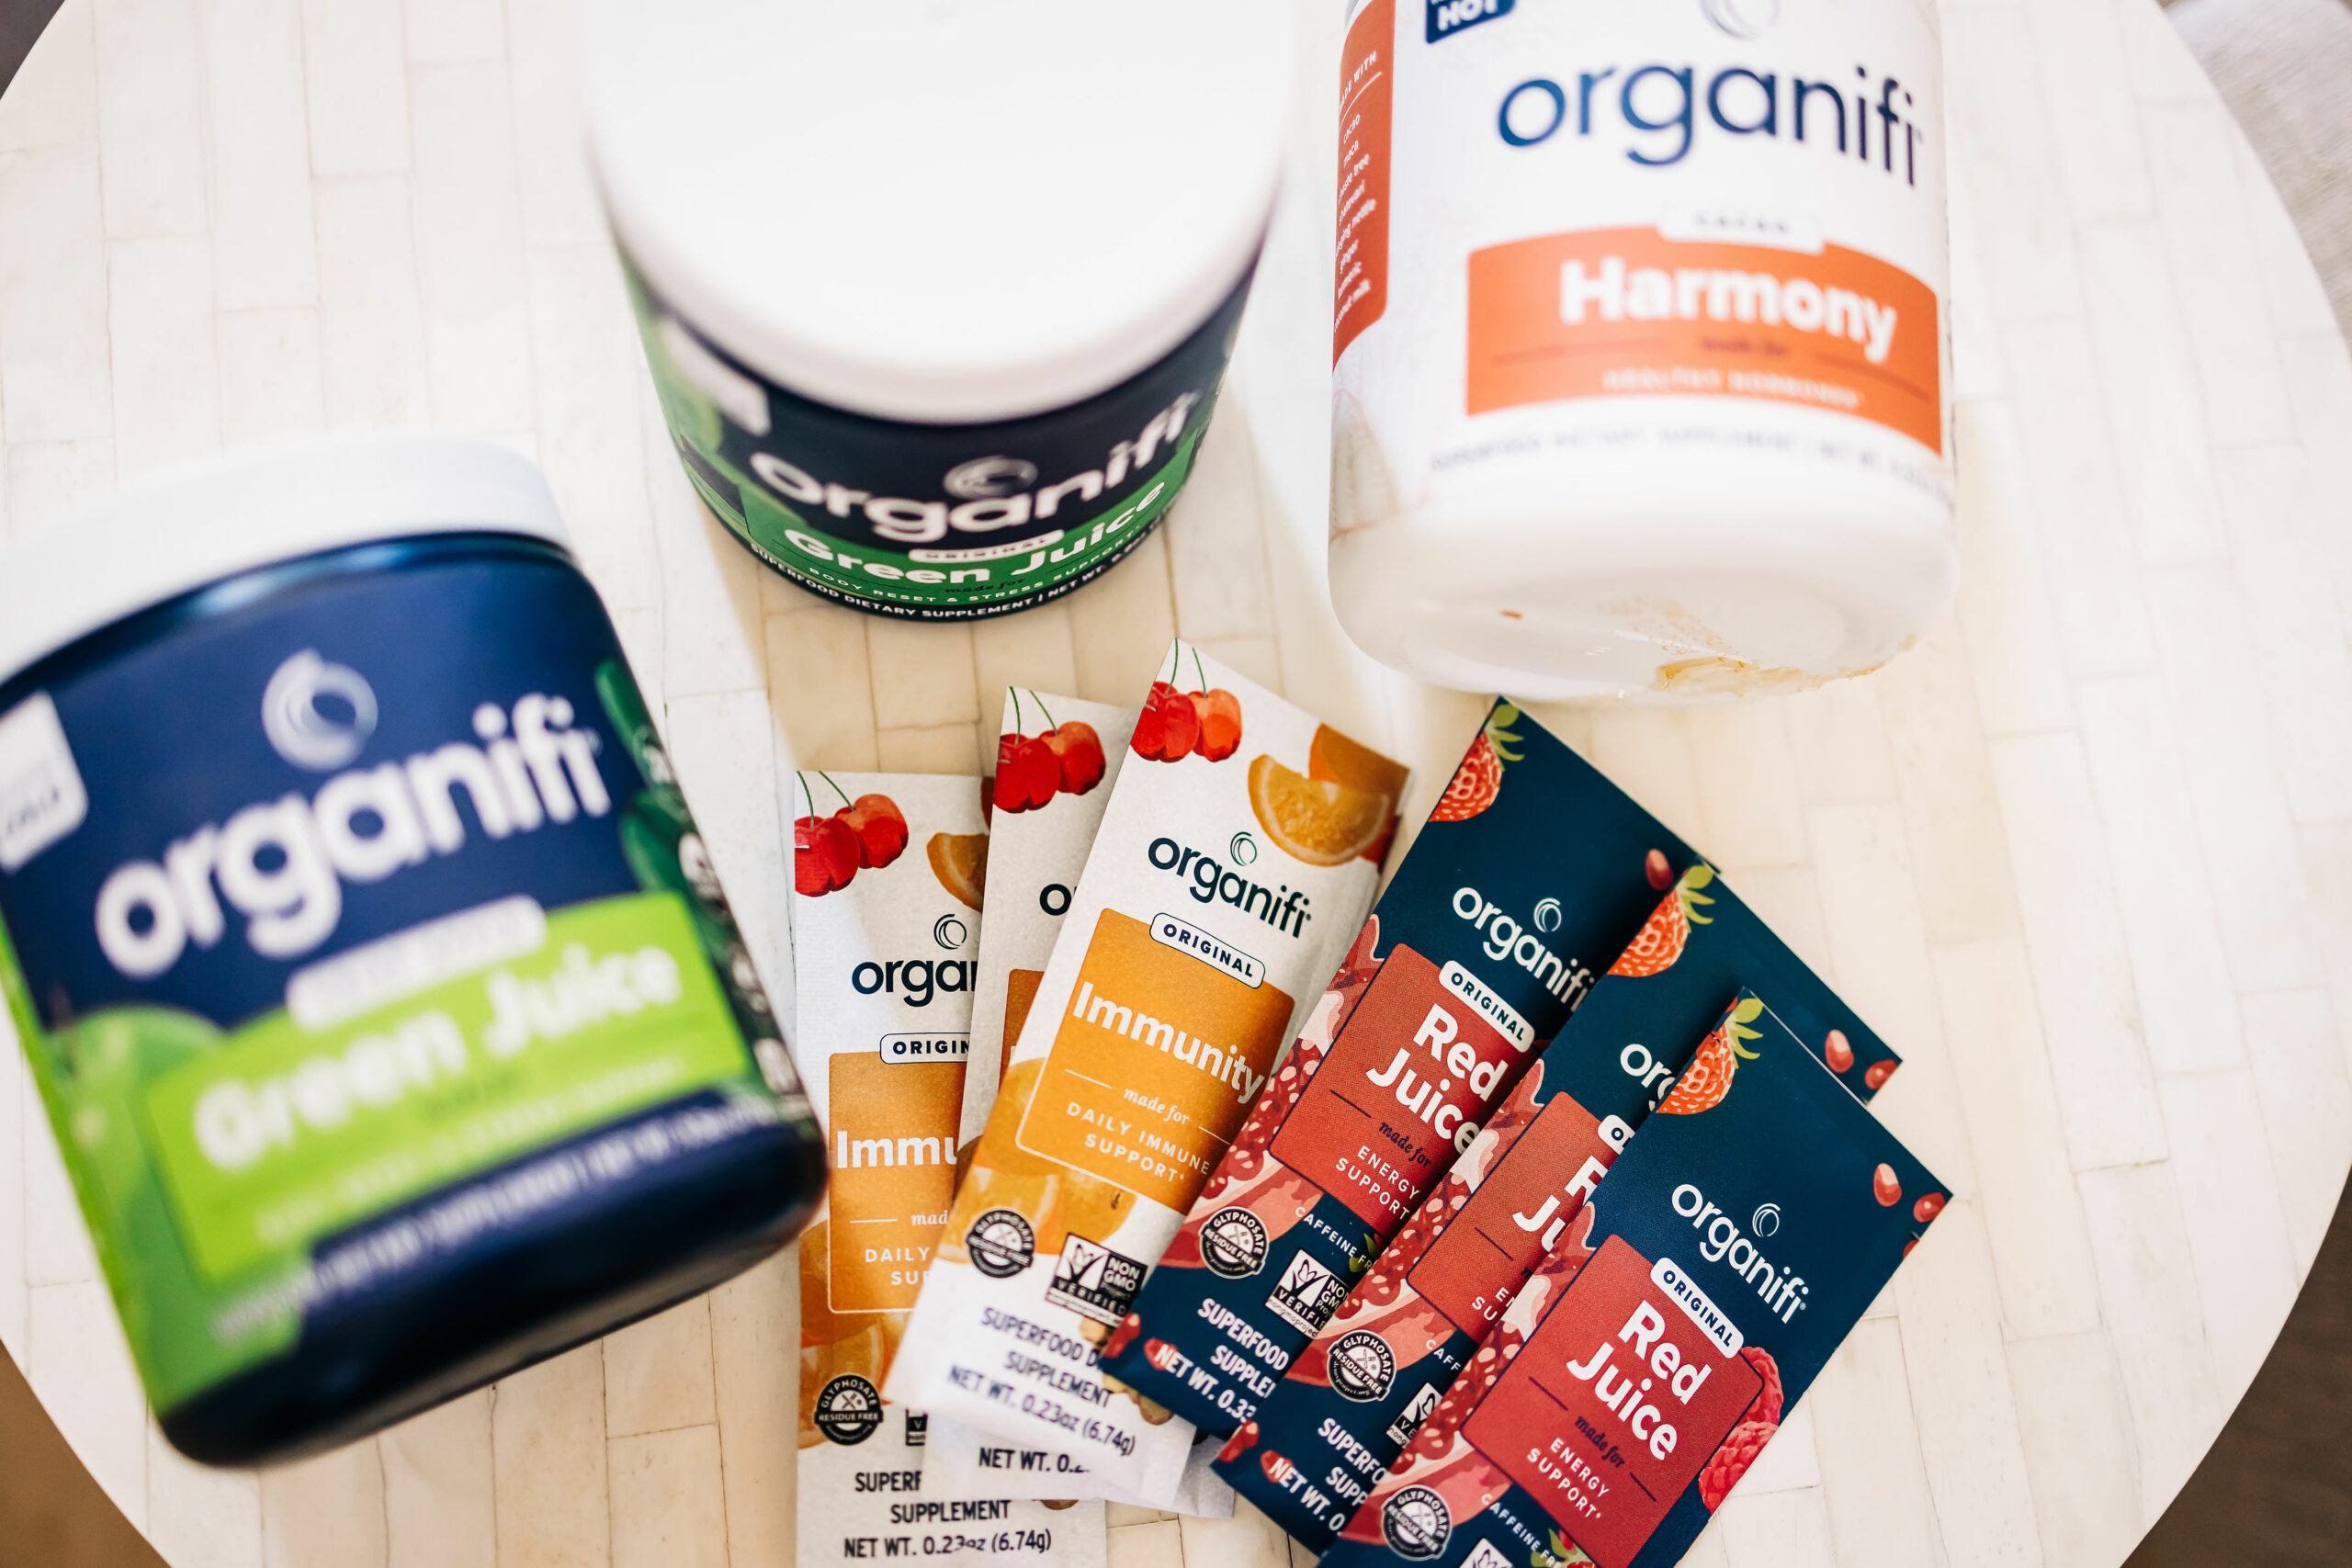
Organifi Product Review

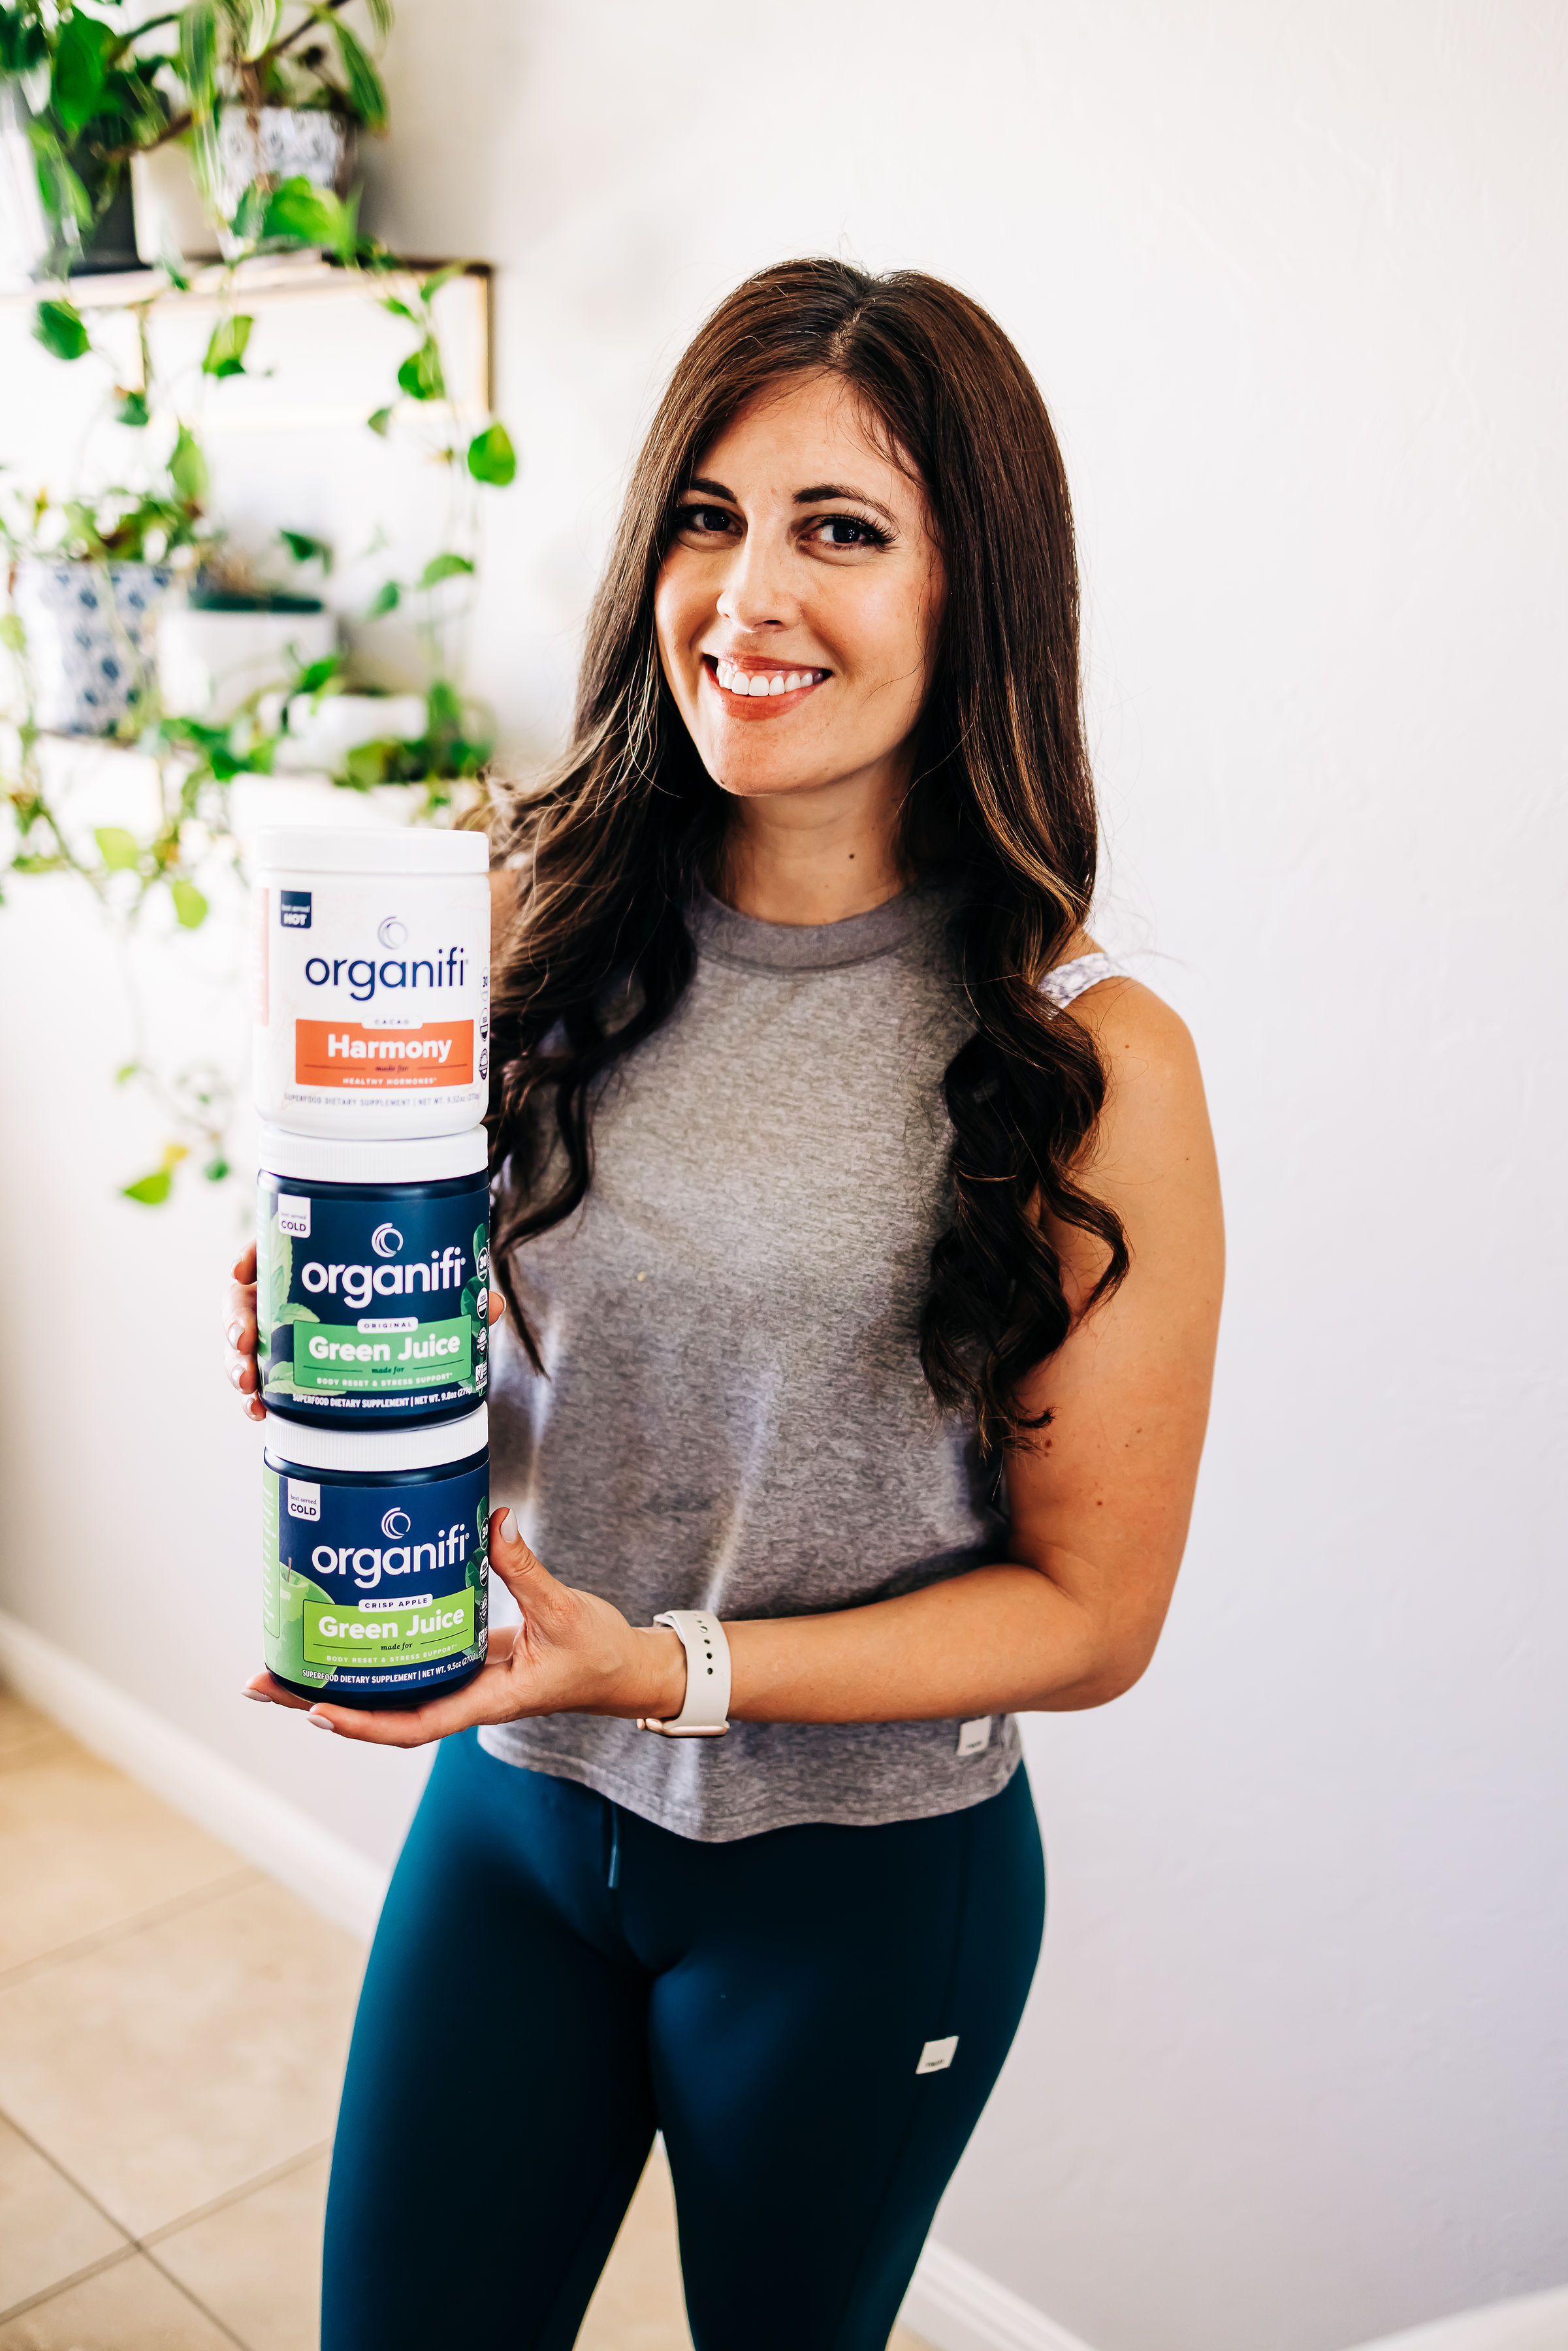
Sharing the details on Organifi and my favorite products! Because I love the brand so much, I partner with them as an affiliate. It gives you a discount and gives me a small kickback if you decide to place an order! You can use FITNESSISTA here for 20% off. 

Hi friends! How are you? I hope you’re enjoying the morning! One of my favorite morning rituals is to drink a glass of Organifi Green juice or AG1 and then head into the day.

For today’s blog post, I wanted to share more about Organifi and the products I love from their line. I’ve been using Organifi for years, but I know that it can be a little intimidating to sort through everything and decide which one to try first. I found out about Organifi from Shawn at the Model Health Show (my #1 all-time favorite podcast) and was 100% influenced. If he was using it, I wanted to try it. I used his discount code and never looked back! I started with the classic green juice and have evolved into red juice, Harmony, protein powders, and their immune support. I’ve also tried a couple of their supplements.

Organifi is dedicated to using organic and natural ingredients sourced from around the world, and prioritize transparency, ensuring that each product is free from artificial additives, fillers, and GMOs. Additionally, Organifi takes sustainability seriously, using eco-friendly packaging and supporting fair-trade practices. Beyond their exceptional products, Organifi fosters a vibrant community, offering education, inspiration, and support on their website and social media platforms.

Organifi Product Review

Since I’ve tried their products, I’ve noticed a few different benefits: from less eventful cycles, to higher energy, and immune support while traveling. I’m going to break down all of my favorites in this blog post, including prices and how they compare to some similar brands on the market.

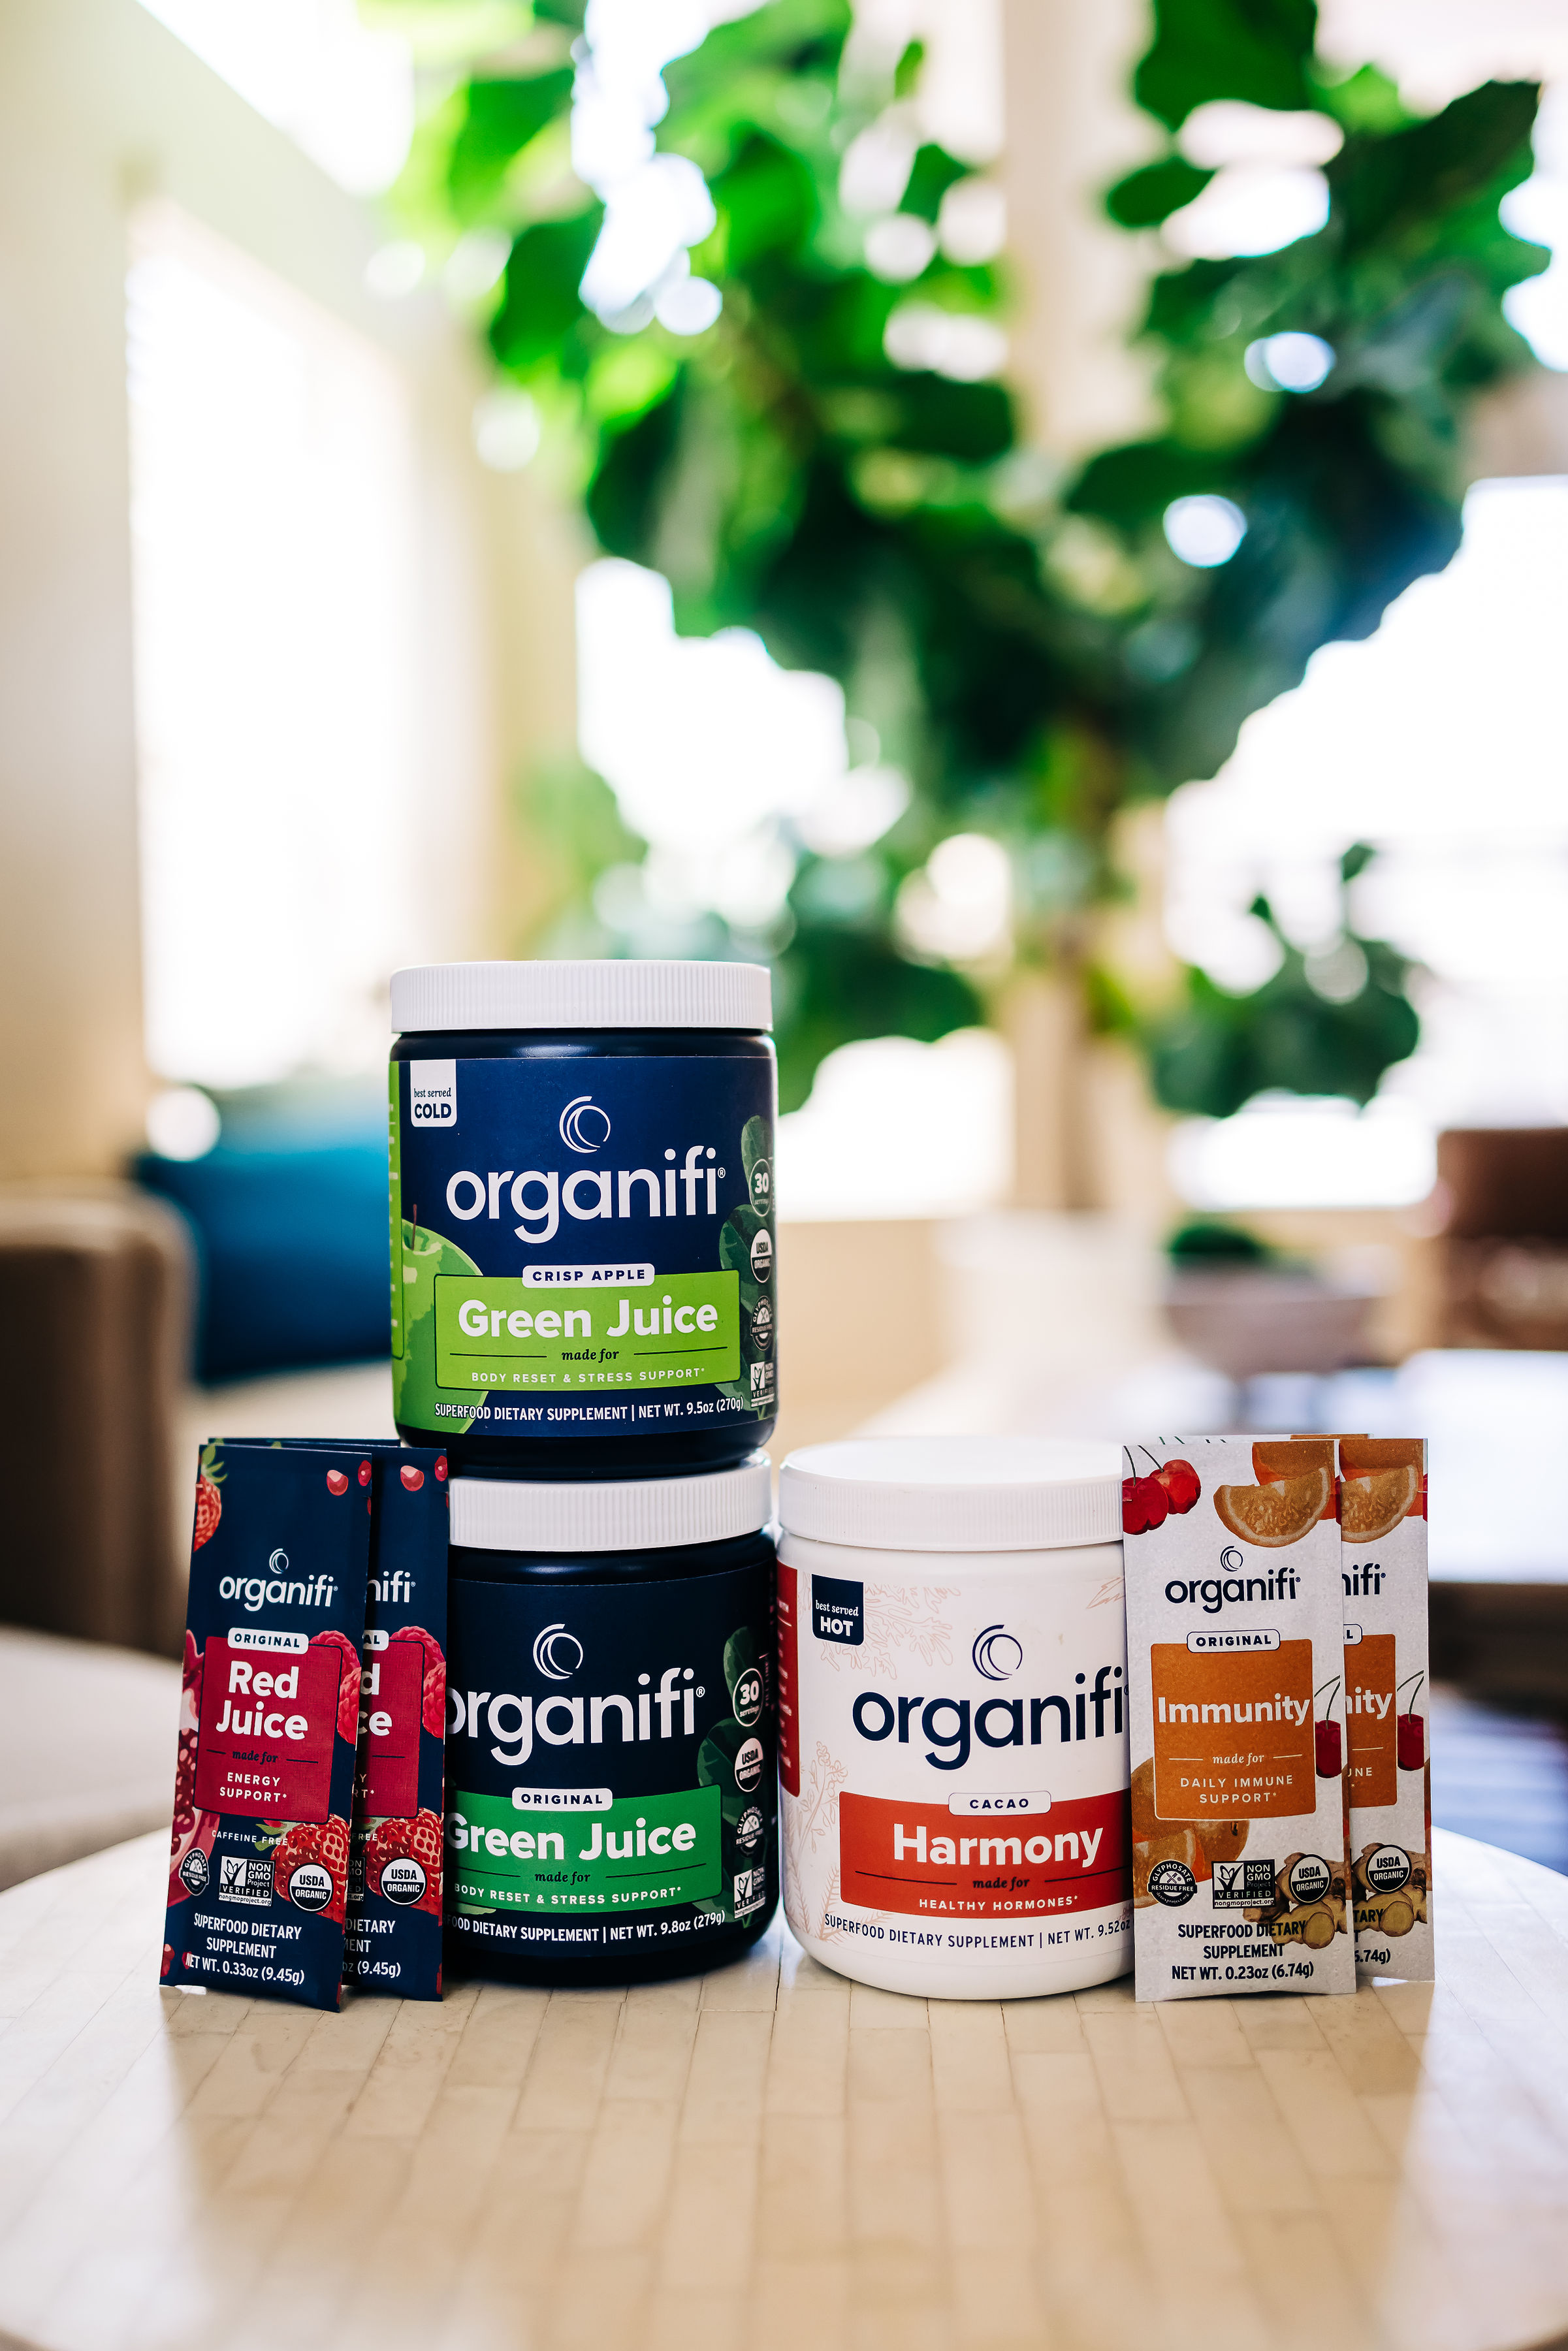
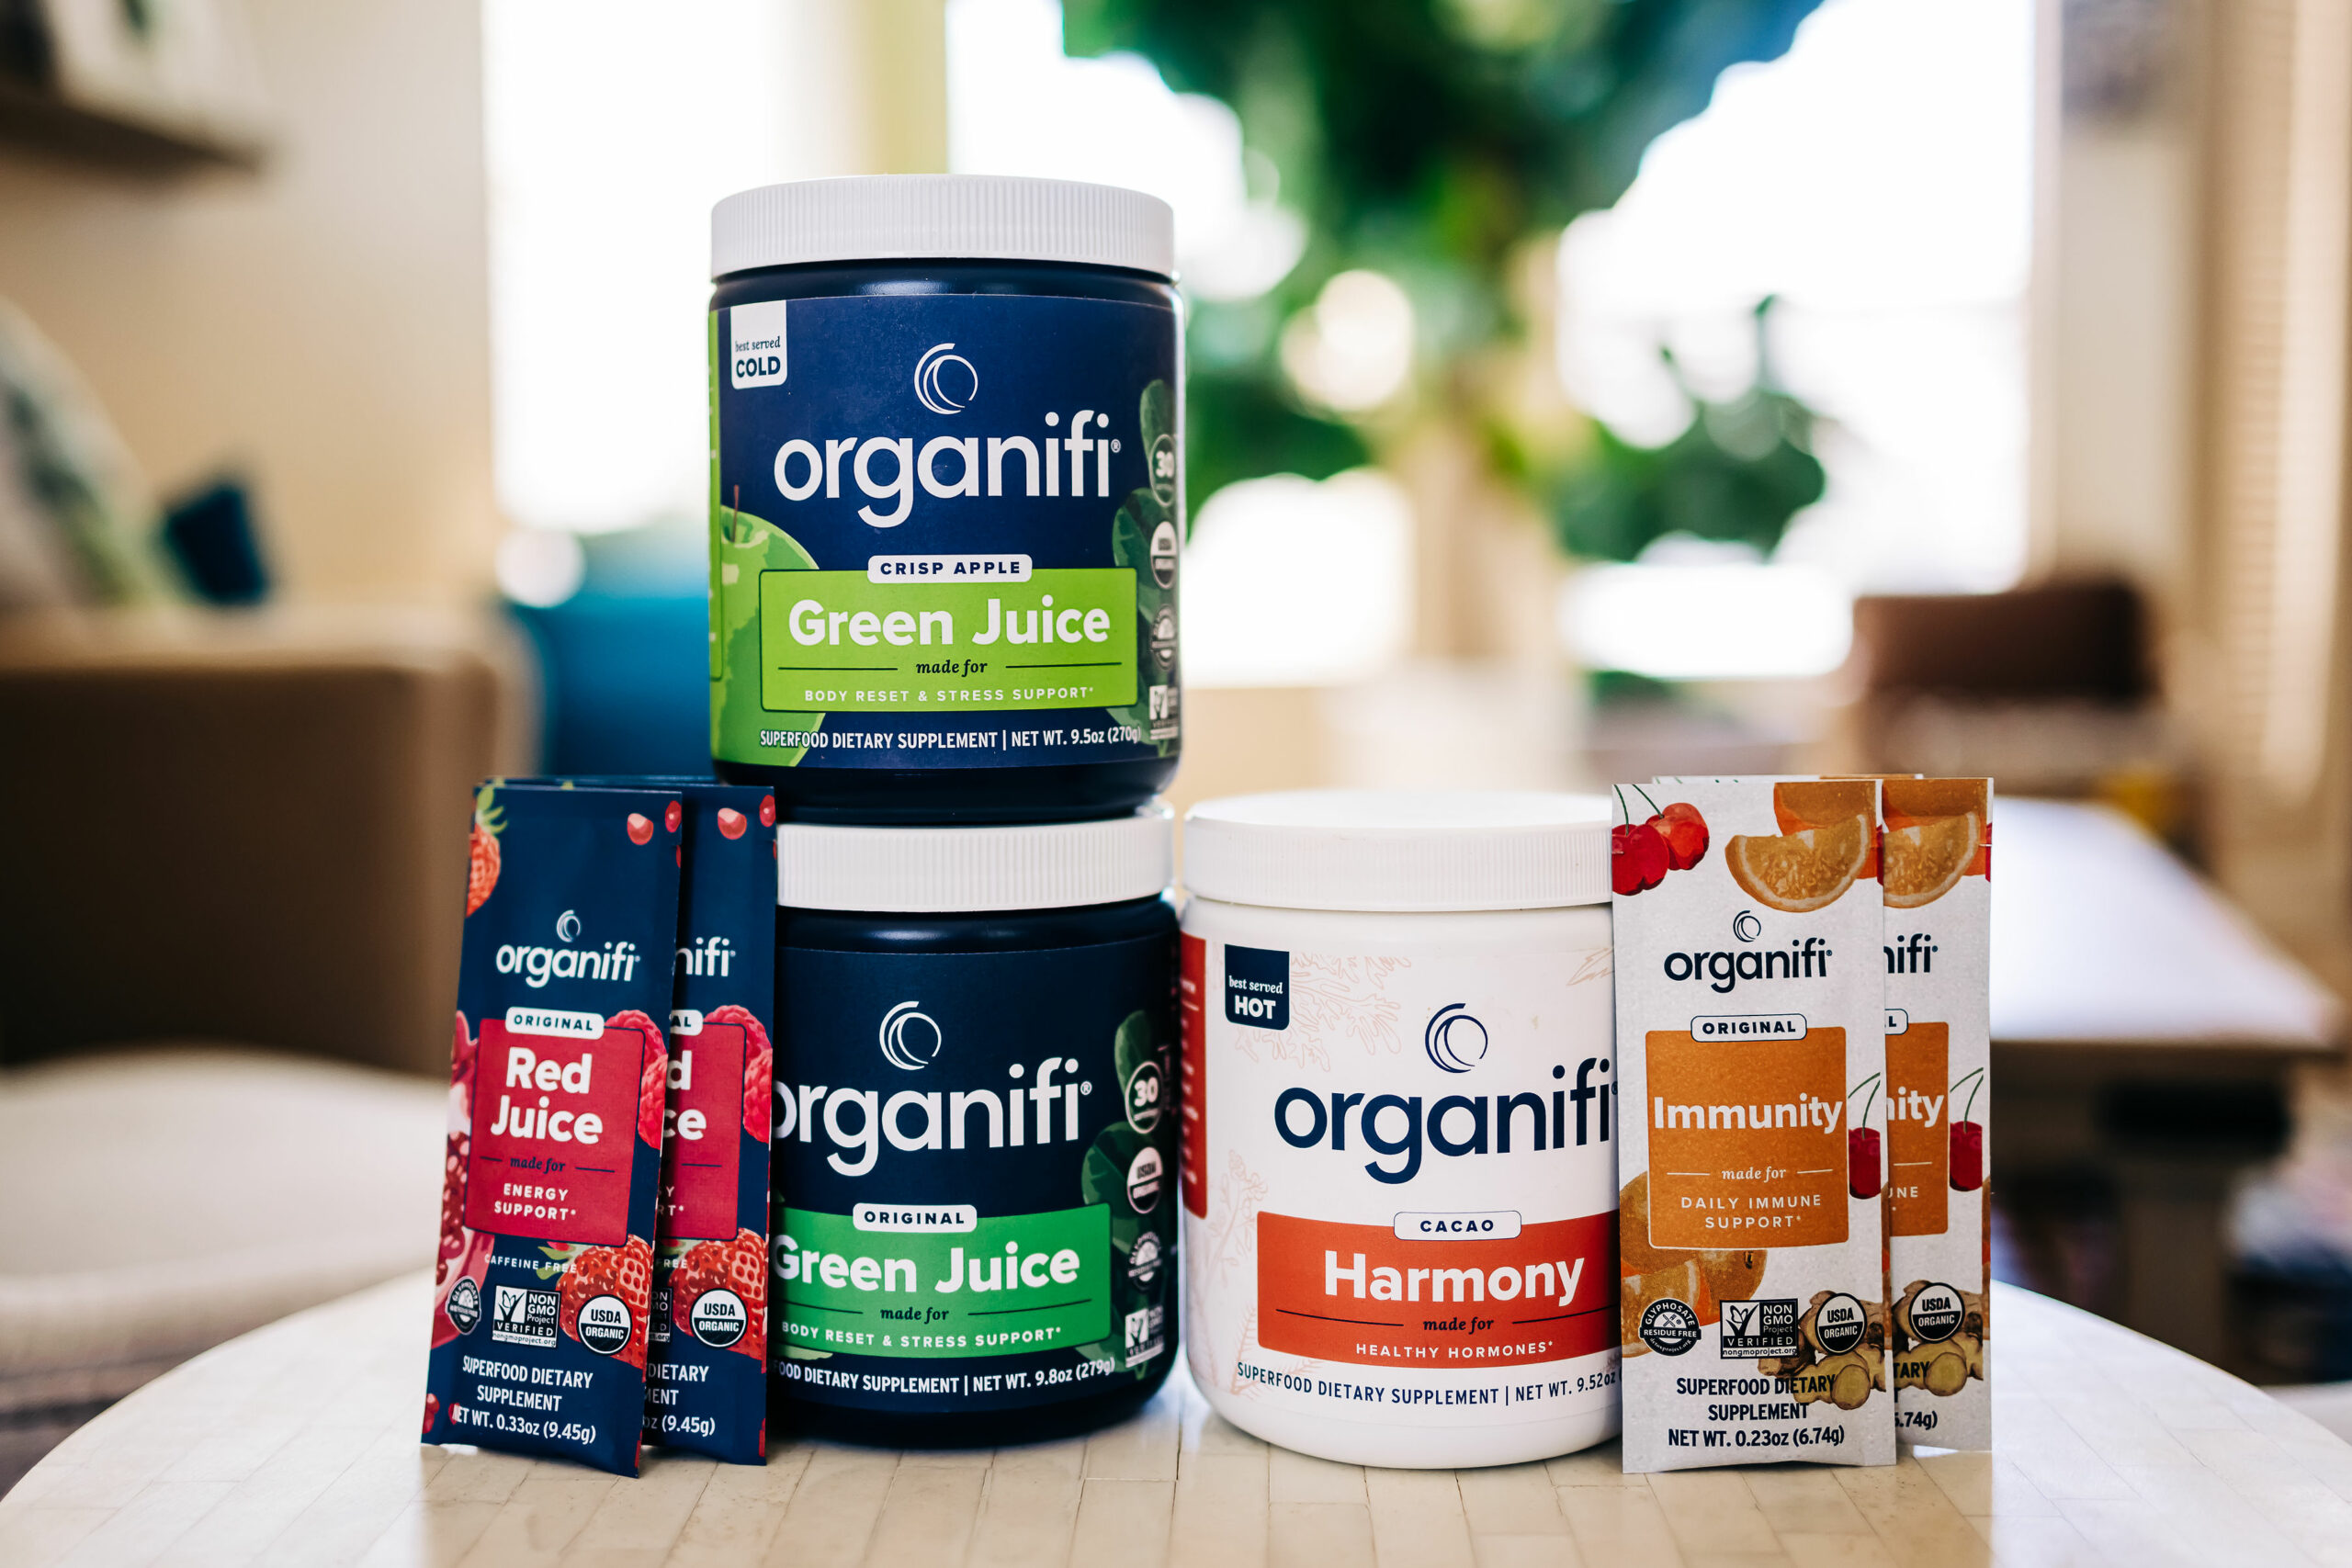
Organifi Green Juice

Organifi Green Juice is a powerhouse blend of organic superfoods like wheatgrass, spirulina, and chlorella. With its refreshing taste and convenient single-serve packets, it’s a fantastic option for those seeking an on-the-go boost of greens.

I alternate between taking Organifi Green Juice and AG, which has a comprehensive blend of over 75 vitamins, minerals, and whole food-sourced ingredients. It also includes probiotics, enzymes, and antioxidants to support overall health and wellness.

While both products offer impressive nutrient profiles, Organifi Green Juice stands out for its affordability and simplicity, while AG1 provides a more comprehensive and all-encompassing approach to nutrition. Ultimately, it comes down to personal preference and individual needs. You can read my blog post comparing Organifi Green Juice and AG1 here. I will say that Organifi tastes way better; like a slight lemon-y green juice, while AG1 tastes more vitamin-y.

Organifi Red Juice

Organifi Red is crafted with a blend of premium ingredients such as beets, acai berries, cordyceps mushrooms, and rhodiola. These carefully selected ingredients work synergistically and can provide a range of benefits. The beets deliver natural nitrates, supporting healthy blood flow and cardiovascular function. Acai berries bring their antioxidant power to the mix, protecting against oxidative stress and supporting overall well-being. Cordyceps mushrooms are known for their adaptogenic properties, which can help to reduce stress and enhance energy levels. Rhodiola, another adaptogen, supports mental clarity and focus. Together, these ingredients create a harmonious blend that can help support energy levels, promote detoxification, and boost overall vitality.

It tastes like a fruity punch and is super refreshing.

How to drink: I like it blended with room-temperature filtered water.

Organifi Harmony

Organifi Harmony is made with carefully selected ingredients like maca, chasteberry, and shatavari, and offers a natural approach to nurturing hormonal health. Maca, can help the body adapt to stress and promote a sense of balance. Chasteberry, also known as vitex, has been traditionally used to support menstrual health and alleviate PMS symptoms. Shatavari, an herb commonly used in Ayurveda, can aid in hormone regulation and supports reproductive health.

I love the chocolate flavor of the Harmony and recommend this one the most to friends!

How to drink: I like it in warm almond milk (like a hot cocoa) or a scoop in my smoothie or oatmeal. It gives an awesome chocolate flavor.

Organifi Immunity

Organifi Immunity is a powerful blend of immune-boosting ingredients to help support your body’s natural defense system. Packed with key nutrients such as elderberry, turmeric, and ginger, this potent formula offers a holistic approach to fortifying your immune health. Elderberry is known for its antiviral properties and can help reduce the duration and severity of cold and flu symptoms. Turmeric is a potent anti-inflammatory spice that can support immune function and overall wellness. Ginger, with its immune-enhancing and antioxidant properties, aids in digestion and can provide relief from respiratory issues.

It has a lovely orange-y flavor and tastes delicious.

How to drink: I mix it with filtered water and talk it like a shot.

Is Organifi Good For You?

I would say that if you’re looking for an extra nutrient boost and some extra adaptogens in your life, it can be an amazing choice. As always, talk to your health care provider before adding any new supplements into the rotation.

FAQs About Organifi:

Does Organifi green juice have caffeine?

Organifi green juice includes match and has trace amounts of caffeine. It doesn’t make me feel wired when I drink it. It has around 3-4mg of caffeine, while a cup of decaf coffee has around 7mg.

Does organifi green juice help you lose weight?

I don’t see it as a weight loss tool, as that will be dependent on SO many different factors. However, I think a glass of green juice in the morning can encourage you to make healthier choices throughout the day, as it can help set the tone for the entire day.

does organifi need to be refrigerated?

You can keep the products in the refrigerator, but it’s not required for freshness.

is organifi a meal replacement?

Their protein powder includes vitamins, minerals, and enzymes, but I don’t think it’s enough to sustain for an entire meal. For a meal-sized smoothie (with some fruit, veggies, and healthy fas), it would absolutely work (and tastes delicious).

is organifi FDA approved?

From their website: “All organifi blends are produced in a GMP certified facility — which means that the facility is an FDA approved facility — and each batch must pass microbial testing before any product is allowed to be released into the marketplace.”

Is Organifi safe for pregnancy?

I would definitely check with your doctor or midwife to be sure.

So, tell me, friends: have you tried Organifi? If so, what’s your favorite product? if place an order, you can stack FITNESSISTA for an extra discount on top of current promos.

I’ll pick a lucky commenter from today’s post to receive a product of their choice 🙂

xoxo

Gina

The post Organifi Product Review appeared first on The Fitnessista.


from The Fitnessista https://ift.tt/rDEtgAN
https://ift.tt/UCZDhWB

HIIT vs. steady state cardio for weight loss

Comparing HIIT and steady state cardio if weight loss is your goal.

Hi friends! How are ya? I hope you’re having a lovely morning so far! We’re still on a little trip – sharing lots of details on IG stories! – but I had some posts ready to go while I’m gone. Today, I wanted to talk about two extremely popular cardio strategies and how they compare, especially if weight loss if your goal.

For years, cardio has been a go-to solution for cardiovascular health, weight management, performance and endurance training. HIIT has also surged in popularity in the past decade and is here to stay. Sometimes there’s confusion about which type of cardio you should choose in your routine, so today, I’m breaking it all down in this post!

HIIT vs. steady state cardio for weight loss

HIIT: High-Intensity Interval Training

HIIT is like a fiery explosion of energy that revs up your metabolism and torches calories long after your workout is over. By alternating intense bursts of exercise with short recovery periods, you push your body to its limits and experience the often-touted “afterburn effect.” HIIT can increase the size and density of mitochondria, which are like the fat-burning little powerhouses in our cells.

To get the body back to homeostasis, it has to bring all pre-exercise factors back to baseline, including decreasing tissue temperature and heart rate. Your body continues to burn calories at an accelerated rate for hours post-workout.

Benefits of HIIT:

Time efficient: HIIT workouts are quick and SWEATY, which makes them ideal for busy individuals. It offers a tremendous calorie burn and fat loss potential due to its intense nature and the post-workout EPOC (oxygen consumption post exercises).

Cardiovascular benefits:  HIIT also helps improve cardiovascular fitness by challenging your heart and lungs, resulting in enhanced endurance and stamina.

Performance benefits of HIIT: HIIT can also improve fitness performance, including power and strength.

Another advantage is its muscle-preserving quality, as HIIT workouts can stimulate muscle growth while targeting fat stores. Plus, HIIT can be customized to any fitness level, with modifications and variations available for beginners to advanced athletes. Incorporating HIIT into your fitness routine can rev up your metabolism, boost your mood through endorphin release, and provide a fun and challenging workout experience that keeps you motivated and engaged.

Benefits of low to moderate steady state cardio

While High-Intensity Interval Training (HIIT) gets a lot of attention, let’s not overlook the fantastic benefits of low to moderate steady state cardio. Engaging in steady state cardio, such as jogging, cycling, dancing, or swimming, brings several advantages to your fitness journey.

Cardiovascular health: it helps improve cardiovascular health by strengthening your heart and increasing your lung capacity. This type of cardio promotes endurance and stamina, making everyday activities easier and more enjoyable.

Calorie burn: Steady state cardio also aids in weight management by burning calories and facilitating fat loss.

Stress relief and mood good: It can be a great stress reliever, providing a calming and meditative experience that allows you to clear your mind and recharge.

Additionally, low to moderate cardio is often accessible to people of various fitness levels and ages, making it a suitable option for beginners or those recovering from injuries. Incorporating regular sessions of low to moderate steady state cardio into your fitness routine can contribute to a healthier heart, improved endurance, and an overall sense of well-being.

Comparing HIIT and steady state:

When it comes to weight loss, both High-Intensity Interval Training (HIIT) and steady state cardio have their unique advantages. HIIT is known for its efficiency in burning calories and promoting fat loss due to its intense nature and the metabolic boost it provides. The short, intense bursts of exercise followed by brief recovery periods create an “afterburn effect,” where your body continues to burn calories at an elevated rate even after you’ve finished your workout.

On the other hand, steady state cardio, such as jogging or cycling at a moderate intensity, is effective in burning calories during the exercise session itself. It helps create a calorie deficit, which is key for weight loss. Steady state cardio also improves cardiovascular health and endurance, making it a great option for longer duration workouts that provide mental clarity and stress relief. Both HIIT and steady state cardio can be beneficial for weight loss, so the choice ultimately depends on individual preferences, time availability, and fitness goals. Incorporating a combination of both can offer variety, prevent workout plateaus, and maximize the benefits of both training methods.

So, which one should you choose if weight loss is your goal?

The answer is… it depends.

I would take into account your fitness goals, preferences, current fitness level, hormonal health, energy level, foundations (sleep quality, stress, etc.), and lifestyle.

If you’re short on time and looking to maximize calorie burn and fat loss, HIIT can be a good bet. However, for many women, who are already stressed to the max and burned out, it can be the wrong choice. I often see HIIT over-utilized, which can contribute to stress, burnout, adrenal issues, cycle disruption, fatigue, and injury. If your stress bucket is full (either from emotional stress, toxins, medications, lack of sleep, poor nutrition, etc.), I would absolutely recommend strength training and low-intensity steady state in these situations.

Since we’re talking about weight loss in today’s post, it’s worth mentioning that you need to be a deficit for weight loss, so nutrition will play a major role. Also, if the body is in the sympathetic state (stressed, not fueled properly, not sleeping well, etc.), it will fight losing weight or fat. Relationships, toxins, sleep, stress, water quality, etc. can all play a part in achieving weight loss and health goals.

If you enjoy longer workouts and find solace in steady state cardio, go ahead and lace up those running shoes or hop on that bike. There are tremendous benefits to steady state, especially Zone 2 training, which is getting a lot of hype right now. (Let me know if you want me to do a post on Zone 2!)

Here’s a pro tip: You can also combine both approaches for optimal results. Incorporate HIIT workouts one to three times a week and sprinkle in steady state cardio sessions for variety and overall cardiovascular health. The key is to listen to your body, find what works for you, and have fun along the way.

Remember, consistency and progression are key. Whatever cardio method you choose, make sure to gradually increase the intensity, challenge yourself, and maintain a balanced approach that complements your overall fitness routine and keeps you feeling amazing!

So, friends: which do you prefer? Do you like HIIT or steady state workouts more?

If you’re looking for new workouts to do in your routine, plus meal guides, recipes, and fitness guidelines from a pro (meeee), join us for Fit Team here!
xo

Gina

The post HIIT vs. steady state cardio for weight loss appeared first on The Fitnessista.


from The Fitnessista https://ift.tt/1nkYm7z
https://ift.tt/CytiFhI

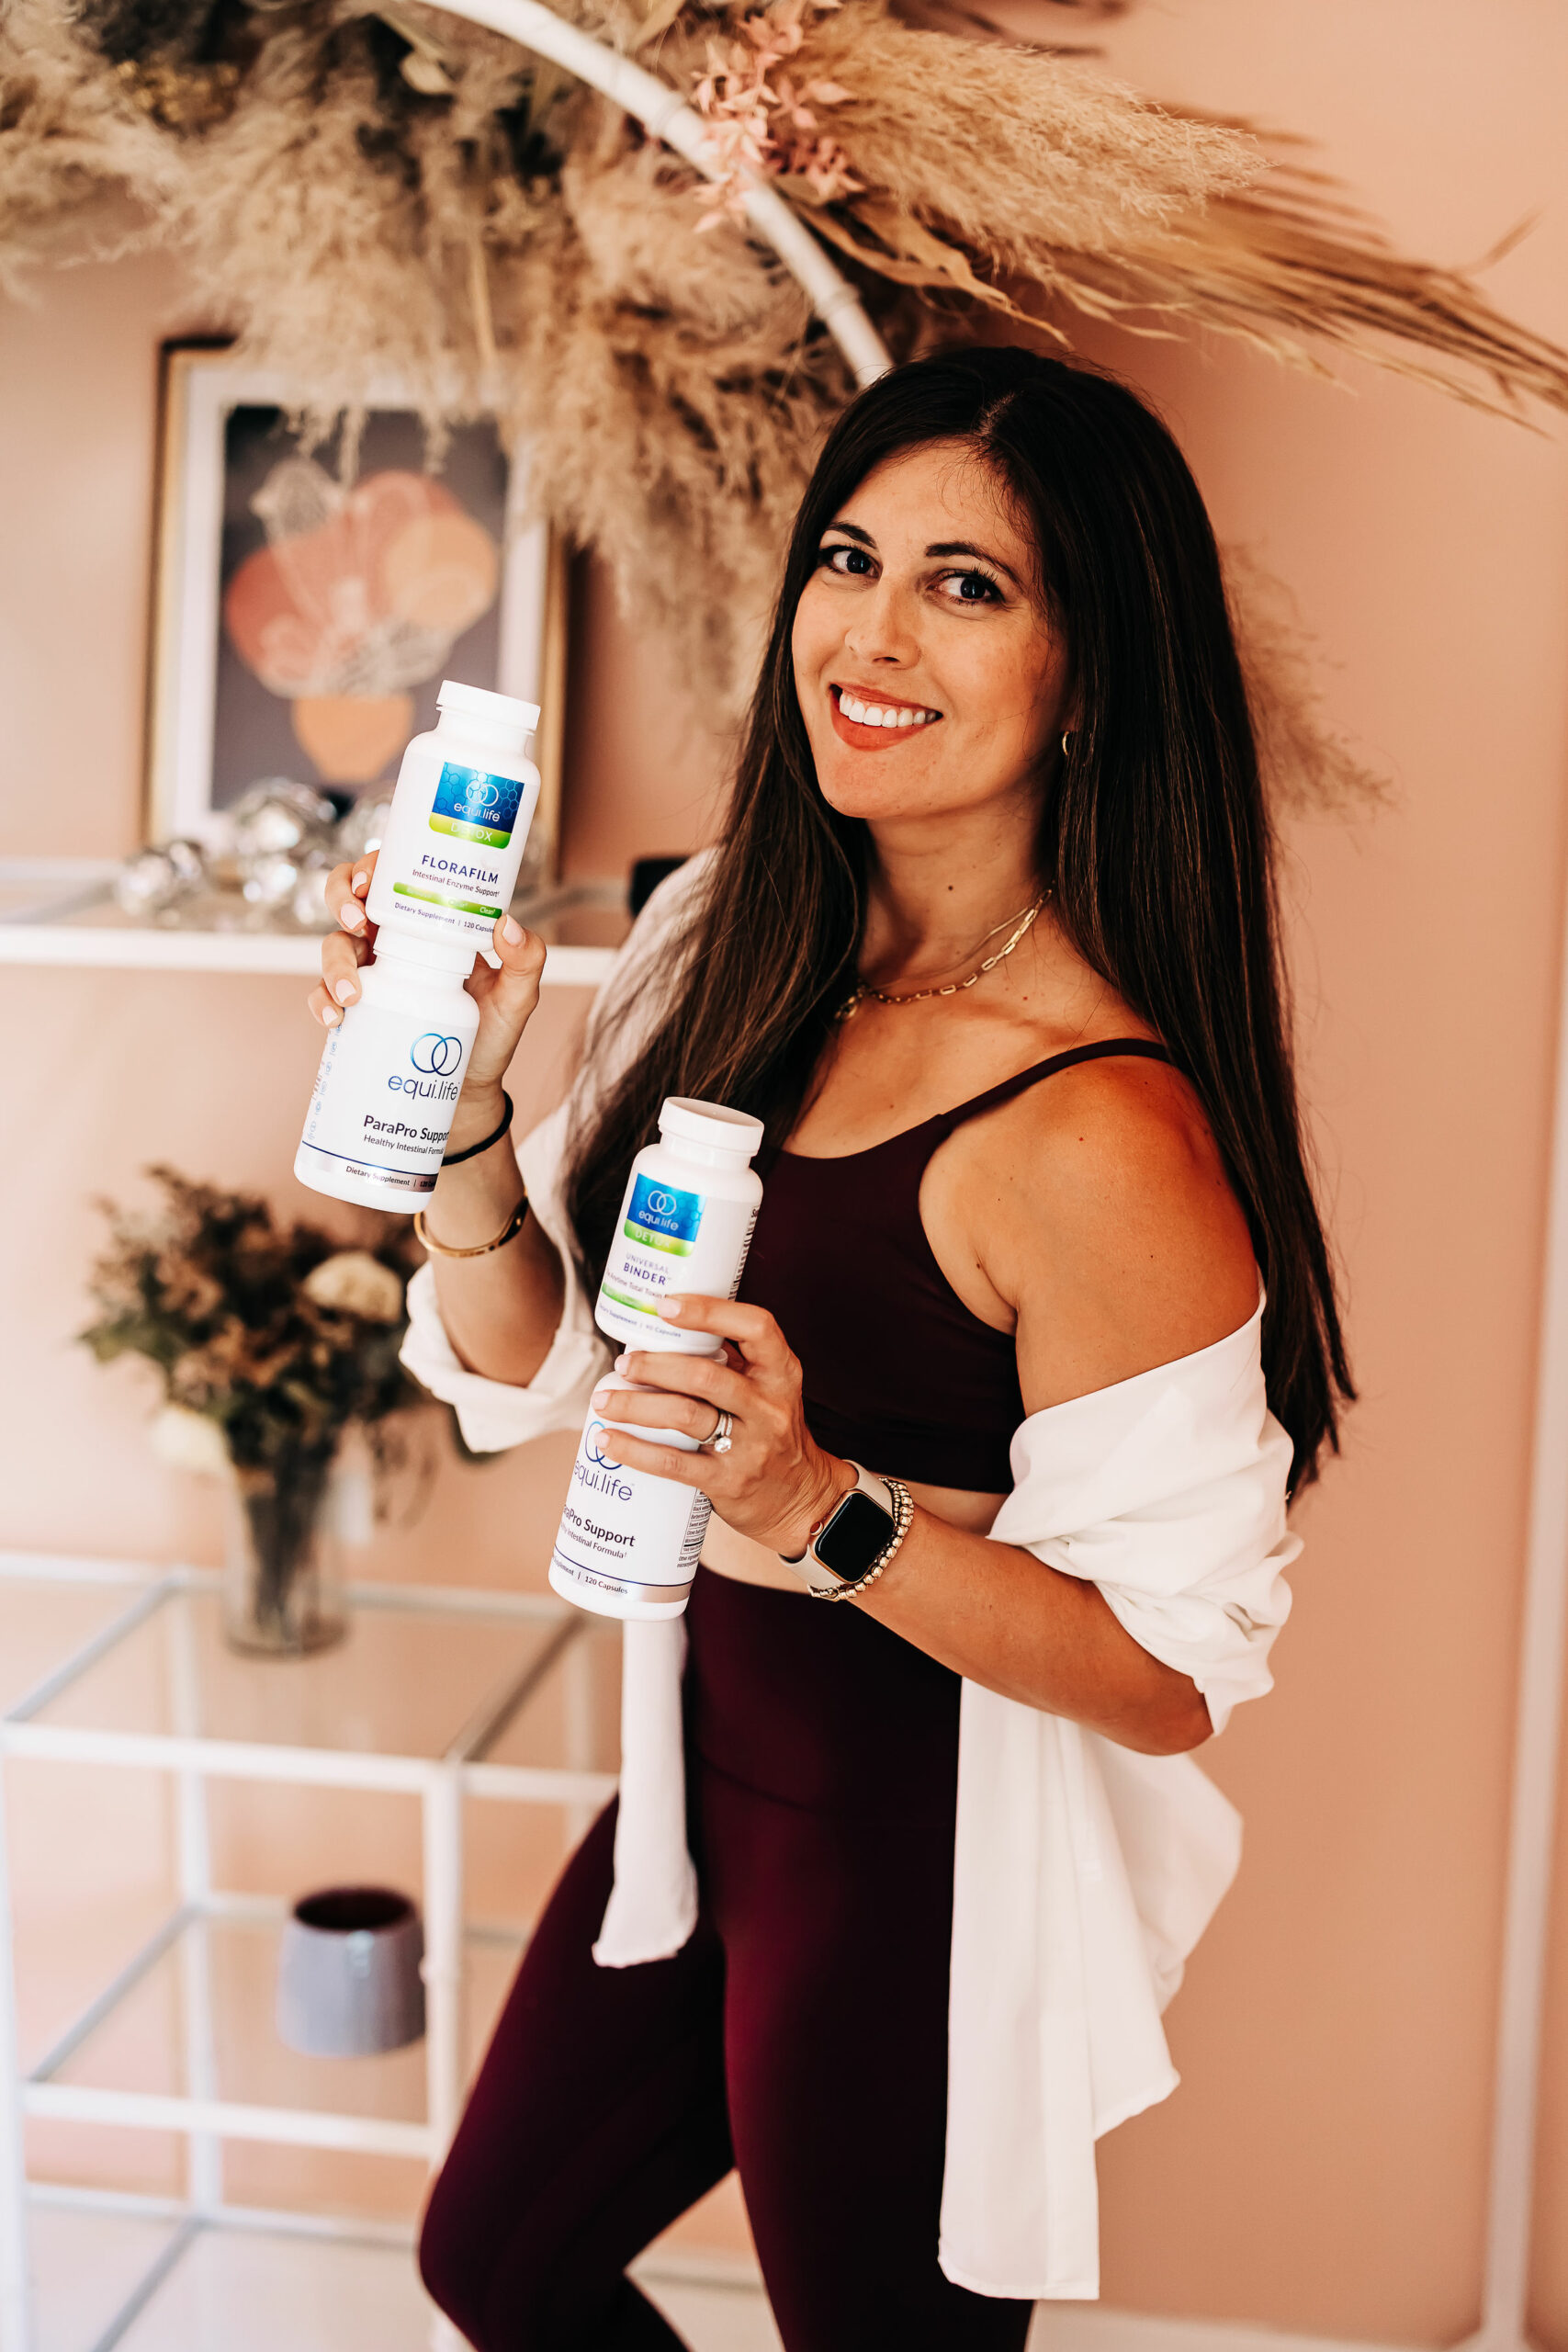
My experience with the EquiLife Para Support Protocol so far

Disclaimer: The information provided in this article is for entertainment and educational purposes only and is not intended replace medical advice. Always consult with a qualified healthcare professional before starting any new health protocol or supplementation. Please remember that I’m not a doctor and am simply sharing my experience using these products. 

Hi hi! How are you? I hope you’re having a lovely day! We’re still off on our trip, but in the meantime, I wanted to share more about the EquiLife Para Support Protocol since I’m almost a month into the two-month program. I’ve been learning more about the implications of parasites and their prevalence in our lives, and I knew it was something I wanted to do. I had some symptoms that I wanted to see if I could resolve and have been pleasantly surprised by my experience so far.

My experience with the EquiLife Para Support Protocol so far

I’ve heard it said that, “If you have a pulse, you have a parasite,” and then can affect humans in various ways. It’s interesting that they’re so common – an estimated   but aren’t commonly treated or addressed in Western medicine.

Here are some common symptoms that may be due to parasites:

Digestive Issues:

Persistent diarrhea, constipation, bloating, gas, abdominal pain, and frequent nausea can be signs of a parasitic infection in the gastrointestinal tract.

Unexplained Weight Loss:

Sudden and unexplained weight loss, despite a normal or increased appetite, could be a symptom of certain parasites that interfere with nutrient absorption.

Fatigue and Weakness:

Feeling constantly tired, fatigued, and lacking energy, even after sufficient rest, may be a result of parasitic infections that disrupt nutrient absorption.

Skin Problems:

Itchy skin, rashes, eczema, hives, or the sensation of something crawling on the skin are possible indicators of parasitic involvement.

Changes in Bowel Movements:

Stool abnormalities such as greasy or oily consistency, presence of mucus or blood, and the appearance of worms or their eggs in the stool

Mental and Emotional Disturbances:

Parasitic infections can affect mental well-being, leading to symptoms such as anxiety, irritability, mood swings, and cognitive difficulties.

Joint and Muscle Pain:

Some parasitic infections can cause muscle aches, joint pain, and inflammation, resembling symptoms of arthritis.

Allergic Reactions:

Parasites can trigger immune responses, resulting in allergic reactions like itching, hives, or asthma-like symptoms.

Sleep Disturbances:

Insomnia, disturbed sleep patterns, or restless sleep may occur due to the body’s response to parasitic activity

It’s important to remember that these symptoms can be caused by various factors, and experiencing one or more does not necessarily indicate a parasitic infection. If you suspect a parasitic infection, it’s best to consult with a healthcare professional who can conduct appropriate tests and provide a proper diagnosis.

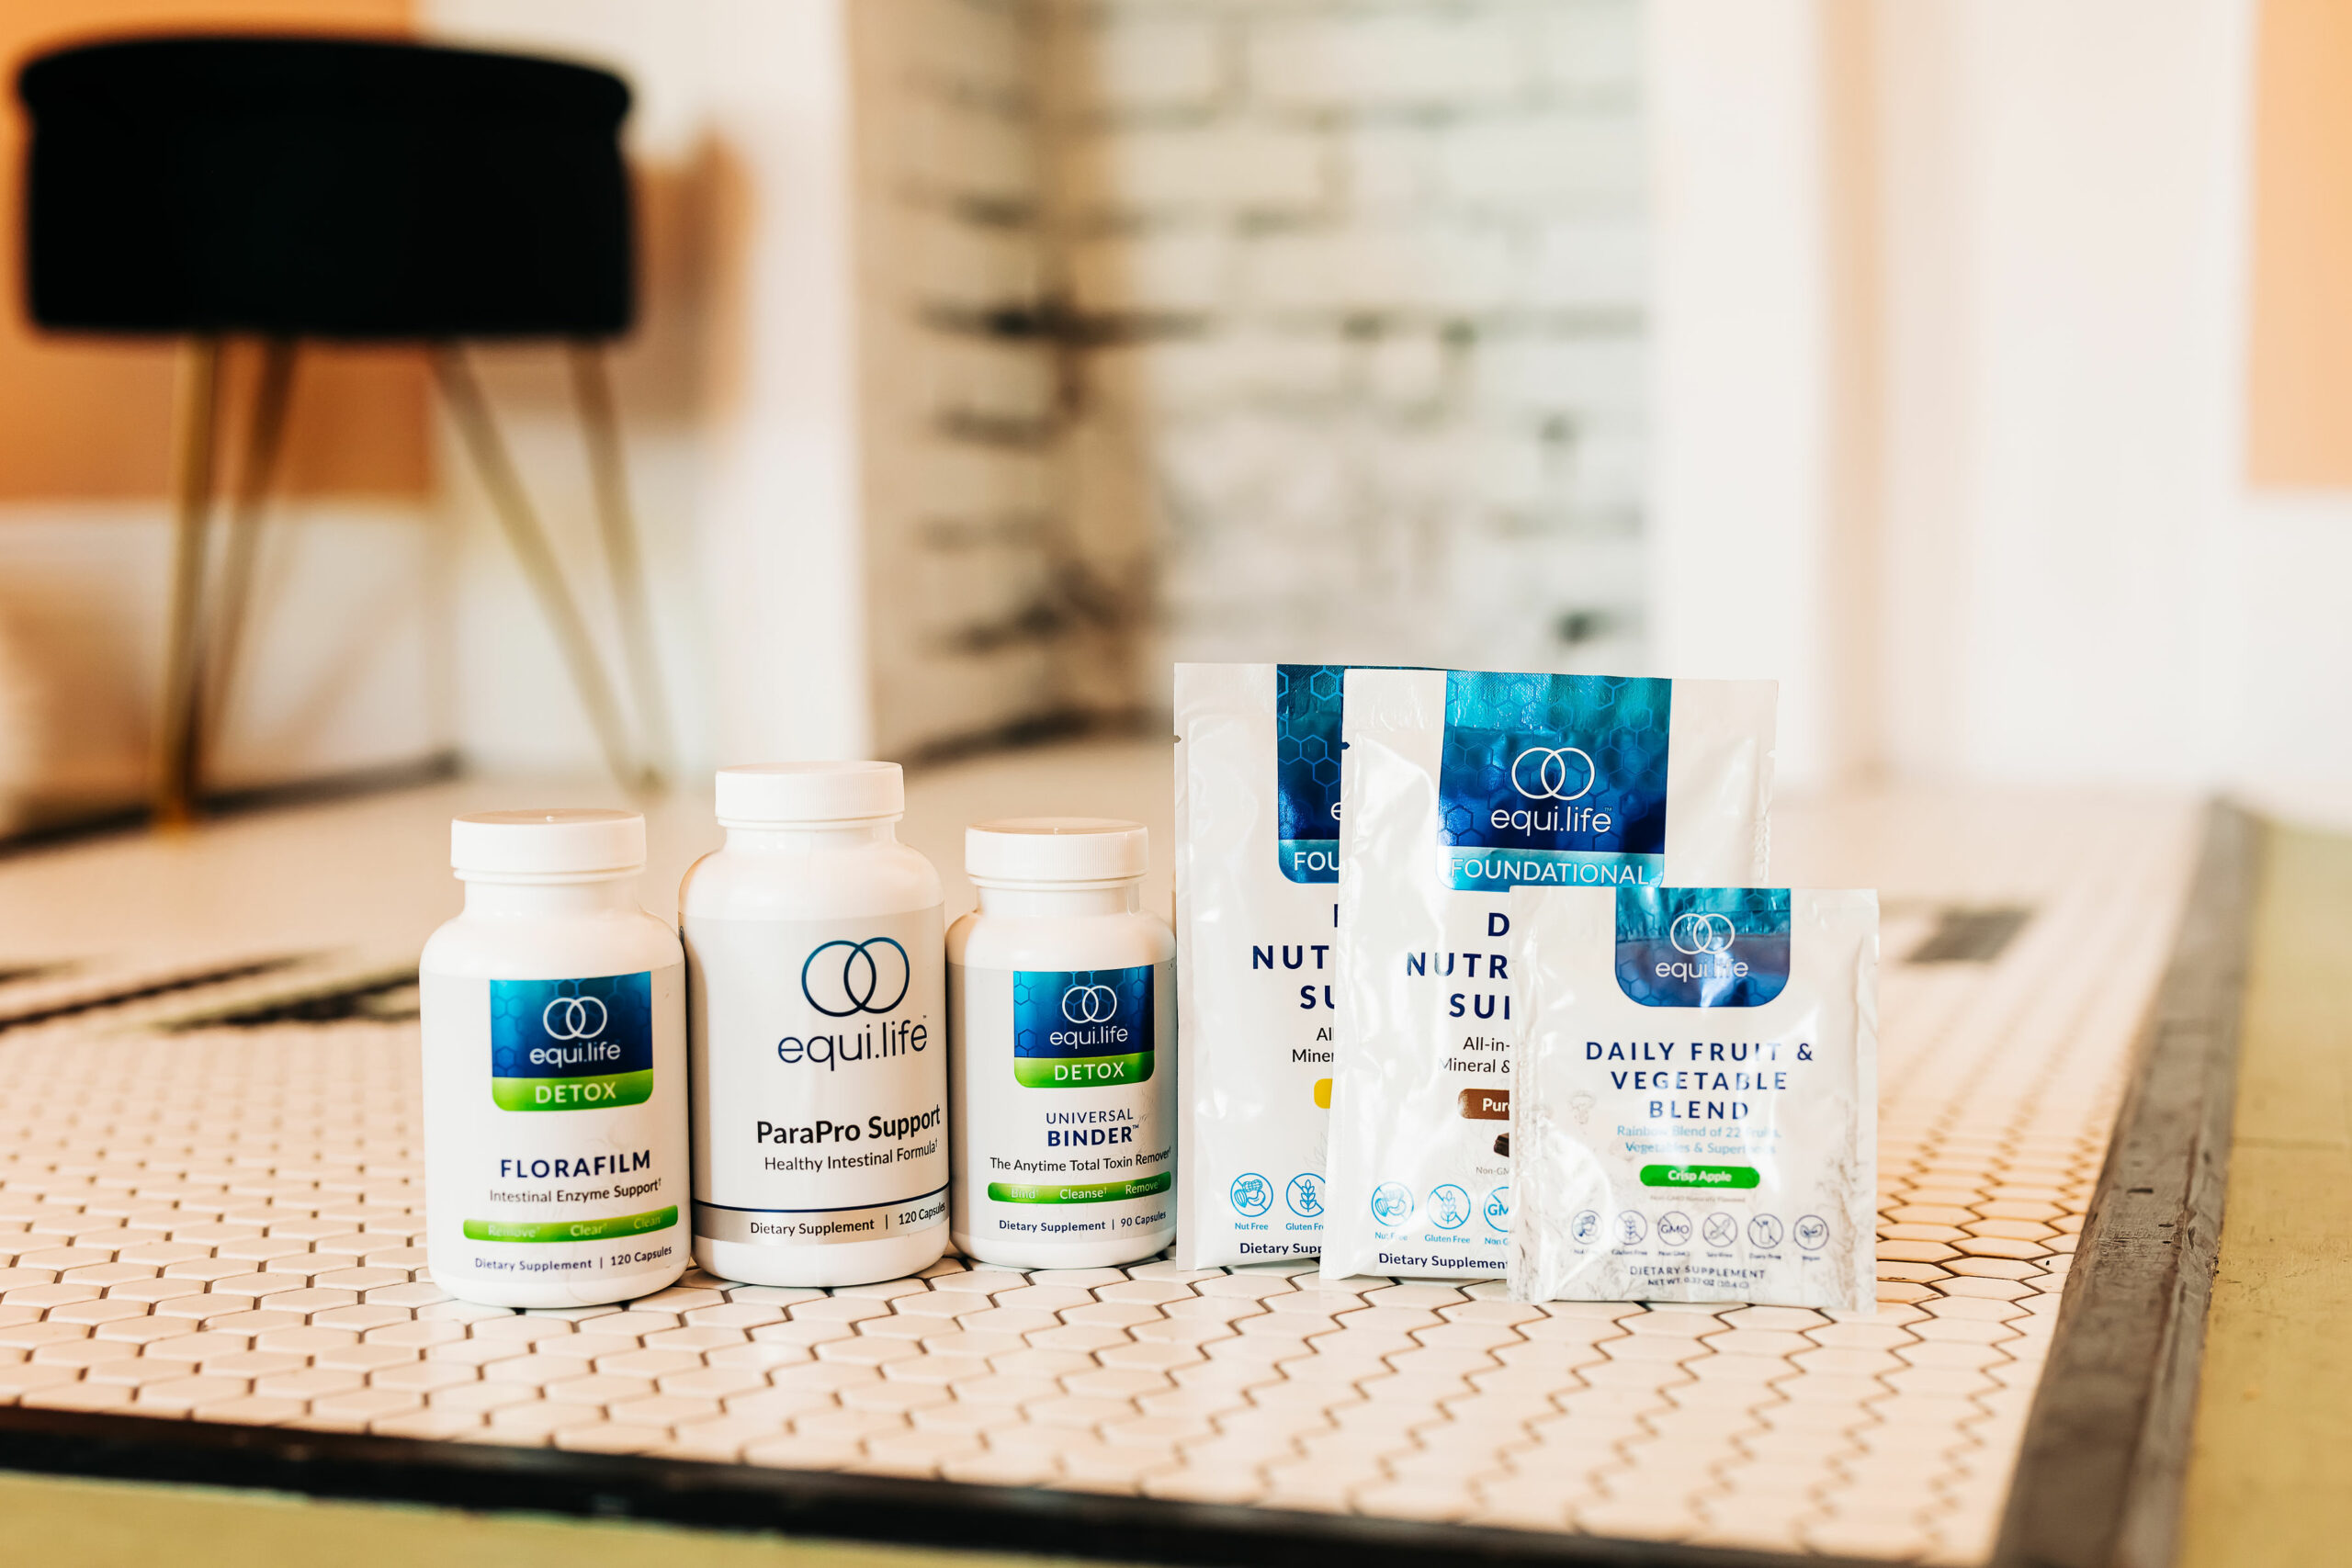
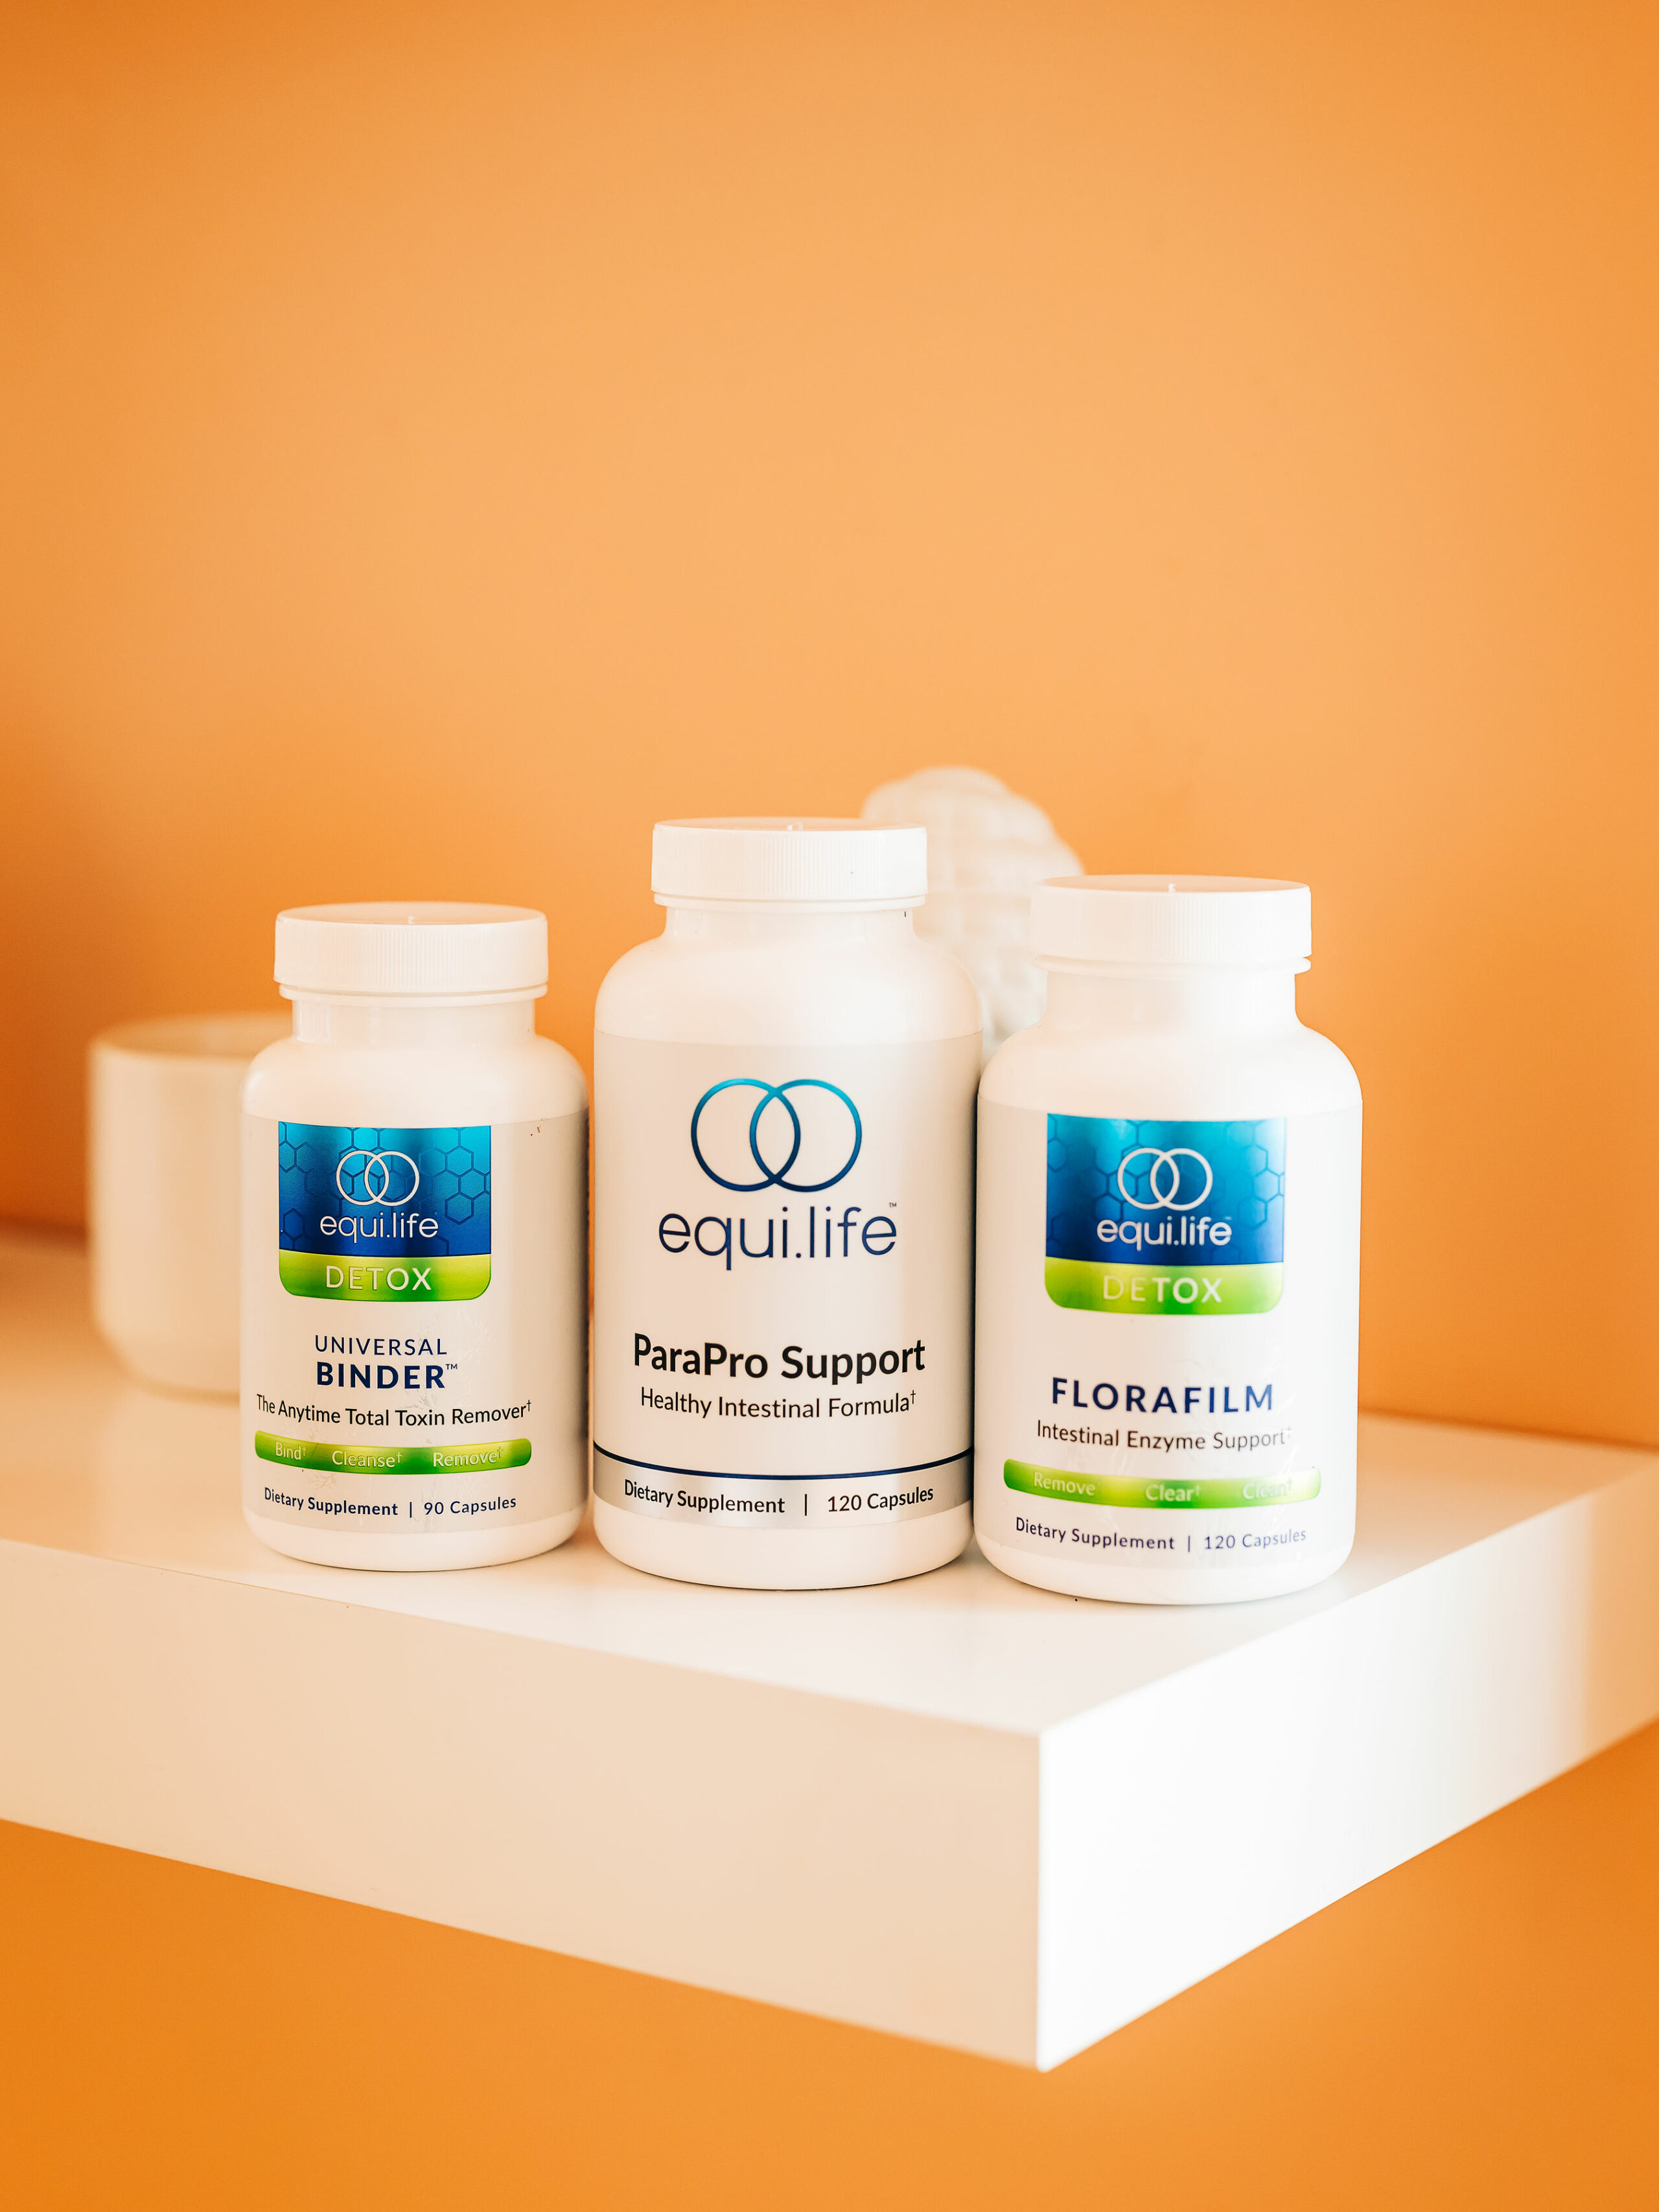
For me, my biggest symptoms were eye floaters – not more than normal but something that was bothering me – itchy skin, and sleep disturbances during the full moon. (I know it sounds woo but parasites can be more active with increased serotonin levels). A friend recently completed the protocol and highly recommended it, so I decided to go for it.

Here’s how it works:

You take 2 FloraFilm in the morning

4 Para Pro Support at night

2 Universal Binders before bed

and optional: eat an entire clove of garlic before bed.

Yes, I’ve been going to bed smelling like a garlic dragon for WEEKS. There aren’t any other nutritional guidelines, which makes the protocol easy to follow. I’ve been trying to just focus on more fresh foods.

*You can read more about it here.

What I’ve noticed:

– Actual parasites saying farewell. I’d seen pictures and videos of people passing parasites online, and while I didn’t check it under a microscope, it was definitely an interesting experience.

– Less bloating. I noticed decreased bloating in my face and stomach within a few days of starting the protocol.

– Less eye floaters. You guys know I’ve been dealing with some eye problems – turned out to be a combo of horrible allergies setting off inflammation + residual virus after having viral pink eye – and the first time I started to see improvement was after starting the protocol. It could have just been a coincidence, but it absolutely didn’t hurt things in my situation.

Cons:

– I with they included more nutrition guidelines with the protocol. You continue with your regular diet + the supplements.

Other than that, it’s been a pretty seamless experience for me. That’s not to say that some people do not experience “die off” symptoms or start to feel worse before they feel much better, so definitely recommend working with a practitioner. If you are experiencing health issues, or are considering any protocols, make sure your health foundations are in place and work with someone knowledgeable that you trust!

If you and your health team determine that this is a good fit, the link to this protocol is here and you can use FITNESSISTA10 for 10% off through the 30th.

Have a great day and I’ll see ya soon!

xoxo

Gina

The post My experience with the EquiLife Para Support Protocol so far appeared first on The Fitnessista.


from The Fitnessista https://ift.tt/1DjB9SV
https://ift.tt/G0i7fgK

Acidic Foods: The Ultimate Alkaline Diet Guide

Ready to be basic? We mean having a basic (alkaline) pH — the measurement of how acidic or alkaline something is.

Cue the alkaline diet that claims eating alkaline foods can alter your body’s pH. The science is iffy, but the claim is that an alkaline (basic) bod is more resilient from disease than an acidic one.

So what are the most acidic foods to avoid on an alkaline diet?

Acidic foods include:

If you’re into tracking your body’s pH or actively following an alkaline diet, here’s the deal with acidic foods.

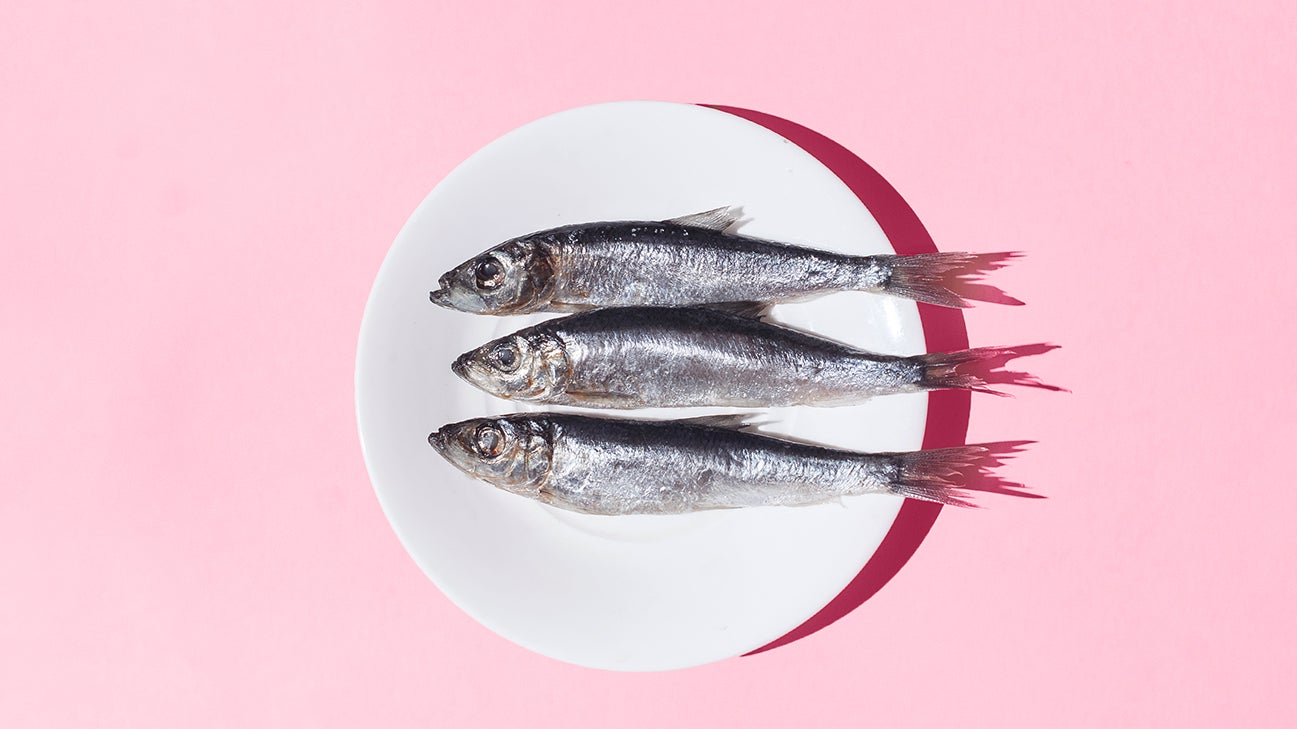
three small whole fishes on a plate
zsv3207/Getty Images

What the pH-uck does a food’s pH mean?

The values of pH range from 0 to 14:

  • Acidic: 0.0–6.9
  • Neutral: 7.0
  • Alkaline (or basic): 7.1–14.0

Acidic foods fall into the acidic range of the pH scale and are different from acid-forming foods. Acidic foods have an acidic pH that doesn’t always leave acidity behind. Whereas acid-forming foods promote acidity in the body.

Foods also have different potential renal acid loads (aka PRALs). PRALS are based on acid excretion in your pee or the acid load your kidneys need to get rid of to keep a balanced pH.

Acid-forming foods tend to have high PRALs, which have been connected to Western diets high in animal protein. According to a 2019 meta-analysis, consuming a diet high in PRALs have been associated with high triglyceride levels and obesity.

Low PRALs are often related to plant-based diets full of fruits and veggies — even acidic ones like citrus fruits and tomatoes. A 2018 review found diets low in PRALs may be beneficial for kidney, heart, and bone health.

But can you actually change your pH?

In reality, what you eat can’t change your body’s blood pH — regardless of high or low PRALs. Your body naturally regulates your blood’s pH at 7.35 to 7.45. Certain foods can impact how much acid is in your urine, since that’s where uric acid exits the body.

Overall, your body stays slightly basic, but different body parts can have a completely different pH. Take your stomach for instance. In order to break down food, stomach acid needs to stay very acidic with a pH of 1.35 to 3.5.

Most acidic foods

Still want to get alkaline? Here’s the breakdown on acidic foods that have high and low PRALs.

Soft drinks

Sipping on soda adds a bunch of phosphoric acid to your body, which causes an increased acid load. Phosphoric acid is often seen in Western diets and is highly absorbable. 

Red and processed meats

Another high phosphorus food is red and processed meats. Phosphorus, plus the high protein content of these foods, equals an even higher dietary acid load. It’s not just red and processed meat either. Eating any animal protein, such as eggs and poultry, also creates an increased acid load.

Processed grains

Refined grains include foods like baked goods, fast food, and white bread. These noms all wind up contributing to a higher acid load. According to a 2014 article, adding fruits, vegetables, and other alkaline foods to these grains can help to reduce the dietary acid load.

Dairy products

When you eat dairy foods such as cheese, milk, and ice cream, you’re eating high amounts of phosphorus. Research also links dairy with other acid-forming compounds like sulfur-containing amino acids and chloride.

Acidic fruits

Although citrus fruits like oranges, lemons, limes, and grapefruit have a low pH level, they don’t create acid in your body when eaten.

On the other hand they’re considered reflexogenic foods, which can make acid reflux worse. For this reason, the National Institute of Health recommends avoiding or reducing citrus fruit intake if you have GERD (aka acid reflux).

Tomato products

Similar to citrus fruits, tomatoes and tomato products have a high acidity that can trigger acid reflux and make symptoms worse.

But eating raw tomatoes may be more tolerable compared to tomato products like ketchup, tomato sauce, and tomato paste. This is because raw tomatoes are slightly less acidic than their canned counterparts. 

Acidic veggies

There are very few acidic vegetables (yes, tomatoes are a fruit!), but some veggies can become acidic depending on how they’re prepped. Pickled cucumbers or cabbage made into sauerkraut turn acidic, but in their natural form they stay alkaline.

Should they stay or should they go? Acidic foods to avoid

Just because foods are acid-forming or just straight up acidic doesn’t mean they’re all bad.

But some acid-forming foods, like soft drinks, don’t provide any nutritional benefit. Research has found excess phosphoric acid from drinking tons of soda is linked to health issues like kidney problems and kidney stones, increased bone fracture risk, and prediabetes.

So if you’re worried about acid load health effects, it may be wise to cut down your soda intake or nix it all together.

Diets high in PRALs (think dairy and red meats) are also linked to heart and kidney disease. But that doesn’t mean these foods can’t have a place in a healthy diet if you balance your meals with fruits and veggies.

Foods like citrus fruits and tomatoes should only be avoided if you deal with GERD, otherwise keep them around. Since they’re low PRAL foods, they’re actually considered alkaline. According to a 2015 article, citrus fruits contain properties that are:

  • anti-inflammatory
  • antioxidative
  • cardiovascular protective
  • neuroprotective

The same goes for tomatoes that contain a beneficial antioxidant called lycopene. A 2020 article links lycopene to a decreased risk of:

  • cardiovascular disease (CVD)
  • obesity
  • type 2 diabetes
  • cancer
  • neurodegenerative disorders

It’s good to keep in mind that lycopene is relatively low in fresh tomatoes and significantly higher in cooked tomatoes. Combining cooked tomatoes with healthy fats helps your body absorb lycopene.

tl;dr: It’s all about balance

It’s fine to eat acid-producing foods like dairy and processed meats in moderation, maybe skip or limit the soda, and increase your intake of low PRAL fruits and veggies.

It’s generally believed this approach will keep ya healthy.

Eat these instead: Nonacidic and low acid foods

Enough on what not to eat on an alkaline diet, the top alkaline foods to nosh on include:

While the claims of the alkaline diet are bold, many of these foods do have promising health benefits.

For example, the foundation of the Mediterranean diet is similar to the alkaline diet and limits red meat, cheese, and processed foods and is high in fruits and veggies. A 2018 article found following this type of eating pattern may help reduce the risk of developing chronic diseases like:

This is off the charts! Acidic and alkaline foods chart

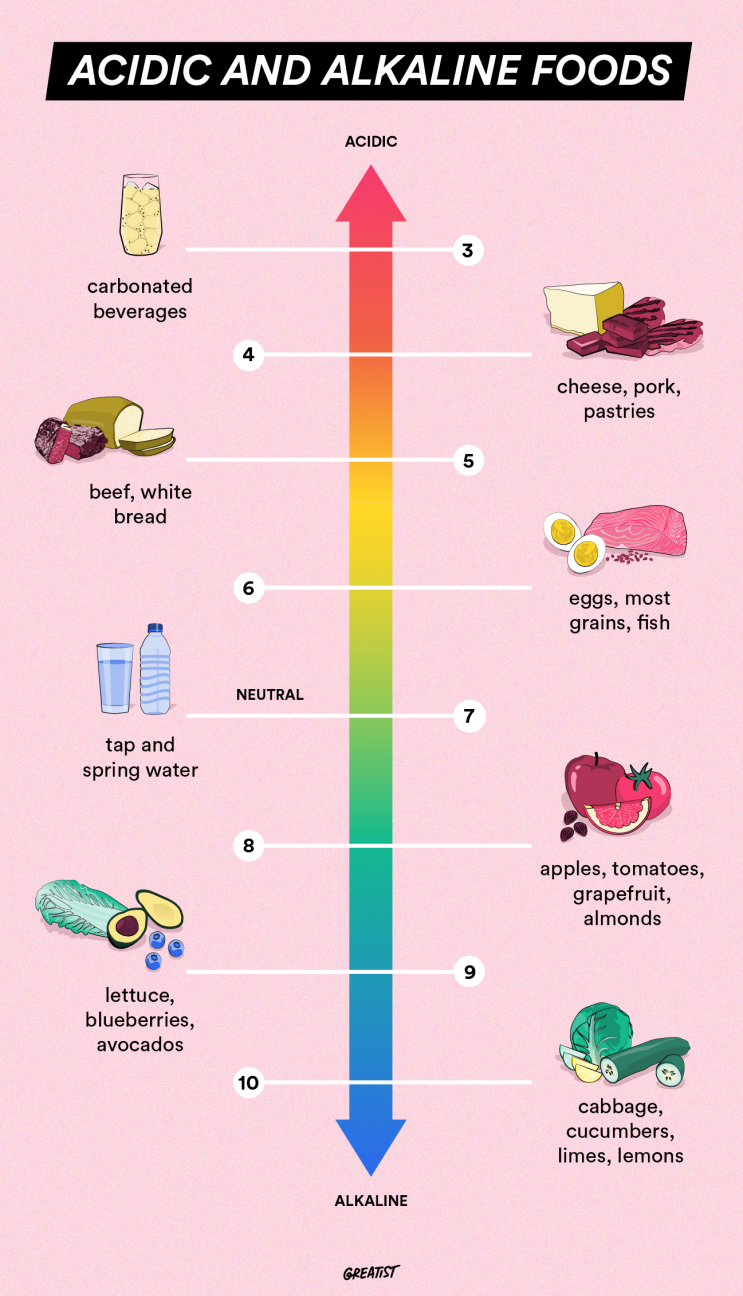
Wondering where your fave foods rank from acidic to alkaline? To make things simple, here’s where certain foods fall on the pH scale after being metabolized.

PSA: foods like limes, lemons, and tomatoes have an acidic pH, but are considered alkaline because of their low PRALs.

acidic foods chart
Design by Maya Chastain

The takeaway

When your diet is high in processed foods, red meat, and soda your acid load increases, which may cause health issues.

When eating in the name of health, limiting these acid-forming foods and increasing low PRAL foods like fruits and vegetables can be beneficial. But some acidic foods, such as citrus fruits and tomatoes, only need to be avoided if they trigger GERD symptoms.

There isn’t sufficient evidence that the alkaline diet can actually improve your health, but eating a balanced diet of acidic and alkaline foods does the body good. So before making any drastic changes to your diet, be sure to consult with a health professional to see if it’s the best switch for you.


from Greatist Health RSS Feed https://bit.ly/3eJNMIq

Most Viewed

Yoga For Healing...TakeYour Next Step To Wellness

Popular Posts